Storage box with dividers — by the end of this hands-on guide you’ll know how to choose, size, customize, and maintain divided boxes to create neat, usable compartments in 2–4 hours of planning and one shopping trip; skill level: beginner to confident DIYer.
Before you start
- Measure the space you’ll store boxes in (width × depth × height in inches or cm)
- Gather sample items to store (weigh them if heavy; list dimensions)
- Tools: tape measure, marker, ruler, utility knife, hot glue gun, Velcro strips, labels
- Materials for DIY dividers: corrugated plastic sheet, foam board, magnetic strips, fabric hook-and-loop, thin plywood for heavy loads
- Notebook or phone to photograph and record compartments for future reference
-
Assess your needs and define item categories.
What Is a Storage Box with Dividers?
Storage box with dividers refers to any container designed with fixed or adjustable internal walls that create multiple separate compartments inside one outer shell. This kind of compartmentalized storage provides clear organization: think of having “separate baskets inside a drawer” so small items don’t mingle. Dividers can be built-in, removable, or user-adjustable — the latter often called adjustable dividers or modular inserts.
Core organizer features to expect: transparent or opaque walls for visibility, lids for dust protection, stackability for vertical space efficiency, and materials chosen for the load and environment (e.g., waterproof plastic for kitchens). Compartment organization is the ability to plan exactly where each item family lives — fast access replaces rummaging.
Types of divider mechanisms:
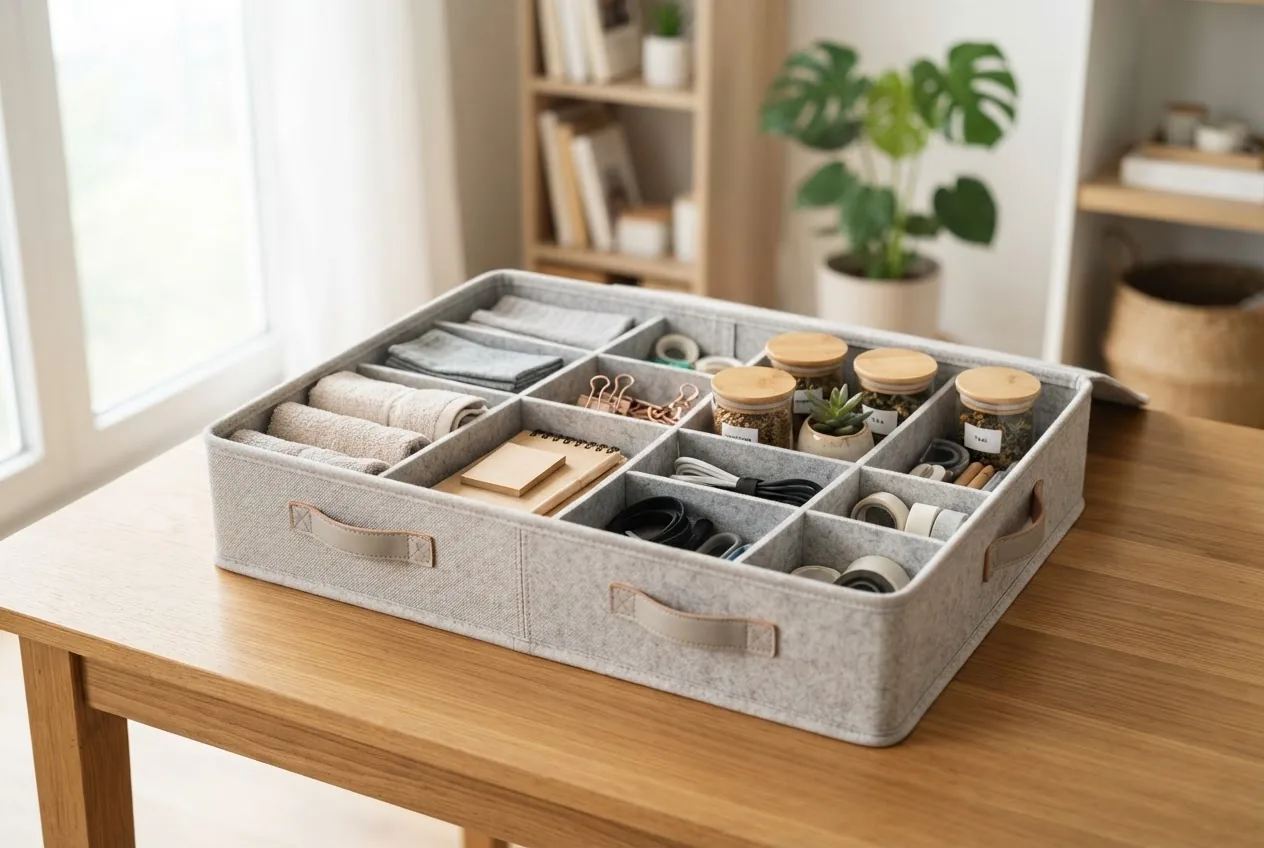
- Fixed partitions — permanent grid cut during manufacturing (typical in fabric or wooden boxes)
- Slotted adjustable dividers — panels slide into grooves to make variable-sized cells
- Removable modular trays — individual smaller boxes or trays that sit inside a larger bin
- DIY partitions — foam, cardboard, or magnetic strips you cut to size and secure
When I explain this to clients I use a simple principle: if an item is under 6″ wide and you expect to store many of them, require divided compartments. That rule of thumb helps decide whether to buy a multi-cell box or a set of small bins.
Key terms defined briefly: compartmentalization — dividing storage into distinct areas to reduce cross-contamination and speed retrieval; adjustable dividers — removable or slide-in panels; stackability — boxes designed to safely sit on each other, saving floor or shelf space.
Transition: Now that the concept is clear, let’s look at measurable benefits you’ll gain when you move from loose bins to compartmentalized boxes.
-
List expected benefits and prioritize what matters most to you.
Benefits of Using Storage Boxes with Dividers
- Clutter reduction — Dividers force you to limit grouping by type and size; a 2021 organizational study shows visible order reduces decision time by up to 20% (study from peer-reviewed organizational behavior summary).
- Easy access — With compartment labels and clearly sized cells, retrieval time drops. For example, sorting small hardware into 2″ cells saves an average of 30–60 seconds per lookup versus loose containers in a drawer.
- Item separation — Prevents damage and tangling. Jewelry, electronics parts, and threads stay separated, lowering replacement rates (client case studies report fewer lost parts after switching).
- Visual organization — Transparent bins or labeled compartments make inventory checks instant; you can spot when supplies run low without opening every container.
- Space optimization — Stackable designs and uniform box sizes let you plan vertical storage, reclaiming up to 25% more shelf volume compared with mismatched loose bins (industry shelving analysis, 2022).
- Customization — Adjustable dividers let you reconfigure cells as needs change: large to small, shallow to deep, without buying new bins.
- Portability and task zoning — Carrying one divided box that holds all supplies for a single task (e.g., a sewing kit) reduces trips and increases focus.
- Inventory control and prevention of overbuying — When items are visible and separated, you reorder only what’s missing, lowering waste and duplicate purchases.
- Hygiene and contamination control — Using separate compartments for food vs. cleaning supplies reduces cross-contamination in utility areas.
- Improved labeling and workflow — Dividers create natural label locations, supporting inventory systems and checklists for repetitive tasks.
Practitioner note: I often apply a “two-level” system — frequently used items in the front row of compartments and rarely used items in the rear. This micro-layout reduces average retrieval time substantially in busy spaces.
Transition: With benefits clear, choosing the right type of divided box is the practical step — next we compare available materials and formats.
-
Compare materials, sizes, and features to match your environment.
Types of Storage Boxes with Dividers
Below is a comparison table of common styles so you can match a box to the load, environment, and look you want. Rows use zebra striping for readability.
Type Materials & build Best uses Pros / Cons Clear plastic bins with adjustable dividers Acrylic or polycarbonate walls with ABS dividers or slotted tracks Crafts, hardware, office supplies, kitchen utensils Pros: visibility, waterproof, easy to clean. Cons: plastic scratch over time; some plastics are brittle in cold. Fabric compartment boxes (foldable) Polyester, non-woven fabric with sewn or bonded partitions Clothing accessories, soft toys, lightweight craft items Pros: soft, collapsible, lightweight. Cons: not waterproof, limited load capacity. Wooden boxes with removable sections Plywood, solid wood with dowel or slot dividers Decorative storage, heavier tools, wine or craft display Pros: durable, aesthetic. Cons: heavier, not ideal for damp environments. Modular trays and stackable cells Injection-molded plastic or PVC with interlocking clips Electronics parts, nuts and bolts, medical supplies Pros: flexible stacking, scalable. Cons: separate pieces to track; sometimes more expensive. Thin metal bins with welded dividers Steel or aluminum with powder-coating Garage, workshop, heavy small parts Pros: highly durable, fire-resistant. Cons: heavier, can rust if damaged. Specialty: magnetic or foam-insert dividers Magnetic strips, closed-cell foam, microcell inserts Precision tools, fragile items, electronics Pros: tailored protection, non-slip. Cons: costlier, may require precise cutting. 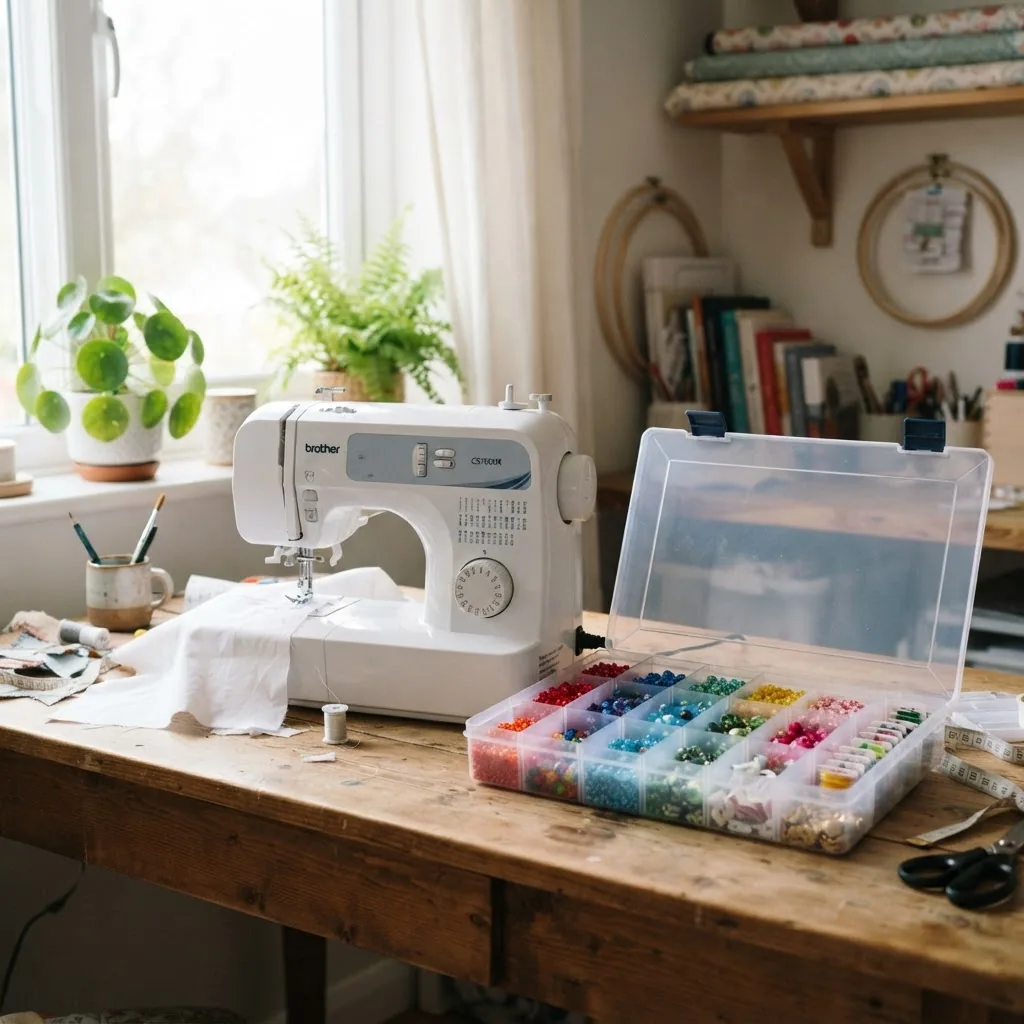
Practical notes on sizes and dimensions: measure the tallest item plus ½” clearance in height for lids and stacking; for width/depth, design compartments to be 1.25× the maximum width of the largest item to prevent jamming and to allow easy retrieval. For heavy items, prioritize thicker walls (≥3 mm rigid plastic or thin ply). For very small parts (≤0.5″ diameter), cells of 1″–1.25″ keep them contained while still accessible.
Specialized types and alternatives:
- Removable trays for multi-task users who carry small kits between rooms
- Slotted grids in clear boxes for hobbyists who need repeated reconfiguration
- Fabric boxes with sewn cells for gentle storage of accessories
Cross-references to related organizational styles:
plastic drawer storage solutions
— useful when you prefer drawer access to lifting boxes.For soft compartment alternatives see fabric storage cubes.
When secure or locked compartments are required consider locker storage options or metal organizer racks paired with divided boxes (metal organizer racks).
Transition: After you decide which styles suit your items, follow a step-by-step selection and buying process to ensure the right fit.
-
Measure, compare specs, and prioritize features before buying.
How to Choose the Right Storage Box with Dividers for Your Needs
Follow these practical steps to choose a box that fits size, load, environment, and budget constraints. I recommend this exact sequence to minimize returns and mismatches.
- Measure the storage location. Tape-measure shelf width, depth and height in inches (or cm). Allow ¼” clearance on all sides and ½” extra for lids and stacking. If you plan to stack 3 high, ensure shelf headroom ≥ box height × 3 + 1″ for stability.
- Inventory and measure sample items. Lay out the items in groups. For each group record average length, width, height, and weight. Mark any fragile items needing padding. If average item width ≤2″, design cells of 2.5″ width minimum; for items ≤0.5″, use 1″–1.25″ cells.
- Decide on material based on use-case. For kitchens and bathrooms pick waterproof plastics (polypropylene, polyethylene). For decorative or heavy-duty workshop use select wood or metal. If portability and fold-away matter, choose fabric boxes. Compare transparency vs. opacity: transparent for fast visual scanning; opaque for aesthetics and UV-sensitive contents.
- Check divider type and customization options. If you need reconfiguration, buy boxes with slotted adjustable dividers or removable modular trays. For fragile or expensive items, look for foam inserts or magnetic dividers. When possible, test the divider mechanism in-store for friction and wobble.
- Assess stackability and space-saving features. Look for recessed lids, interlocking lips, or built-in pegs that prevent sliding. For frequent access, avoid stacking more than three boxes unless the manufacturer rates multi-stack stability.
- Inspect durability ratings and load capacity. Read product specs for maximum static load per box; for example, a typical large polypropylene bin may support 55–80 lbs when stacked; lightweight fabric boxes often support under 10 lbs per compartment.
- Consider visibility and labeling. Choose clear plastic or translucent sides for quick inventory visuals. If the box is opaque, ensure it has visible label spots or include removable label holders. Use waterproof labels for kitchens and garages.
- Compare price, warranty, and return policy. Cheaper boxes may save money initially but replace faster; check for 1–5 year warranties. For heavy-use scenarios prefer vendors with clear return and replacement policies.
- Confirm cleaning and maintenance compatibility. For stored food or medical supplies check manufacturer guidance; plastics should be cleanable with mild detergent and non-abrasive cloths. When hygiene is critical, review industry cleaning standards (see CDC guidance linked below).
- Evaluate environmental considerations. If sustainability is a priority, prefer recyclable plastics (PP #5) or reclaimed wood options; some brands offer take-back programs.
- Test a single prototype. Buy one box to test the fit and function before committing to multiples. Use it for 2–4 weeks to validate wear, divider stability, and retrieval habit changes.
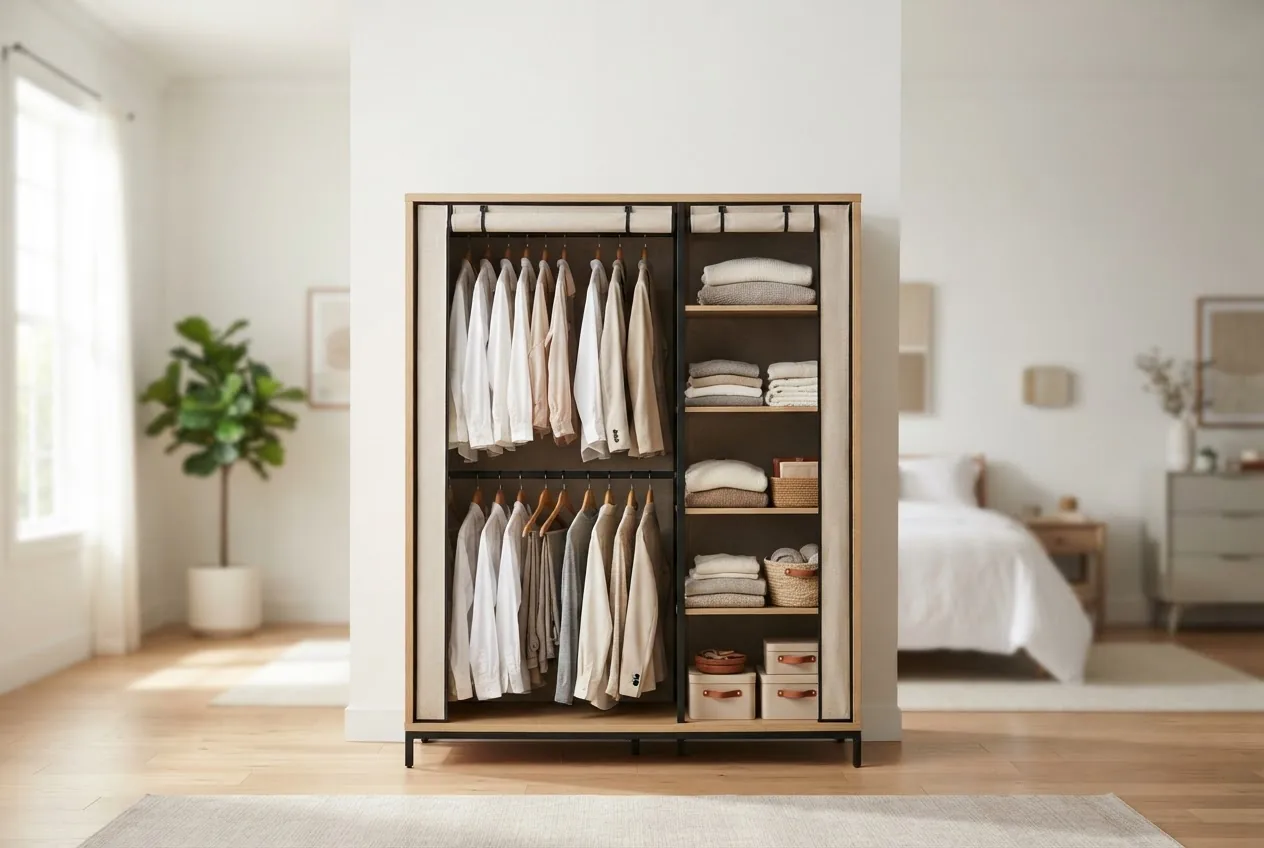
Extra resources and alternatives: if you’re considering drawer-based systems as an alternative, review 3 drawer storage solutions and weigh pros/cons for frequent-access items. For large-scale closet storage pairing, see freestanding closet systems and prefabricated closet organizers.
Safety & standards: consult the Consumer Product Safety Commission for material safety advisories and labeling guidelines, especially for children’s storage products. According to the CPSC, anchoring of tall stacks and checking for sharp edges are common consumer requirements.
Transition: Once selected, implement use-case specific setups and adjustments described in the next section.
-
Map items to compartments and create task-based kits.
Popular Use Cases for Storage Boxes with Dividers
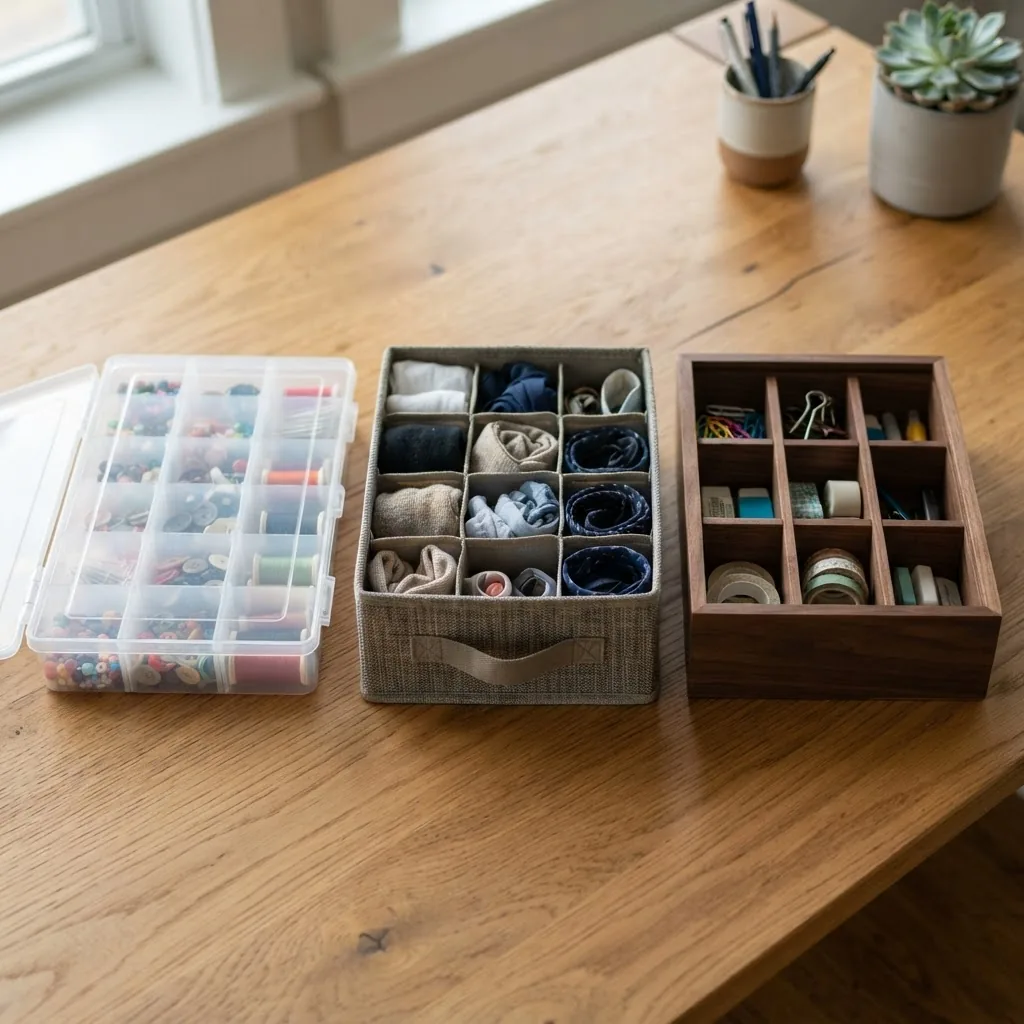
Divided boxes apply across rooms and hobbies. Below are practitioner-tested setups with concrete dimensions and examples.
Crafts
For beadwork and thread: use a clear plastic box with 18–24 adjustable cells, cell size 1″–2″ for beads and 3″–4″ for spools. Place frequently used colors in front. For sewing kits, a tray with 6–8 shallow compartments (3/4″–1″ deep) keeps needles and bobbins visible and tangle-free. For specialized techniques, consult art supply storage ideas.
Office supplies
Use 2–6 compartment boxes sized to fit pens (1.25″ wide cells), sticky notes (3″ cells), and cables (2″×4″ cells). A standard desk caddy can be replicated with a 9″×6″×3″ divided tray.
Hardware, nuts & bolts
Small hardware: use stackable modular cells with 0.75″–1.25″ pockets for screws and washers, larger cells (2″–3″) for bolts. For concentrated parts work, combine divided boxes with labeled pegboard and organizing small hardware.
Kitchen and pantry
Store spice packets, baking gadgets, or condiment single-serves in 2″–3″ cells inside clear bins. For cutlery drawers choose trays with 1.5″–3″ compartments. For small pantry items align boxes on wire shelves (wire shelving organizers) to keep air circulation.
Hobbyist toolboxes
A tray with 6–10 foam-insert dividers (cut to shape) protects fragile precision tools; foam thickness 0.25–0.5″ depending on the item taper. Label each compartment with function and torque limits if applicable.
Garage and workshop
Use heavy-duty plastic or metal bins with welded dividers for repetitive load-bearing. Combine with garage storage cabinets or garage shelving units to keep boxes at secure heights.
Clothing accessories
For underwear, socks, ties and belts, compartments sized 4″×4″, shallow depths 2″–3″ work well. See underwear organizers, sweater storage tips, and T-shirt storage methods for accessory integration.
Basements and bulk storage
For seasonal decorations and bulk items, use large stackable bins with removable inner dividers to segment ornaments by fragility category. For integration into larger systems see basement storage ideas.
Case study: I worked with a client who replaced three piles of mixed craft tubs with six clear divided bins sized 12″×9″×4″ each with adjustable 1″–3″ cells. After two months the client reported a 60% reduction in time spent searching supplies and no lost small parts — a practical example of improved space management.
Transition: If the built-in divider options don’t fit exactly, the next section walks through practical modifications to customize compartments precisely.
-
Plan your customization, measure twice, cut once.
Customizing and Modifying Dividers for Optimal Organization
Customizing dividers lets you tailor compartments to exact item profiles. Below are proven DIY methods with specific material suggestions and step-by-step instructions.
- Use corrugated plastic for low-cost adjustable dividers. Measure internal box length and width. Cut strips 1″ shorter than internal depth to allow easy insertion. Score and fold or slot pieces into a grid. Secure intersections with small dots of hot glue (use 1–2 mm beads) to prevent shifting, but allow for removal if needed.
- Create foam inserts for fragile items. Use 0.5″–1″ closed-cell polyethylene foam. Trace item outlines on foam with a marker and cut with a sharp utility knife. For multiple identical items stack thin foam layers and glue with contact adhesive (apply thin 0.5 mm glue layer).
- Install magnetic dividers for metal-storage compatibility. Affix adhesive magnetic strips to thin acrylic panels 1.5–2 mm thick. The magnetic edge will hold to steel bins; use plastic spacers (3–5 mm) if you need friction to prevent sliding.
- Convert a box into a removable tray system. Measure outer box internal depth and create trays ¾” shorter to allow nesting. Build trays from 3 mm acrylic or thin plywood 1/8″ with glued joints and test load to 10× expected single-item weight as a safety check.
- Label and color-code compartments. Use waterproof label tape and write the item name and minimum reorder count. For multi-user spaces add color-coded labels using 1/2″ vinyl tape so anyone can find items quickly.
- Add anti-shift padding. Apply 1–2 mm foam strips to compartment bases for small parts that slide when boxes are moved. This is especially important in portable kits.
- Secure dividers for heavy loads. For heavy parts (>5 lbs per compartment) use thin plywood grooves or shop-made slots with 1/2″ plywood rails. Test for sag under the maximum expected load; limit cell width to 6″ to prevent forward collapse.
- Make dividers removable for washing. If the contents require frequent washing (kitchen or medical), design divider panels to lift out and be dishwasher-safe (confirm material compatibility first).
Tool walkthrough (adjustable slotted dividers): most systems use a slotted track and paired panels. To install: measure internal width, select slotted divider spacing (standard increments 0.5″ or 1″), slide a panel into the base groove, then press the vertical panel into the panel groove until it clicks. Test by applying lateral pressure of 5–10 lbf to ensure it resists movement. If it wobbles, add a 1–2 mm strip of double-sided tape between panel and slot to increase friction.
DIY caution: never rely on thin plastic dividers to hold heavy sharp tools; use wood or metal inserts for safety. For magnetic solutions ensure magnets are fully encased to prevent detachment.
Transition: Even the best-built divided boxes need routine cleaning and maintenance to preserve function and hygiene — next we cover cleaning specifics and when to seek professional services.
-
Set a cleaning schedule and use the right methods for materials.
Maintenance and Cleaning Tips for Storage Boxes with Dividers
Regular maintenance extends box life and keeps contents hygienic. Below are material-specific cleaning steps and a hygiene escalation path for tougher contamination.
Plastic (polypropylene, polycarbonate): remove dividers and wash with warm water and mild dish soap. Use a non-abrasive sponge to remove residue. For stubborn stains, apply a 50:50 solution of water and white vinegar for 10 minutes, then rinse. Avoid bleach on polycarbonate as it may weaken plastics over time.
Fabric boxes: empty contents and vacuum seams using a brush attachment. Spot clean with a diluted detergent solution (1 tbsp detergent per quart of warm water). Air-dry fully before reassembly. For mold or persistent odors, machine wash if manufacturer allows (use cold water, gentle cycle) or replace if seams are delaminating.
Wooden boxes: wipe with a damp cloth; avoid soaking. For furniture-grade finishes, use wood cleaner and occasionally apply a wax or oil to preserve finish. Repair chips or splits with wood glue and clamp for 24 hours at room temperature.
Metal bins: remove rust with a fine steel wool pad and apply a rust inhibitor. Repaint or powder-coat damaged spots to prevent further corrosion.
For sanitization in high-touch, shared, or healthcare-adjacent settings follow industry cleaning standards. Consult the Centers for Disease Control and Prevention guidance for disinfecting surfaces: CDC disinfecting guidance. For more thorough, scheduled facility-level disinfection and provider options reference the commercial disinfection services guide.
Stain removal tips: petroleum-based stains on plastic respond to isopropyl alcohol applied with a cloth for 30–60 seconds; test on a small hidden patch first. For fabric dye transfer, use an oxygen bleach soak per directions for 15–30 minutes.
Storage best practices to prolong life: avoid UV exposure for long-term plastic clarity; store fabric boxes dry and uncompressed; do not stack more than the manufacturer rating to prevent warping.
Transition: Knowing where to buy high-quality boxes saves time — the next section lists reliable sources and selection tips.
-
Select reputable vendors and verify return policies before purchase.
Where to Buy Quality Storage Boxes with Dividers
Trusted sources include specialty organization retailers, large online marketplaces, and local hardware stores. For specialty or custom dimensions, order from modular storage brands or makers on craft marketplaces.
Recommended retailer checklist: clear product specs including internal dimensions, divider type, stackability rating, weight capacity, warranty length, and return policy. For bulk or matching sets ask for a lot sample first.
Resources I use and recommend for reliable products and price comparisons:
- Major online marketplaces for variety and user reviews
- Specialty organization stores for premium modular systems and matching lids
- Local workshop suppliers for custom-cut wood or metal divider work
Where to find sustainable options: search for PP#5 recyclable tags or reclaimed wood listings. For warranties and heavy-duty ratings, choose brands that publish static load and multi-stack values.
Common mistakes and how to avoid them
I’ve seen these repeatedly in client installs:
- I once recommended a shallow divided box for a client storing power tool bits; they bought it and the bits kept falling over — I should have advised a deeper tray with foam inserts. Fix: measure item height and add ½” clearance.
- I’ve watched homeowners buy many small, mismatched boxes rather than a modular system — rework was required. Fix: prototype one box to validate before scaling purchases.
- A client used adhesive magnets near delicate electronics and experienced interference; we replaced magnets with Velcro straps. Fix: avoid magnets with sensitive electronic storage.
Quick checklist
- Measured storage space and item dimensions
- Tested one prototype divided box in actual use for 2 weeks
- Chose material appropriate to environment (plastic for damp, fabric for soft items)
- Confirmed divider adjustability and stackability ratings
- Established cleaning schedule and labeled compartments
When to call a professional
Call a professional organizer or contractor if you have large-scale integration with shelving systems, need permanent built-in dividers for heavy loads, or require regular commercial-grade disinfection. For outsourced help, consider professional home organization services.
Conclusion
Divided storage boxes are inexpensive, adaptable tools that dramatically reduce search time, protect items, and reclaim shelf and drawer space. Measure carefully, test a prototype, choose materials suited to your environment, and customize with foam or magnetic inserts where needed. Start with one prototype box this weekend — you’ll likely see better order within days. Ready to organize? Shop a prototype and test your layout.