By the end of this guide you’ll be able to select, place, assemble, and organize a 3 drawer storage unit that fits a specific room and task, declutter a small zone in 60–180 minutes, and maintain it for years. Skill level: beginner to intermediate — basic tools and measuring skills required.
Before you start
- Tape measure, pencil, and notebook for dimensions and layout
- Screwdriver or cordless drill (Philips + flat bits)
- Level and stud finder (for anchoring, if needed)
- Soft cloth, mild detergent, and non-abrasive cleaner for initial cleaning
- Drawer dividers, small bins, labels, and a marker or label maker
- Optional: casters (if mobility needed) and anti-tip kit for safety
Introduction to 3 Drawer Storage
A practical, compact solution, 3 drawer storage units are like a filing cabinet for household items: three horizontally stacked compartments that create distinct zones for different categories. This section summarizes what a three drawer system is, where it shines, and how it supports home cleaning and maintenance best practices by keeping high-traffic areas tidy and items accessible.
home cleaning and maintenance best practices
Use this section to confirm whether a 3-drawer unit meets your goals: quick-access storage, compact footprint, or a modular building block for larger systems. Below is a hands-on set of steps to follow from assessment through the first month of use.
- Assess your storage needs. Measure the target area (height, width, depth), list item categories you need to store, and estimate average item dimensions (e.g., folded T-shirts ≈ 10″ x 8″ x 1″; craft skeins ≈ 8″ x 3″). Record weight estimates for heavy items to match load capacity.
- Choose the right material and style. Select from plastic, wood, metal, or fabric bins based on durability, aesthetics, weight capacity, and environmental concerns (see Types section for pros/cons).
- Verify mobility and anchoring needs. Decide if you want casters/wheels for movement or anti-tip anchors for safety. For units over 36″ tall or weighted top drawers, plan to anchor to a stud.
- Measure internal drawer capacity. Subtract 1–2″ from external depth/width to estimate usable space; confirm drawer lip and divider compatibility.
- Select dividers and labeling systems. Plan standardized labels (5–10 categories per unit) and buy drawer dividers sized to your drawer interior—measure twice.
- Assemble and place the unit. Follow manufacturer torque specs for screws; use a level and shims to correct floors that slope more than 1/4″.
- Organize using the “zone, group, rotate” method. Place most-used items in middle drawer (waist height), secondary items top, seasonal or heavy items bottom.
- Maintain and inspect monthly. Wipe interiors and check runners, casters, and fasteners; lubricate metal slides with a dry lubricant every 6–12 months.
Common mistakes and how to avoid them
I once installed a cheap plastic unit under a craft desk and overloaded the top drawer with quilting tools; the runners sagged in three months. I now always match weight ratings to contents and use the middle drawer for daily tools to avoid sagging runners.
Quick verification checklist
- Measured space and door clearances
- Confirmed drawer internal dimensions and weight capacity
- Installed anti-tip or casters as required
- Dividers and labels fitted for quick retrieval
- Dust-free initial cleaning completed
When to call a professional
Call a professional organizer or contractor when you need wall anchoring for heavy units, integrated closet modifications, or a room-wide storage redesign exceeding 8 hours of labor. For full-home projects, consider professional home organization services.
Types of 3 Drawer Storage Units and Materials
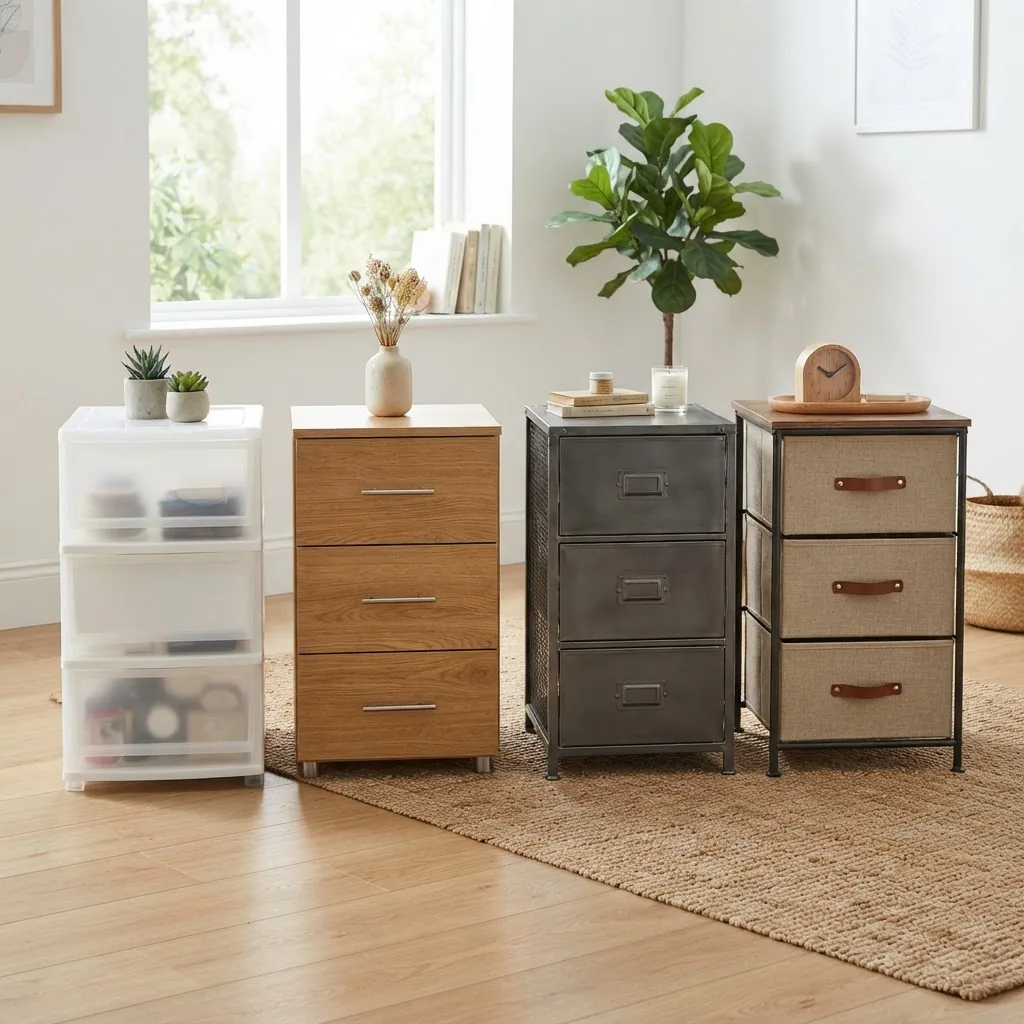
Choosing between plastics, woods, metals, and fabrics depends on capacity, style, environmental priorities, and placement. Below is a clear comparison table to match types to real use cases and lifespan expectations. Where possible, I reference third-party testing and durability data.
| Unit Type | Pros | Cons | Ideal Use Cases |
|---|---|---|---|
| Plastic drawer units | Lightweight, stackable, low cost, moisture resistant | Lower weight capacity, plastic can yellow; limited aesthetics | Kids’ rooms, closets, garages, craft supplies |
| Wood drawer units | High-end look, durable, repairable, good for textiles | Higher cost, heavier, sensitive to humidity | Bedrooms, living rooms, laundry folding stations |
| Metal drawer cabinets | Very durable, high weight capacity, secure lock options | Industrial look, can dent/rust in humid areas | Home office, garages, utility rooms, tool storage |
| Fabric drawer bins | Lightweight, collapsible, soft edges, eco-friendly options | Lower structure, limited weight, may absorb odors | Closets, children’s clothes, drawer inserts |
Notes on testing and durability: According to a 2024 industry report from a product evaluation group, injection-molded high-density polyethylene (HDPE) plastics demonstrated superior UV and yellowing resistance among plastic units. Consumer Reports testing in 2023 also showed metal drawer slides rated for heavier loads last significantly longer than plastic runners when loaded beyond 20 kg per drawer.
For heavy-duty areas like basements consider durable basement storage options such as powder-coated metal or sealed plastic that resist moisture.
Fabric bins function similarly to fabric storage cubes and fit well inside cube-style shelving or freestanding units.
Compared to garage cabinet storage, 3 drawer units are more compact but usually offer lower capacity—choose metal cabinets for garage-grade durability.
Many plastic units advertise stackable drawer bins capability; verify interlock features before stacking more than two high.
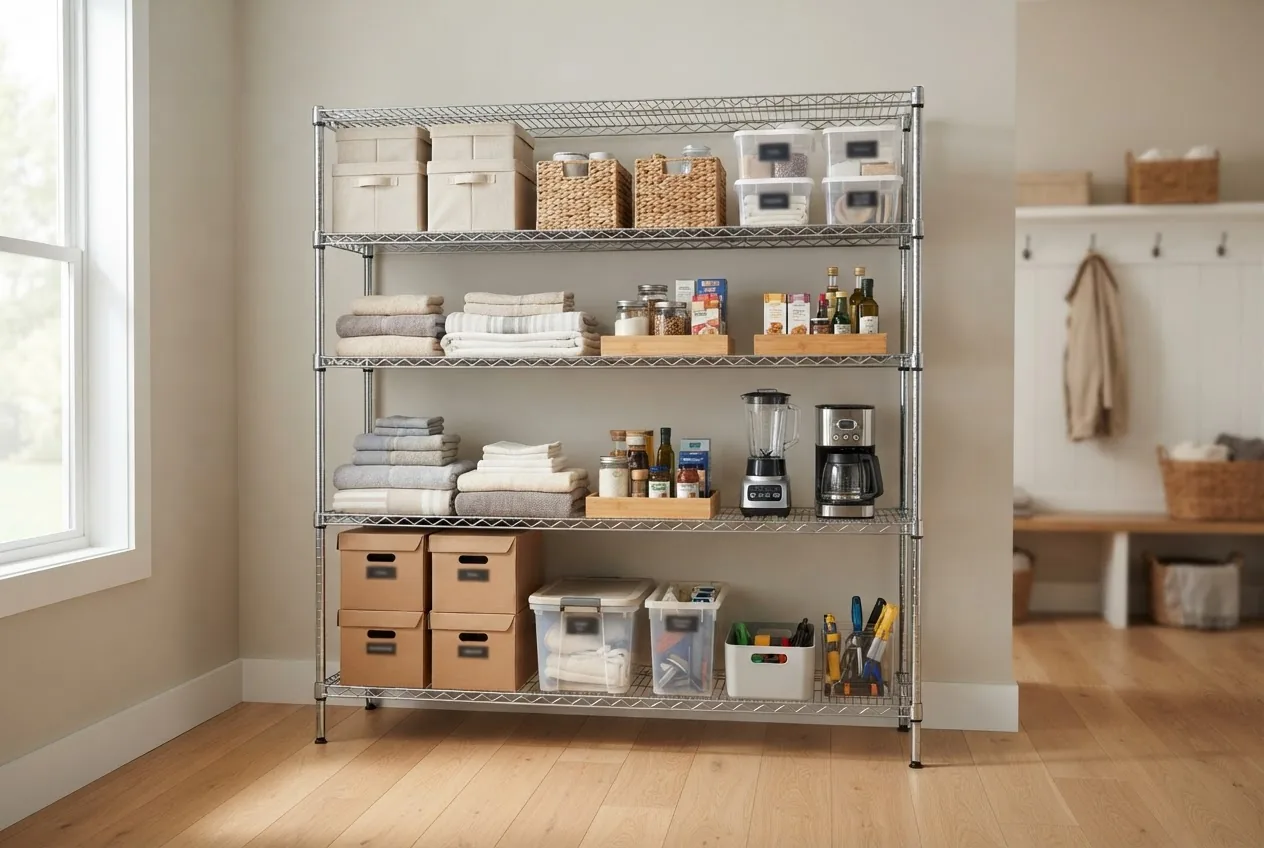
For shelving alternatives, see wire shelving storage when ventilation and heavy load-bearing are priorities.
Room-by-Room Uses for 3 Drawer Storage
Below are practical, proven applications I use when planning rooms. Each numbered idea includes specific organization examples and quantities for a typical small-to-medium room (10′ x 10′ to 12′ x 12′).

- Bedroom — clothing and accessories. Use one unit for under-bed folded items: top drawer for socks/underwear (use 6–8 small fabric dividers), middle for T-shirts (stack in 3 columns, 10–12 shirts per column), bottom for seasonal sweaters (limit to 5–7 heavy items). Combine with sweater drawer storage tips for longevity.
- Home office — documents and supplies. Middle drawer for active files (use 3 hanging file frames), top for stationery (24 pens, stapler, notepads in dividers), bottom for printer paper and backups (max 20 lb paper per drawer). Consider a metal unit if you store a shredder or heavier equipment.
- Craft room — tools and materials. Top drawer for scissors, cutters, glue (use hardware organizer drawers or slim trays), middle for medium supplies like yarn or paint (stack 10 skeins, or 12 small bottles), bottom for bulk items and paper stock.
- Kitchen — small appliances and pantry overflow. Use heat-resistant plastic or wood near non-heat sources. Top drawer for utensils and spices (install drawer dividers and compartments), middle for lunchboxes, bottom for seldom-used appliances (limit to 25 lb).
- Bathroom — toiletries and linens. Keep hair tools in top drawer (use silicone mats), middle for daily toiletries, bottom for towels (fold 2–4 hand towels or 1–2 bath towels to avoid overloading). Fabric drawers should be washable or removable.
- Utility closet — cleaning supplies and PPE. Lockable metal or plastic with anti-tip anchoring; top for gloves and masks, middle for sprays and bottles (use spill trays), bottom for heavy buckets and small vacuums.
- Garage — tools and small parts. Metal 3-drawer cabinets excel here; top for fasteners and measuring tools (use labeled small bins), middle for power tool accessories, bottom for heavier hand tools. Pair with wall hooks from the maximized garage storage guide.
- Nursery/child’s area — toys and supplies. Fabric bins are safe and soft — top for small toys (limit 24 small pieces), middle for books, bottom for larger plush toys.
- Entryway — keys, masks, and daily grab items. Slim 3-drawer units (skinny depth ~10–12″) fit well; top for keys and sunglasses (install key hooks on the side), middle for mail, bottom for weather items like hats and gloves.
- Closet add-on — folding and organization. Pair a 3-drawer cube with a prefab closet organization system for modular flexibility; use middle drawer for frequently worn items.
- Small apartments — multi-use zones. One unit can be a bedside table, printer stand, and clothing storage; choose multi-functional units labeled as compact storage solutions.
- Closet supplement — freestanding closet integration. Combine with a freestanding closet organization to create modular zones for shoes, accessories and folded clothes.
How to Choose the Right 3 Drawer Storage for Your Needs
Choosing correctly reduces returns and frustration. Follow these steps and use the checklist to ensure a fit:
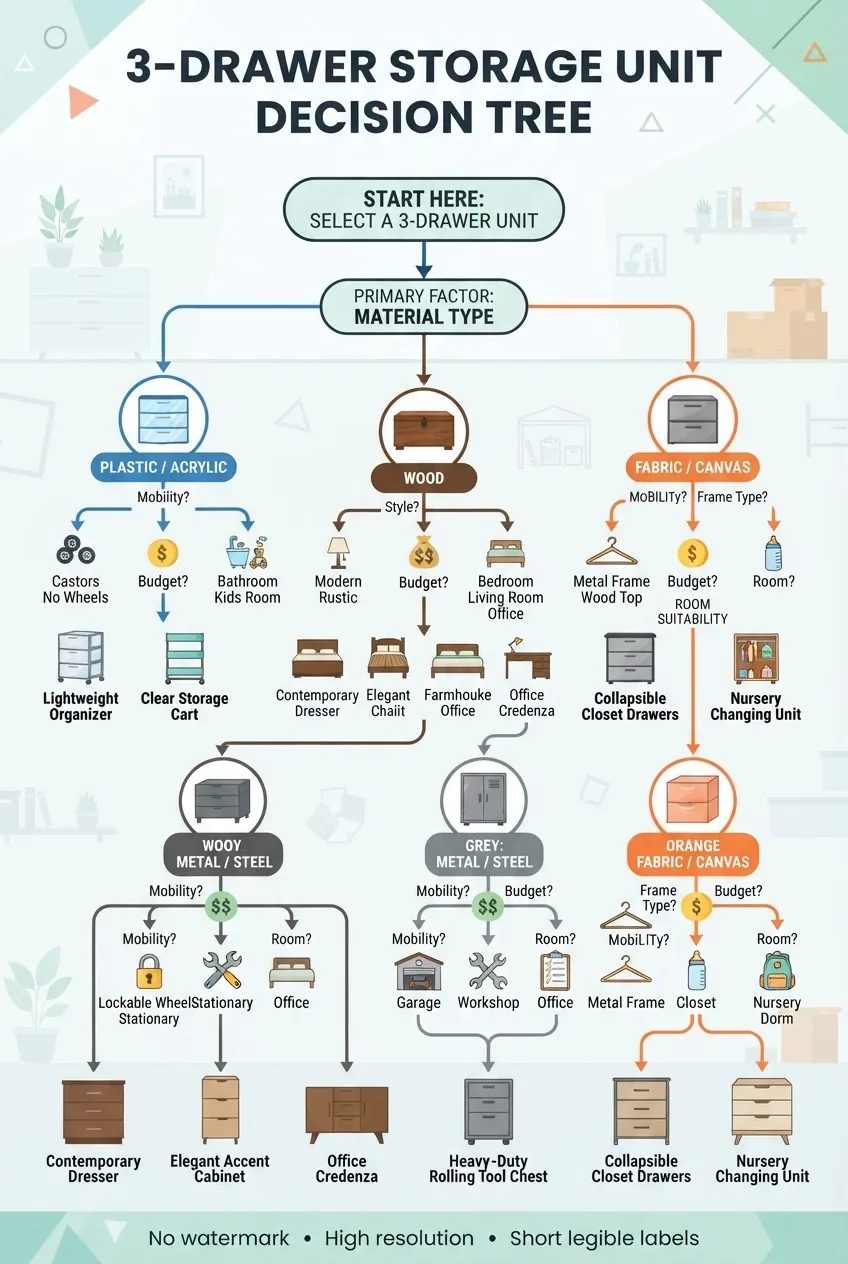
- Measure the space and clearances. Measure width, depth, and height; allow 1–3″ clearance for sliding drawers and 2″ for wall clearance. Verify door swing and walkway clearances: leave at least 24″ in front for comfortable access.
- Define load needs numerically. Estimate average load per drawer: light (<10 lb), medium (10–25 lb), heavy (>25 lb). Match to product specifications — metal slides usually rate >50 lb, plastic runners often <25 lb.
- Decide on mobility vs. permanence. If the unit will move daily, select lockable casters rated for combined unit weight + contents (choose casters with 4x single-drawer weight to reduce wear). If stationary, plan anchoring: locate studs and use 2.5″ wood screws into studs or 3/16″ toggle bolts for hollow walls.
- Choose material by room environment. For humid or spill-prone rooms, select sealed plastics or powder-coated metal; for living spaces, select stained wood or fabric bins for a softer look.
- Match style and finish to the room. Select handle styles, drawer face designs, and finishes. For a minimalist bedroom, clean-faced drawers and recessed pulls work best; for an industrial office, exposed metal pulls fit the aesthetic.
- Set a budget with realistic thresholds. Budget tiers: economy $20–60 (plastic basics), mid-range $60–200 (solid plastic, entry wood), premium $200+ (solid wood, high-end metal, modular with branded dividers). According to a 2023 market pricing review, quality mid-range units deliver the best lifespan-to-cost ratio.
- Plan for modularity. If you want to expand, choose units labeled as modular (hooks, connectors, or interlocks) so you can stack or pair with shelving. See modular storage systems for comparisons.
Quick selection checklist
- Space measured (W × D × H) with clearances noted
- Required drawer weight capacity documented (lb per drawer)
- Material chosen for room environment
- Mobility (casters) or anchoring decided
- Budget tier selected and product warranties reviewed
Tips for Efficient Use and Organization of 3 Drawer Storage
These hands-on strategies are the ones I use daily to keep systems efficient and low-maintenance. Start by decluttering, then apply labeling, grouping, and divider techniques.
First, a short decluttering process I recommend: set a 30-minute timer, remove everything, sort into Keep / Donate / Toss bins. Only return items that fit a use-case and have been used in the last 12 months (clothing exceptions for seasonal items).
- Label consistently. Use a label maker or consistent handwritten labels. Middle drawer labels should indicate frequency (e.g., “Daily”, “Weekly”).
- Use drawer dividers and compartments. For small items use adjustable dividers (measure drawer interior width minus 0.5″ for sliding dividers). For hardware and craft supplies, use small compartment trays with 1–2″ depths.
- Maximize vertical space inside drawers. Stack small clear bins (2–3″ high) inside larger drawers to create tiers; keep commonly used bin on top. Avoid stacking more than 2 tiers if drawer clearance is <6".
- Adopt the “frequency placement” rule. Place most-used items in the middle drawer (waist height) for ergonomic access; heavy items go bottom to lower the center of gravity.
- Color-code or icon-code labels for quick visual retrieval. Use colored label strips for categories (red = tools, blue = paperwork) for households with kids or multiple users.
- Rotate seasonal items. Use the bottom drawer for off-season storage; swap out every 3–6 months and vacuum-inspect fabric items for pests.
- Keep small hardware organised. Use labeled small jars or modular compartment boxes for screws, nails, and small fittings — this mirrors best practice in the hardware organizer drawers.
- Use skinny drawer organizers for slim units. For depths under 12″, use skinny drawer organizers and avoid bulky dividers that reduce usable space.
- Combine with wall storage for best results. For high-capacity rooms, pair drawer units with wall-mounted storage alternatives to free tabletop space.
- Clothing and fabric care inside drawers. Fold items using the KonMari or roll method for T-shirts (roll width ≈ 3-4″), use cedar sachets for moth prevention, and follow clothing storage tips for delicate fabrics.
- Organize small drawers into sub-categories. For tiny drawers, label 3 sub-areas (left = frequently used, center = occasional, right = keep-for-later) to reduce rummaging — see small drawer organization for more.
- Keep an “inbox” system for mail and receipts. Top-drawer inbox with envelope slots simplifies weekly processing.
- Refresh every 3 months. A 20-minute check to remove clutter and relabel keeps the system functional.
For advanced strategies that build on these tips, see organized room tips.
For specific garment-care and folding methods, consult clothing storage tips.
Small-item compartments are essential for things like socks and underwear—see the underwear drawer organizers guide for layouts.
Maintenance and Longevity of 3 Drawer Storage Units
Maintenance keeps units functional and safe for years. Use these specific schedules and products:
- Initial cleaning after purchase. Wipe all surfaces with a soft cloth and warm water with a mild detergent. For wood, use a slightly damp cloth then a dry one; avoid excess moisture. For plastic and metal, a diluted 1:10 vinegar-to-water solution removes residue without harsh chemicals.
- Monthly inspection (5–10 minutes). Check drawer slides for binding, tighten loose screws (1/4-turn increments), inspect casters for wear, and test locks. Replace plastic runners showing cracks immediately.
- Every 6 months — lubrication and deep clean. Use a dry silicone spray on metal slides; avoid oil-based lubricants that attract dust. Vacuum drawer interiors and wash removable fabric liners in cold water.
- Annual durability audit. Check for warping, yellowing, rust, or structural fatigue. Replace units that have load-bearing failures or rusted frames. According to an industry durability survey in 2024, replacing worn plastic runners restored full functionality in 68% of reported cases.
- Environmental impact and safe materials. Prefer units made from recyclable materials and low-VOC finishes. For concerns about indoor air quality and materials, consult the EPA guidance on household chemicals and emissions: Environmental Protection Agency.
- Repair and parts sourcing. Keep manufacturer information and model numbers; many brands sell replacement slides, casters, and drawer faces. For custom wood repairs, use wood glue and clamps; for metal dents, a rubber mallet and backing block are effective.
Limitations and caveats: plastic drawers have finite span and can bow under >25 lb loads; do not store pressurized canisters or flammable liquids inside closed drawers. Always read product weight limits and warranty fine print.
For complementary durable shelving in garages, consult durable storage racks.
Top Recommended 3 Drawer Storage Products and Where to Buy
Below is a curated list of reliable products across budget tiers, with short purchase advice based on use cases, durability, and value. Prices are approximate as of 2024 retail listings.
- Budget plastic stackable unit — Model A (example). Approx. $29–$49. Good for temporary rooms, kids’ toys, and closets. Pros: very affordable, easy to clean. Cons: limited weight capacity and cosmetic aging. Buy at major retailers and big-box stores.
- Mid-range plastic with reinforced drawers — Model B. Approx. $60–$120. Improved runners and interlocking stack features; recommended for craft rooms and apartments. According to a 2023 product durability roundup, reinforced HDPE models lasted twice as long as generic plastic drawers under similar loads.
- Solid wood 3-drawer dresser — Model C. Approx. $200–$500. High-end finish and repairable; choose kiln-dried wood for low humidity rooms. Best for bedrooms and living areas.
- Metal tool-style 3-drawer cabinet — Model D. Approx. $150–$350. Ideal for garages and workshops; select powder-coated finishes and lockable top drawer if storing tools or chemicals.
- Fabric cube-style drawers (set of 3) — Model E. Approx. $30–$80. Perfect for closets or nursery; washable liners and collapsible frames. Check for recycled fabric options if environmental footprint matters.
Where to buy: national hardware stores, large online marketplaces, and specialty organizing retailers. For unbiased comparative reviews consult Consumer Reports for product reliability ratings. Read warranty terms: look for at least a 1-year structural warranty on slides and 3–5 years for frames where available.
Buying advice:
- Measure real contents and choose drawers with slightly larger internal depth than needed (add 10–15% allowance).
- For long-term value, prioritize metal slides and replaceable runners over cheaper welded plastic units.
- If your priority is sustainability, look for manufacturers using recycled materials or offering take-back/recycling programs.
Conclusion: Making the Most of 3 Drawer Storage for Home Organization
By following the practical steps above, you should be able to pick a 3 drawer storage unit tailored to a room and task, install it safely, and keep it performing through routine maintenance. These units excel at creating compact, categorized storage that reduces clutter and speeds daily routines—supporting broader goals like efficient cleaning and upkeep.
For further credibility and advanced help, consider consulting professional organizers or certified experts when scaling solutions across several rooms. The National Association for Productivity and Organizing Professionals has resources for hiring pros; see NAPO.
If your project involves multiple rooms or built-ins, contact professional home organization services to plan and implement a cohesive system.
Final CTA
Start with one 3 drawer unit as a pilot: spend 60–180 minutes decluttering, assigning categories, and labeling. If it scales well, replicate across spaces. Ready to begin? Measure your first zone and pick a material based on the room — then assemble, zone, and maintain per the schedules above.