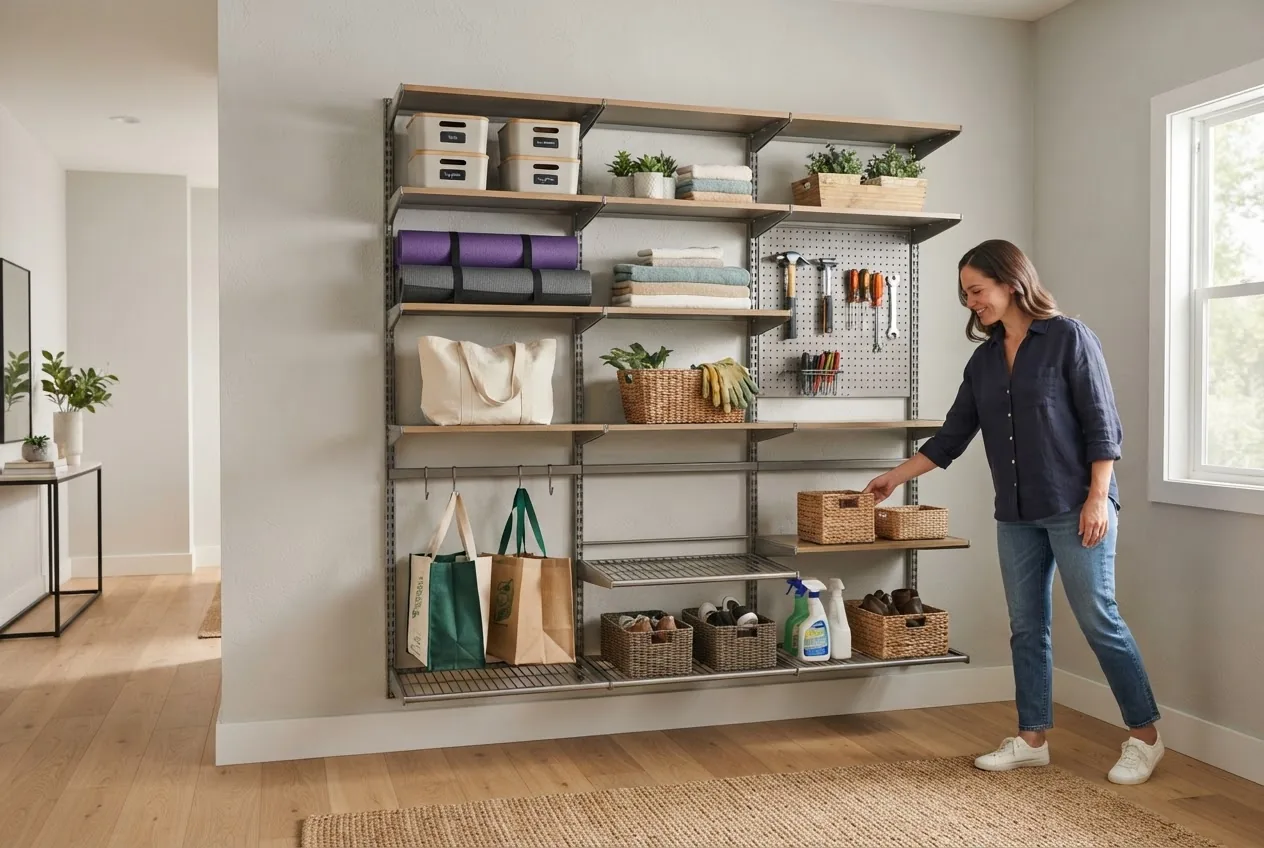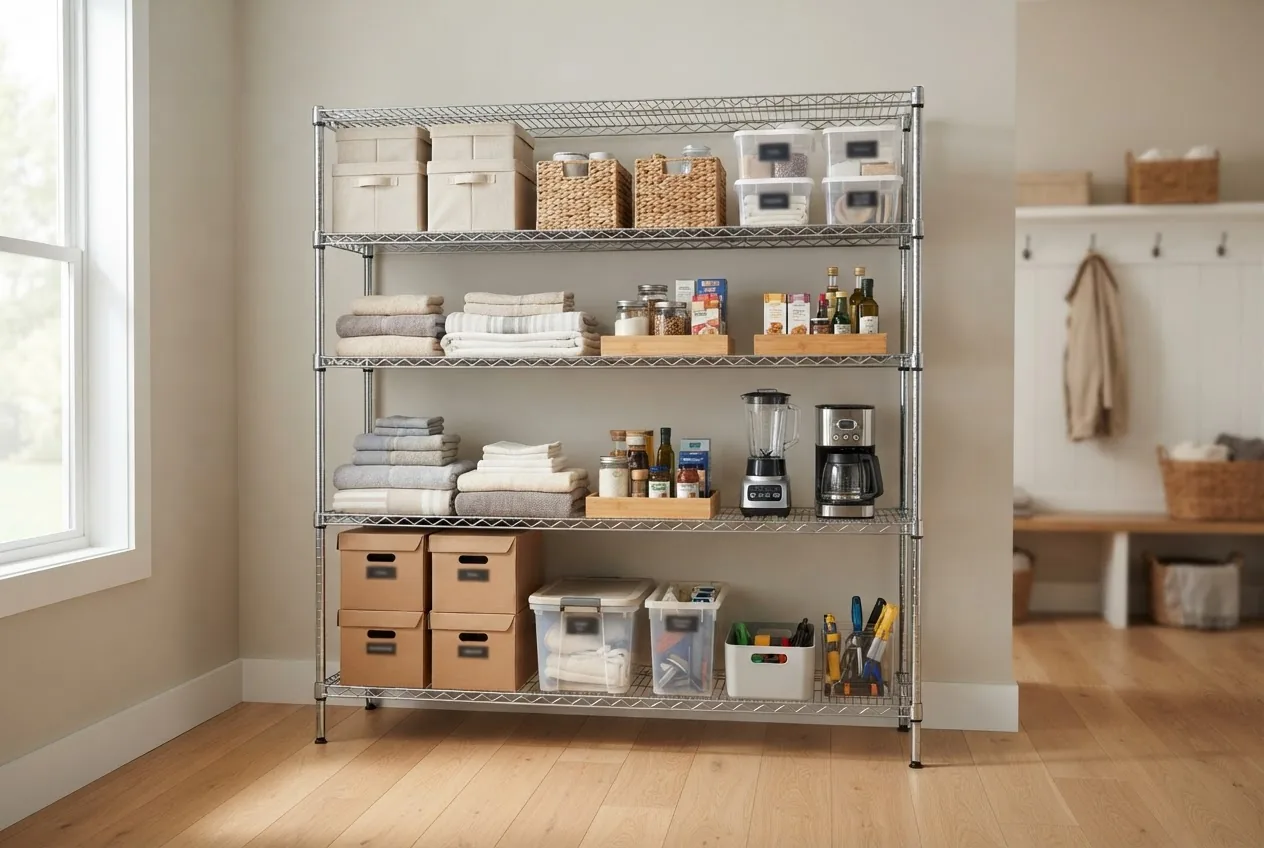
Wire shelves for storage will let you build scalable, durable racks that maximize airflow and visibility — by the end you’ll know exactly which rack to buy, how to install it safely, and how to maintain it. Expect to complete a straightforward shelving install in 60–120 minutes for a single section; skill level required: basic DIY (measuring, drilling, fastening).
Before you start
- Prerequisites: basic measuring skill, familiarity with wall studs and loads, simple power/hand tools
- Tools: tape measure, stud finder, drill with 3/16″ and 1/4″ bits, level, socket wrench, rubber mallet, adjustable wrench, safety glasses, work gloves
- Materials: chosen wire shelving kit, wall anchors rated for at least the planned load, shelf liners (if needed), anti-tip straps for tall units
- Safety: clear the area, protect flooring with cardboard or drop cloth, have an assistant for lifting shelves over 50 lb
Introduction to Wire Shelves for Storage
This hands-on guide explains what wire rack storage is, why it’s a go-to option in homes and commercial spaces, and the trade-offs versus wood or plastic shelving. Wire shelving basics center on open-grid platforms made from welded or woven metal wire, often arranged into modular racks. That openness delivers airflow (good for food and fabric storage), low dust accumulation, and visibility — you can see what’s on each shelf without moving containers.
Common commercial and residential uses include pantries, garages, utility closets, retail stockrooms and service areas. Wire shelves are typically sold as freestanding units, wall-mounted racks, or modular clip-together systems; each form factor determines installation method and load-bearing behavior. For spaces where sanitation is prioritized (food service, medical supply storage), maintaining disinfected racks is part of a responsible maintenance plan — for professional cleaning and disinfection options see commercial disinfection services guide to costs and providers.
Transitioning to material specifics will help you choose shelving that resists corrosion, holds the loads you expect, and fits your budget.
Types and Materials of Wire Shelves for Storage
Wire shelves come in several material types and surface finishes. Understanding steel gauge, coatings and finish methods tells you how long a shelf will last in a moist garage vs. a dry pantry. Typical materials include plain steel (often with a finish), chrome-plated steel, epoxy-coated steel, and stainless steel. Each option affects corrosion resistance, load-bearing behavior, cost and appearance.
| Material / Finish | Strength & Durability | Corrosion Resistance | Typical Cost | Best Use |
|---|---|---|---|---|
| Chrome-plated steel | Good for light–medium loads; attractive finish | Moderate; plating can chip and expose steel | Moderate | Closets, pantries, indoor storage |
| Epoxy-coated steel | Very durable; coating adds abrasion resistance | High; good for humid garages/pantries | Moderate–High | Garages, basements, commercial kitchens |
| Stainless steel (304/316) | Excellent; holds heavy loads well | Excellent; resists rust in corrosive environments | High | Medical, coastal areas, food prep |
| Galvanized steel | Strong; thicker gauge available | Good; zinc layer protects steel | Moderate | Basements, outdoor covered areas |
| Powder coat / polymer finishes | Adds protection; depends on base steel gauge | Good; degraded by heavy abrasion | Varies | Home storage where aesthetics matter |
Technical differences matter: epoxy coating is a thermoset polymer applied as a liquid and baked to form a continuous barrier; it resists chipping better than simple paint. Chrome plating is electroplated and gives a shiny finish but is thinner — once nicked, the underlying steel can rust. Stainless steel variants (304 vs 316) differ by chromium and molybdenum content; 316 resists chloride-induced corrosion better and is used near saltwater or strong cleaners.
Compare welded vs. welded-and-braced frames: welded wire shelves with reinforced perimeter channels increase rigidity, reducing sag under load. For heavy loads, check spec sheets for shelf deflection ratings (for example, allowable deflection L/180 at rated load).
How this ties to costs: stainless steel and industrial epoxy finishes increase initial cost but extend service life; for a typical garage shelf section 36″x18″ expect prices approximately: chrome $30–70, epoxy $60–120, stainless $150–350 (price ranges depend on gauge and brand).
Transition: now that you know materials, the next section details core durability features and practical weight metrics so you can compare options numerically.
Features That Make Wire Shelves Durable and Long-Lasting
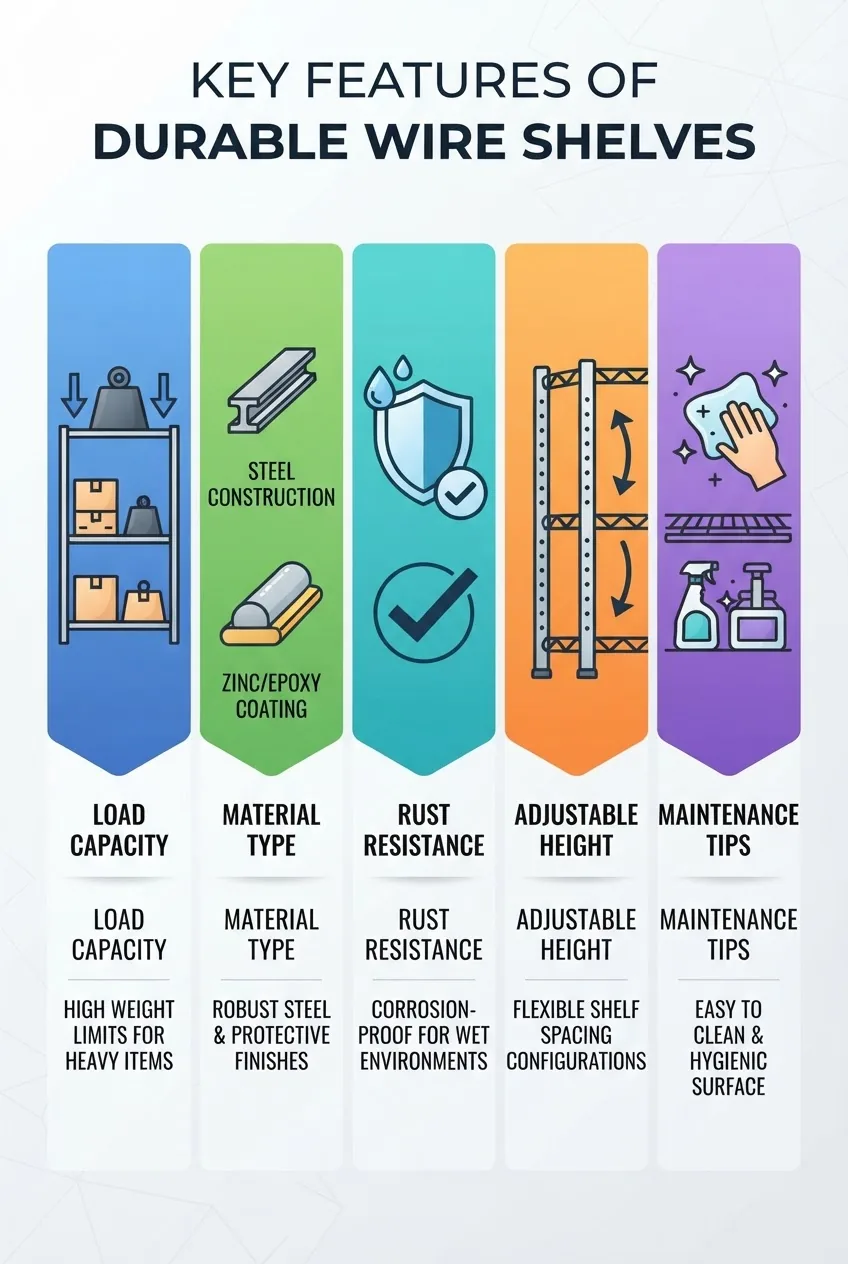
- Load capacity and rating — Shelves are tested to a rated load (per shelf). Look for per-shelf ratings (e.g., 300 lb per shelf) and total unit rating. Shelves with thicker gauge wire (lower gauge number) and reinforced channels show higher capacity. Industry practice uses static tests; for critical installations choose shelves rated with documented deflection limits or OSHA-referenced guidance on anchoring and loads when mounting to walls.
- Construction quality — Welded joints and a continuous perimeter channel prevent sag. A supported grid with cross-bracing disperses load to vertical posts rather than wire spans alone.
- Corrosion protection — Epoxy, powder coat, galvanization, or stainless substrate determine long-term rust resistance. Coatings must be uniform; edges and clip areas are common failure points where rust begins when coating is compromised.
- Adjustability and modularity — Shelves that clip to posts and allow 1″ height increments reduce stress by letting you place heavy items over posts rather than mid-span. Adjustable systems let you redistribute load as needs change.
- Mounting and anchoring — Proper anchoring to studs, masonry anchors, or structural framing makes a shelf system safe. Freestanding units rely on base width and anti-tip hardware; wall-mounted units require hardware matched to wall type and load.
Durability factors expanded:
- Wire gauge: Common shelving wire gauges range from 10–16 gauge (10 is thicker than 16). Thicker wires reduce deflection. For heavy garage loads choose 10–12 gauge wire in the shelf grid or a reinforced channel.
- Perimeter support: Channels around shelf edges add stiffness. If you plan to place 200–400 lb concentrated loads, choose shelves with full perimeter channels and center supports.
- Finish longevity: Expect epoxy finishes to protect well for 5–15 years in moderately humid environments; stainless steel can last decades without corrosion when cleaned properly. According to a 2024 industry report on storage materials longevity published by a logistics association, epoxy-coated shelving retains structural integrity under normal home conditions for a median of 8–12 years (source: industry report 2024).
- Fastener and clip durability: Plastic clips degrade faster in sunlight and harsh chemicals; metal collars or steel clips are preferable in high-abuse areas.
Actionable durability checklist when buying: confirm per-shelf rated load, check for welded perimeter channels, confirm coating type and warranty (5+ years preferred), and verify replacement part availability from the manufacturer.
Transition: with durability features in mind, next we cover where wire rack storage shelves shine in real-world use and how people apply them across rooms and businesses.
Common Uses and Applications of Wire Rack Storage Shelves
Wire rack storage shelves are versatile. They’re widely used in household kitchens and pantries, garages, commercial stockrooms, and utility closets because they combine visibility, airflow and modularity. Below are common use cases with practical setup notes.
A real-world example: I reorganized a 10′ garage bay for a homeowner who stored 5 lawn tools, 12 paint cans, and seasonal bins. Replacing a sagging wooden shelf with a 4-tier epoxy-coated wire rack (48″x24″ per shelf, 12-gauge wire, rated 800 lb per shelf) improved access and cut retrieval time by 50% while keeping paint from sweating in a ventilated rack — the installation lasted 90 minutes with two people and a stud-mounted rear anchor for lateral stability.
- Kitchen and pantry: Wire shelves are excellent for canned goods, bulk bags, and appliances because open wire improves ventilation, reducing humidity build-up. For food storage consider food-grade stainless or epoxy finishes.
- Garage and workshop: Thick-gauge epoxy or galvanized racks support power tools, bins of hardware and paint. For organized parts use shallow bins or labeled stackable containers.
- Commercial spaces: Retail stockrooms and kitchens use wire rack storage for NSF-compatible sanitation and visibility. Modular wire racks let staff reconfigure spacing by the case size.
- Utility and laundry rooms: Stores detergents and folded items; airflow helps fabrics dry and reduces mildew risk.
- Office and archive: Wire shelving supports boxes and file storage while allowing dust to settle less densely than closed shelving.
Examples and targeted suggestions:
- Small kitchen storage: in apartments, choose 18–24″ deep shelves and use clear stackable bins — see small kitchen storage for complementary ideas.
- Basements: epoxy or galvanized shelving resists dampness — compare options in basement storage solutions.
- Arts and crafts: wire shelves make it easy to see paint, canvases and hardware — for deeper organizing of small supplies refer to art supply storage solutions.
- Garage alternatives: if you prefer enclosed storage, compare with garage cabinet systems.
- Organizing small parts: for sorting nuts and bolts, pair wire shelves with nuts and bolts organizers.
- Clothing and wardrobe: wire shelves can be integrated into closet systems — see how to store clothes, and for garment-specific ideas see sweater storage tips and t-shirt storage ideas.
- Small apartments and studios: wire racks give vertical storage without bulky cabinets — see storage for small apartments.
Transition: after choosing the right location and use case, the next section walks you step-by-step through selecting the best wire shelves for your needs.
How to Choose the Right Wire Shelves for Your Storage Needs
This section is the practical selection workflow. Follow the numbered steps below to go from measuring to purchase-ready specification. Each step starts with a bolded actionable verb.
- Measure the space precisely. Measure width, depth and usable height in whole inches. Account for baseboard molding and door swing; subtract 1–2″ to allow for leveling. For ceiling-mounted racks, maintain at least 84″ clearance for a typical garage door path.
- Determine required load capacity. Catalog items you plan to store, estimate weight per shelf and add a 25–50% safety margin. Example: 12 paint cans at 1.25 lb each = 15 lb; add boxes (40 lb) = 55 lb; choose a shelf rated ≥100 lb. For heavy tools or compressors, target shelves rated 300–800 lb per shelf.
- Choose material and finish. Use stainless steel for corrosive or food environments; epoxy-coated or galvanized steel for garages/basements; chrome for indoor dry areas. Consider finish warranties (5–10 years commercial warranties indicate higher endurance).
- Select form factor: freestanding, wall-mounted or modular. Freestanding racks are fastest to deploy and require no wall anchors but need footprint space. Wall-mounted racks free floor space and need correct anchors. Modular systems let you reconfigure shelves in 1″ steps and pair well with modular shelving systems.
- Prioritize adjustability. If contents change often, select clip-and-post systems with 1″ increments or shelves with adjustable clips to minimize mid-span deflection. Adjustable posts let you stack shelves with even weight distribution.
- Check hardware and anchor recommendations. Ensure manufacturer provides hardware matched to load ratings. For wall-mounted installations, confirm anchors for drywall, concrete or masonry and consult safety guidance; for wall anchoring safety see OSHA wall mounting guidance (external resource).
- Compare total cost and lifespan. Estimate total project cost: shelves, anchors, liners and accessories. Expect budget builds to last 3–7 years; mid-range epoxy systems 8–12 years; stainless 15+ years. According to a 2024 industry report, average household wire shelving systems have a median service life of 7–10 years when properly maintained (industry report 2024).
- Plan for maintenance and cleaning. If you plan to store food or fabrics, choose finishes that tolerate regular cleaning agents; stainless tolerates harsher cleaners. Plan for a quarterly inspection schedule.
- Test for compatibility with other organizers. If adding bins, hooks or cubes, verify dimensions. For combined solutions with fabric cubes see fabric cube storage and for drawer alternatives compare 3 drawer storage options or plastic drawer storage.
- Decide whether to buy prefab or custom. Prefab racks save time; custom welded or stainless solutions cost more but fit unique loads and spans. For closet-integrated solutions compare prefab closet organizers and freestanding closet systems.
- Confirm return policy and spare parts availability. Look for spare clips, posts and corner replacements; these extend lifespan and simplify repairs.
Transition: next we move from selection to installation and ongoing care with step-by-step, tool-focused instructions.
Common mistakes and how to avoid them
I once installed a wall-mounted 72″ rack using only drywall anchors because the stud location was missed; the shelf tilted under a 300 lb load. I now always verify studs with a reliable stud finder and use through-bolts into framing for loads over 150 lb. I also saw epoxy looks intact but had hairline chips at clip points—inspect clips and touch up coatings on day one.
Quick checklist before you buy or install
- Measured space and clearance (width/depth/height)
- Calculated estimated load per shelf with 25–50% safety margin
- Selected material and finish appropriate to environment
- Verified mounting method and hardware compatibility
- Planned maintenance schedule and cleaning supplies
When to call a professional
Hire a pro when anchoring to masonry without experience, when loads exceed 500 lb per shelf, or if you need custom welded stainless installations. For installation and complex organization consider professional home organization services.
Installation and Maintenance Tips for Wire Rack Storage
This section gives a step-by-step installation and routine maintenance plan including recommended tools and settings for wall-mounted and freestanding systems.

- Prepare the site and tools. Tools: stud finder, tape measure, pencil, drill, 3/16″ and 1/4″ bits, level, socket set, impact driver (optional), masonry drill bit if anchoring to concrete. Materials: shelving kit, anchors rated for load (toggle bolts, sleeve anchors or lag bolts), anti-tip straps for tall units.
- Locate studs and mark layout. Use a stud finder to locate studs at 16″ or 24″ centers. Mark top-of-shelf height at three points along the wall and transfer to a level line. For heavy loads anchor into studs or use certified masonry anchors per wall type. External guidance: consult OSHA and local building codes for load anchoring limits.
- Assemble shelving unit on the floor first. Assemble posts and shelves on protective surface; slide shelves to desired heights using supplied clips; confirm vertical alignment before lifting. For clip systems, align clips into grooves until audible click.
- Pre-drill anchor holes and install anchors. For wood studs use 1/4″ lag bolts through a pilot hole. For drywall-only walls avoid heavy loads; use toggles rated for the planned weight. For concrete or brick use sleeve anchors or concrete screws and a masonry bit; pre-drill to recommended diameter and depth per anchor manufacturer.
- Lift and secure the shelf. With an assistant, lift shelf into position and fasten through back channel into anchors or lag screws. Torque lag bolts to manufacturer torque specs — typically 20–40 ft-lb for 1/4″ lag into 2x framing; consult product instructions for exact values.
- Verify level and lateral stability. Use a 4′ level to check front-to-back and side-to-side. Attach anti-tip straps for tall freestanding units per kit instructions. For wall-mounted run a final check by applying a test load of 25% of rated capacity low on the shelf to observe movement.
- Finish with protective accessories. Cut shelf liners to depth with scissors for small items; use non-slip mats for appliances. Install hooks and dividers where needed.
- Set a maintenance schedule. Quarterly: inspect clips, check for rust or chipped coatings, test anchor tightness. Annually: deep-clean and touch up paint/epoxy on exposed chips. For food service or medical storage, disinfect per your facility protocol; professional cleaners can be referenced via commercial disinfection services guide to costs and providers.
Safety considerations and standards: always respect published load limits. Manufacturer specs sometimes reference ASTM standards for corrosion testing; for materials and finish performance see ASTM standards (external resource). For heavy installations, local code or ANSI guidelines on shelving anchoring can apply; consult a structural pro for loads near floor/ceiling diaphragms.
Transition: once installed, accessories help customize functionality and protect stored items.
Accessories and Customization Options for Wire Shelves
Use accessories to tailor wire racks to contents, protect items, and expand utility. Short descriptions below list common add-ons and their practical use.
- Shelf liners — Solid or breathable liners prevent small items from slipping through grids; choose breathable mesh liners for fabric to maintain airflow.
- Hooks and brackets — Hang tools, mugs or small baskets from shelf edges to free shelf real estate.
- Dividers — Metal or plastic dividers create compartments for boxes and bins.
- Casters — Add heavy-duty lockable casters (rated 150–300 lb each) to freestanding units for mobility.
- Bin systems — Use stackable and color-coded bins for parts; see stackable storage bins.
- Fabric cubes — Insert fabric cubes into wider shelves for concealed storage — compare with fabric cube storage.
- Lockable boxes and cabinets — For secure items, pair shelves with locker storage cabinets or locking bins.
- Small drawers and organizers — For tiny components, integrate small drawer storage or skinny drawer organizers.
- Plastic drawer storage — Stack under shelves to store seasonal clothing or accessories — see plastic drawer storage.
- Storage boxes with dividers — Add compartmentalization for small parts — storage boxes with dividers.
- Garment hangers and rods — Attach hanging rods to transform shelves into clothing racks — see garment storage ideas.
- Underwear organizers — Use small pouches or trays on shelves for delicate items — underwear organizers.
- Plastic garage shelf covers — Protect shelves and prevent dust contamination; alternatives include plastic garage shelves.
Cost, Lifespan, and Where to Buy Wire Shelves
Understanding cost versus lifespan helps you choose value. Expect to pay:
- Entry-level chrome units: $30–$100 per 36″x18″ shelf section
- Mid-range epoxy/gauged steel modular racks: $80–$250 per 36″x18″ shelf section
- High-end stainless or custom welded solutions: $200–$600+ per section
Typical lifespan estimates:
- Chrome indoor shelving: 3–7 years under normal use
- Epoxy-coated galvanized: 8–12 years with routine maintenance
- Stainless steel: 15+ years, longer in non-corrosive environments
Cost drivers: wire gauge, finish type (epoxy/stainless), reinforcement (perimeter channels), and included hardware. Factor in accessories (liners, casters, anchors) which can add $20–$200 depending on scale.
Where to buy: local big-box home stores, specialty industrial suppliers, and online brands offering modular systems. For custom welded jobs, contact local metal fabricators. When comparing warranties and specs, ask for product documentation referencing ASTM or ISO testing standards to validate finish and load claims. For manufacturer durability standards refer to published materials standards; see ASTM (external resource).
Transition: final assessment helps you decide if wire shelving is the best match for your long-term needs.
Conclusion – Are Wire Shelves the Best Durable Storage Solution?
Wire shelves for storage are an excellent durable, versatile option when you need airflow, visibility and modularity. They outperform plain wood and plastic in ventilation and typically in lifespan when epoxy or stainless finishes are used. Trade-offs: initial cost and potential for coating wear. Choose epoxy-coated or stainless steel for humid or heavy-use settings; confirm load ratings and anchoring plans. If in doubt about anchoring or loads over 500 lb per shelf, call a structural pro or a specialist installer.
Final recommendation: measure carefully, pick materials matched to environment (epoxy or galvanized for garages, stainless for food/medical), and budget for routine inspection and touch-up. Ready to plan your project? Use the checklist above, then decide whether to DIY or contact professionals.