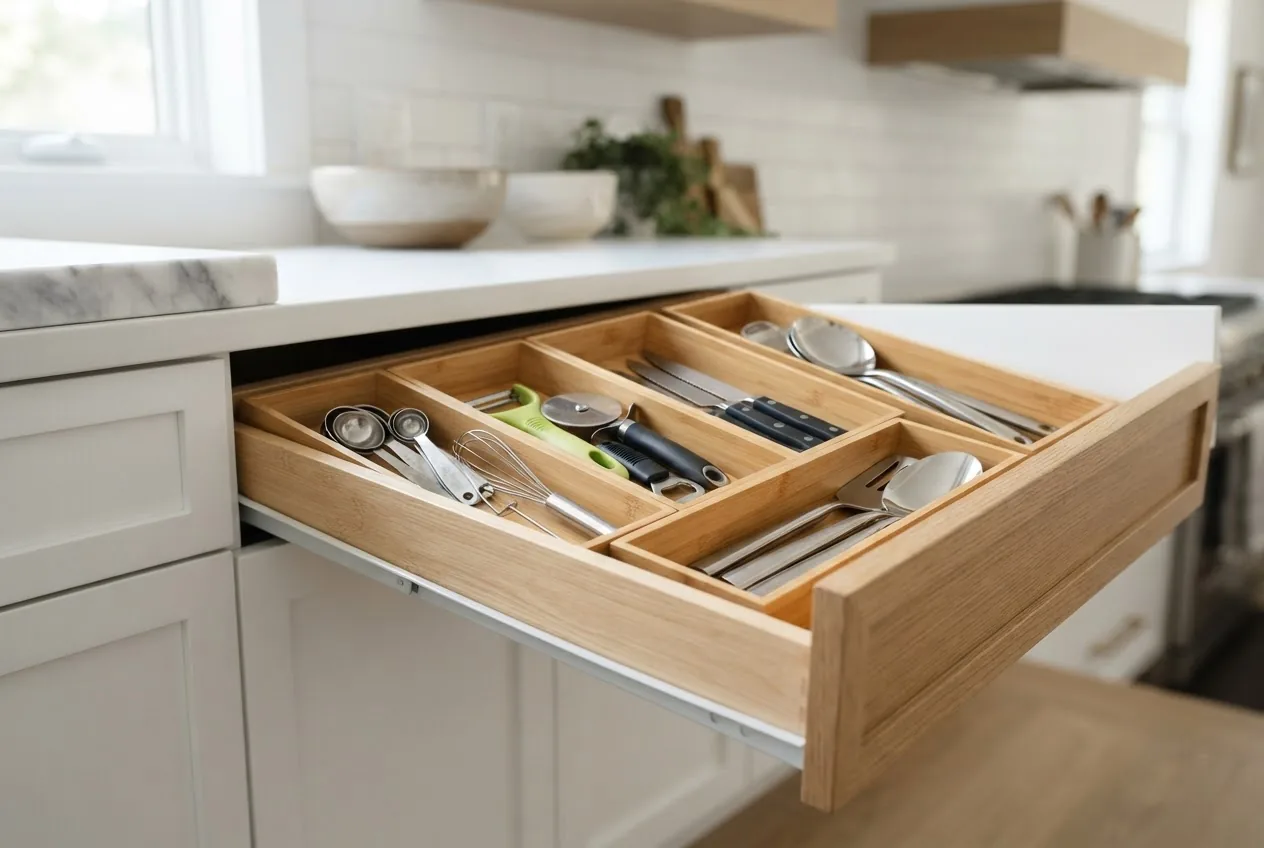
What you’ll achieve: By the end you will have measured, selected, installed, and optimized a skinny drawer organizer for one slim drawer, and you’ll know how to scale the approach across a home. Time required: 45–120 minutes depending on custom cutting and shopping. Skill level: beginner to intermediate DIY.
Before you start
- Tools: tape measure, pencil, masking tape, utility knife, straightedge or ruler, sandpaper (120-grit), hot glue gun or double-sided adhesive pads.
- Materials: cardboard or thin plywood (for DIY), foam board, modular inserts (if buying), microfiber cloth, mild detergent.
- Optional: non-slip drawer liner, felt pads, small drill (for wood dividers), clamps for gluing.
Follow the numbered steps below as the core, action-first roadmap for working through one skinny drawer at a time.
- Measure the drawer accurately — Record internal width, depth (front-to-back), and clear height to the underside of the drawer lip; note any obstructions (drawer slides, grooves). Write down measurements to 1/8″ (3 mm) accuracy.
- Decide layout based on contents — Group items by type (flat, tall, flexible). For utensils or tools use narrow parallel compartments; for stationery use shallow trays. Plan compartments in inches or centimeters using your recorded measurements.
- Choose material and type — Select between fixed trays, expandable drawer organizer (adjustable width via tension/overlap), modular inserts, or custom-cut wood/bamboo dividers depending on durability needs and aesthetics.
- Test-fit before cutting or buying — Use folded cardboard templates (cut to your planned compartments) to test access and ergonomics; adjust layout so frequently used items sit within the top 2–3″ of the drawer for easy reach.
- Install non-slip liner and anchors — Apply a non-slip liner to prevent sliding; use thin adhesive-backed tabs or tiny screws (for wood) to anchor permanent dividers if necessary.
- Place items intentionally — Put the heaviest items nearest to the drawer back to reduce front tipping. Arrange by frequency: daily-use on the right or left depending on dominant hand.
- Label and standardize — For multi-drawer systems, label compartments and keep like-with-like across drawers to reduce decision fatigue and make refit fast.
- Maintain and iterate — Re-check fit after two weeks and after significant item additions; tweak divider spacing by 1/8″ to eliminate rattles or to add clearance for lids.
Common mistakes and how to avoid them
I once installed a rigid wooden divider set for a kitchen cutlery drawer without accounting for the drawer slides; the front of the tray hit the slide and would not close. I learned to always measure inside-to-inside and to use cardboard templates first. I also overstuffed one slim drawer, so now I limit occupancy to 70% capacity to prevent jamming.
Quick checklist
- Internal width, depth, height recorded to 1/8″ (3 mm).
- Cardboard template tested and fits with clearance for slides.
- Material chosen for load and humidity (e.g., bamboo for dry, plastic for wet areas).
- Anti-slip liner installed; dividers anchored or friction-fit.
- Daily-use items immediately reachable and labeled.
When to call a professional
Call a carpenter or professional organizer if you need custom routed dividers, integrated drawer inserts for appliance cutouts, or if the drawer is part of bespoke cabinetry where modifying slides or faces could void warranties.
Now that you’ve completed the practical steps, read the detailed section-by-section guide below for the theory, product comparisons, room-specific layouts, advanced DIY builds, maintenance, buying options, and common pitfalls to avoid.
Understanding Skinny Drawer Organizers: What They Are and Why You Need Them
A skinny drawer organizer is a storage solution designed specifically for drawers that are narrow in width or shallow in height — drawers that standard organizers don’t fit well. These slim drawer dividers and trays turn underused narrow spaces into reliable storage for flat, long, or compact items.
Benefits of organizing skinny drawers include:
- Space maximization — narrow pockets create order without compromising drawer movement.
- Reduced clutter — grouped items are easier to access and inventory.
- Ergonomics — properly planned slim storage with drawers reduces reaching and bending when items are placed by frequency.
- Aesthetics — consistent, narrow dividers offer a cleaner look in modern kitchens and bathrooms.
Common skinny drawer types you’ll encounter:
- Fixed wooden or bamboo dividers: durable, aesthetically pleasing for visible drawers.
- Expandable plastic trays: tension-based width adjustment for slight size variances.
- Slip-in modular inserts: stackable or compartmentalized units for flexible layouts.
- Thin metal wire organizers: low-profile and best when moisture resistance is needed.
Design considerations specific to thin storage drawers:
- Measure internal width and depth accurately and note drawer lip height — these govern what type of organizer will slide in or rest on the lip.
- Choose materials for the environment: bamboo or wood looks great in dry, visible drawers; plastic or metal is sensible near sinks or in garages.
- Decide between permanent dividers (glued or fixed) and adjustable/expandable ones for future flexibility.
Transition: Next we’ll walk step-by-step through measuring and selecting an organizer that will actually fit and work for your specific narrow drawer.
How to Measure and Choose the Right Skinny Drawer Organizer
Accurate measurements and a decision framework are the foundation for choosing the right organizer. Use this numbered how-to with action-first steps.
- Measure internal width — With the drawer fully extended, measure from inside left wall to inside right wall at the top, middle, and bottom; record the smallest number. Use a tape measure and write down to nearest 1/8″ (3 mm).
- Measure depth (front-to-back) — Measure from the inside front face to the inside rear wall. If the drawer has a lip or a front-mounted handle pocket, note the usable depth after the lip subtracts from total depth.
- Measure clear height — From drawer floor to underside of the drawer lip or to any overhanging bottom of the cabinet above. This tells you the maximum height of inserts or vertical dividers.
- Check for obstructions — Note drawer slides, grooves, and any hardware. Measure the gap between slide rails and confirm whether an organizer will sit on the drawer floor or rest on the rails.
- Decide fit strategy — If your drawer width is within 1/2″ of a ready-made expandable organizer’s minimum/maximum range, an expandable organizer will likely work. If the drawer is more than 1/2″ outside standard ranges, consider modular inserts or custom-cut dividers.
- Choose expandable vs fixed — Use an expandable drawer organizer when widths vary between similar drawers or when you want reuse potential; choose fixed-size or custom dividers for a snug, permanent solution when aesthetics and a no-gap fit are priorities.
- Select materials by room — For kitchen drawers exposed to moisture, prioritize BPA-free plastic or stainless steel. For a bedroom or visible bathroom drawer, bamboo gives a higher-end look. According to a 2023 consumer report on home storage materials, plastic organizers rated highest for moisture resistance while bamboo rated best for aesthetic longevity.
- Account for ergonomics — If frequently used items exceed 1 lb (0.45 kg) in a narrow compartment, ensure base support won’t bow; consider metal or thick polycarbonate trays. Keep the most-used compartments within the front third of the drawer for easy reach.
- Test with mockups — Cut cardboard to your planned compartment sizes and arrange them in the drawer. Open and close the drawer 5 times to check for binding and accessibility.
- Final fit tolerance — Allow 1/8″ to 1/4″ (3–6 mm) clearance per side for expandable trays; for fixed inserts aim for a total clearance of 1/16″ (1.5 mm) to avoid rattling while keeping things snug.
Transition: With measurements and a chosen fit strategy, you can now compare organizer types and materials to match load, moisture exposure, and style.
Types of Skinny Drawer Organizers and Materials
This comparison helps you pick the right type for performance, look, and longevity. Below is a concise table comparing common types, pros/cons, and best use case.
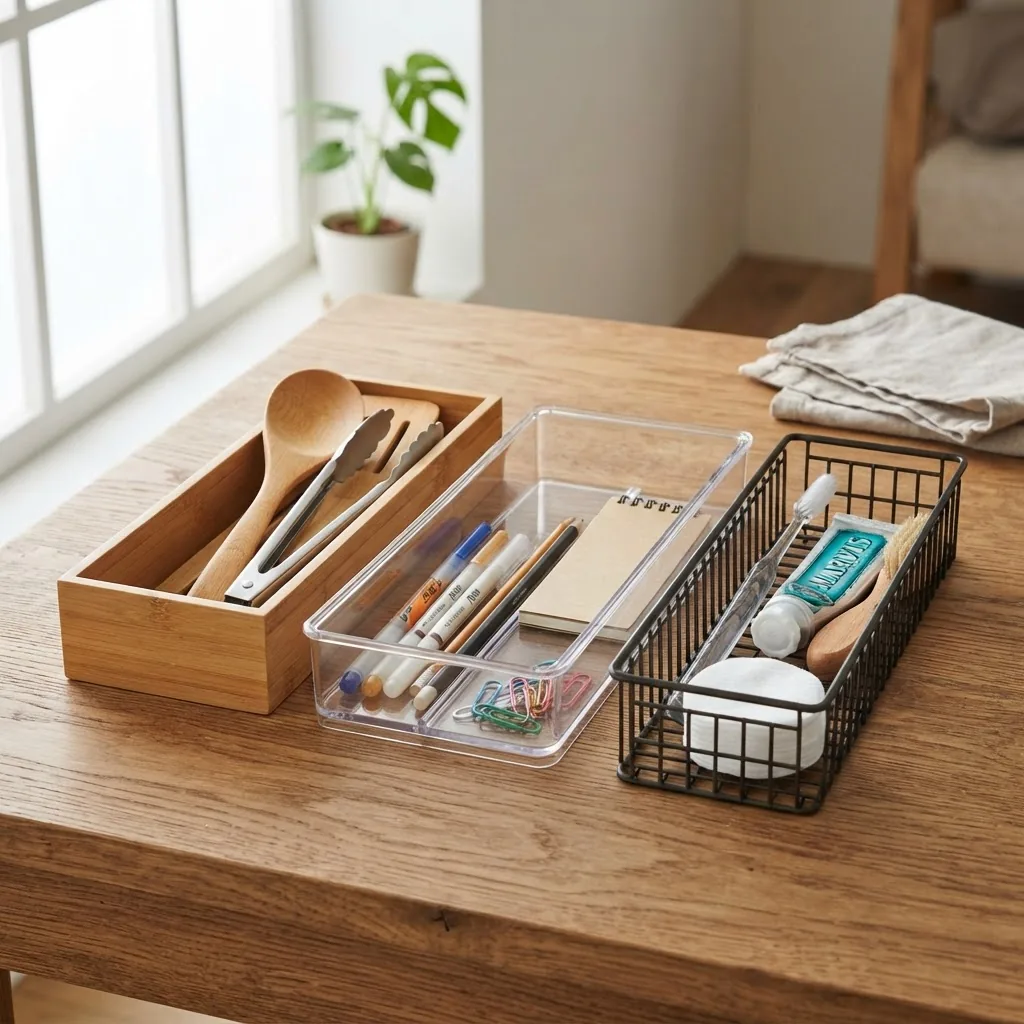
| Type / Material | Pros | Cons | Best use case |
|---|---|---|---|
| Bamboo dividers | Durable, upscale look, lightweight, renewable material. | Can warp in high humidity; fixed sizes limit flexibility. | Bedroom jewelry drawers, visible kitchen cutlery in dry environments. |
| Clear plastic trays (polycarbonate, PP) | Moisture-resistant, easy to clean, often expandable, inexpensive. | Scratches show over time; cheap plastics can yellow; check for BPA-free certification. | Bathroom, kitchen sink-adjacent drawers, office supply trays. |
| Metal wire organizers (stainless, coated steel) | Very durable, thin profile, good for heavy tools and garage uses. | Can rust if not stainless; less visually refined for living spaces. | Garage, utility drawers, tool skinny drawers. |
| Modular inserts (fabric, foam, adjustable bins) | Highly flexible, customizable compartments, gentle on delicate items. | Less rigid — not ideal for very heavy loads; fabric can stain. | Stationery, cosmetics, art supplies, kids’ craft drawers. |
| Custom wood/plywood dividers | Perfect fit, premium finish, permanent solution. | Higher cost and installation time; not easily reconfigured. | Built-in cabinetry, upscale kitchens where appearance matters. |
Certification and safety notes: look for FDA- or third-party-tested materials for food-contact drawers and BPA-free markings for plastics. According to a 2023 consumer report, BPA-free plastics and food-safe polycarbonate scored better in long-term odor resistance than untreated plastics — favor certified products when organizing cutlery or food wrappers.
plastic drawer storage guide for stackable container use is a useful deep-dive when you choose plastic for slim designs.
Transition: Now that you understand types and materials, below are room-by-room layouts and example contents suited to skinny drawers.
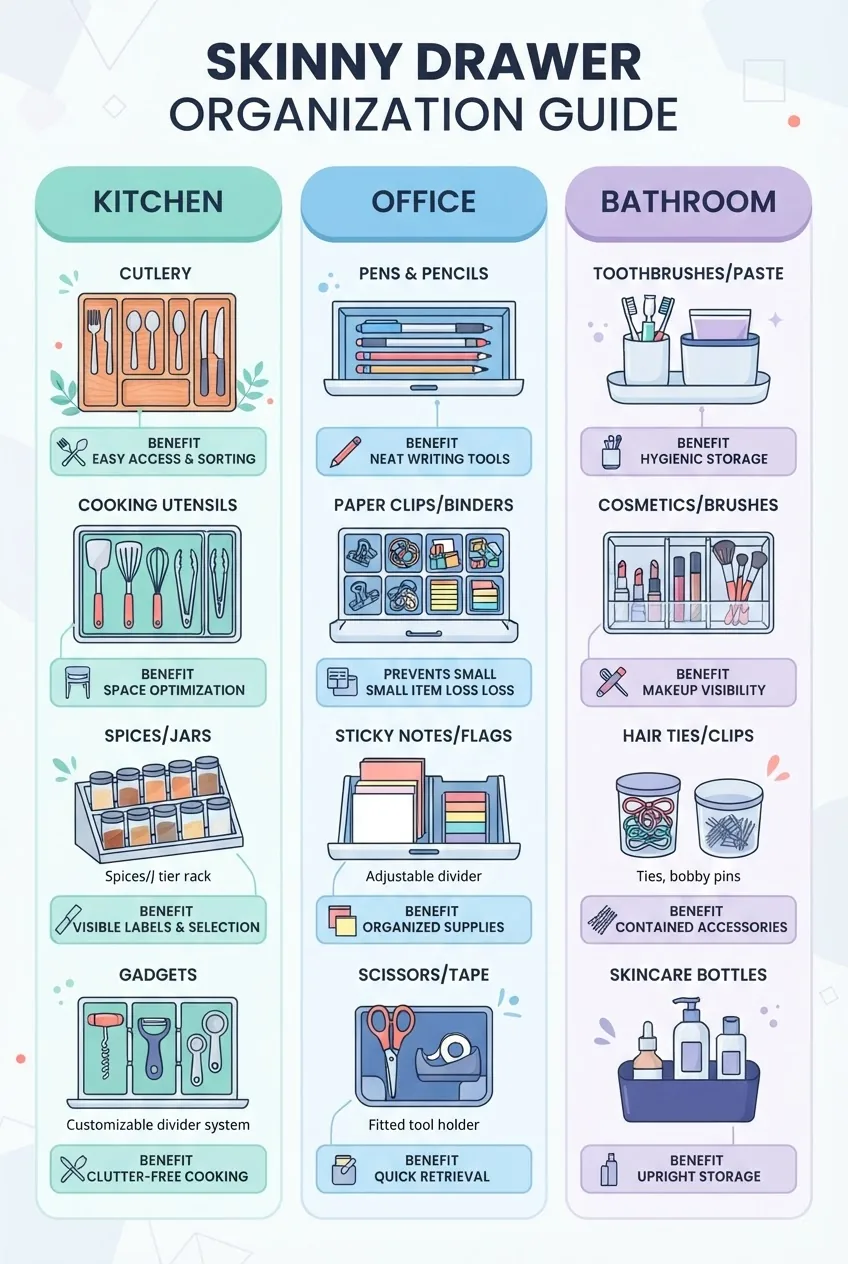
Top Skinny Drawer Organizer Uses by Room
Kitchen
Use narrow parallel compartments for utensils, cooking tools, and foil/wrap boxes. Recommended: bamboo slotted trays for visible drawers and expandable clear trays for drawers near sinks (easier to clean). Keep heavy utensils toward the back and frequently used tools in the front third.
For additional small-kitchen strategies see small kitchen storage ideas guide for efficient organizers.
Office
Skinny drawers are ideal for pens, rulers, sticky notes, and small electronics. Use shallow modular inserts or foam trays with labeled slots. Keep a single compartment for cables with velcro ties to avoid tangling.
For more on storing art supplies in small drawers, see art supply storage guide for organized art materials.
Bathroom
Choose water-resistant plastic trays or coated metal dividers for slim vanity drawers. Reserve one narrow compartment for daily skincare, another for hair tools, and a shallow foam insert for cosmetics to reduce shifting.
Bedroom & Jewelry
Soft modular inserts or felt-lined bamboo trays protect delicate items in narrow dresser drawers. Use small removable boxes for chains to prevent tangling and shallow compartments for rings.
Garage and Utility
Metal wire or thick plastic trays are best for slim tool drawers. Sort bolts and nuts into labeled tiny compartments; consider magnetic strips for small metal tools mounted inside the drawer face to save horizontal space.
Transition: If you prefer building your own, the next section gives low-cost and precise DIY options suitable for skinny drawers.
DIY Skinny Drawer Organizer Ideas for Custom Slim Storage Solutions
DIY options let you match exact internal dimensions and create unique compartment sizes. Below are step-by-step ideas and tips.
storage box with dividers guide for organized compartments is a helpful reference for compartment patterns you can adapt to skinny drawers.
- Cardboard template build (10–20 minutes) — Cut cardboard strips matching drawer internal height and width. Tape them into the planned layout. Use this mockup to test reach and sliding action. Tip: use double-thickness cardboard for better rigidity.
- Foam-core compartment tray (30–45 minutes) — Cut foam-core panels to the base size and slot in thin vertical dividers at 1/8″ intervals to create lightweight modular trays. Glue with PVA or hot glue and sand edges for a snug fit.
- Thin plywood or MDF dividers (1–3 hours) — Cut 1/8″–1/4″ plywood strips to drawer height. Butt-join with wood glue and tiny brad nails. Finish with food-safe oil or paint for kitchen use. Leave 1/16″ clearance per side for expansion.
- Repurposed plastic containers (15–30 minutes) — Use slim plastic food containers or lids as small trays; stack and glue if needed. Ensure they’re BPA-free if used near food. Warning: plastic can flex under heavy weight.
- Velcro-mounted fabric dividers (20–40 minutes) — Sew simple fabric pockets onto a thin board, attach with Velcro to the drawer base for removable, washable inserts—good for cosmetics or socks.
- Magnetic modular mounts (45–90 minutes) — For metal drawer bases, glue small square magnets into custom-designed trays so inserts snap in place; good when you need repositionable compartments without adhesive residue.
DIY downsides: variable durability, potential for off-gassing from some adhesives, and less precise tolerances than factory-made units. For high-humidity environments, only use moisture-tolerant materials and seal wood with a non-toxic finish.
Transition: Proper upkeep keeps organizers working and looking good—read on for detailed maintenance and hygiene guidance.
Maintenance and Cleaning Tips for Long-Lasting Skinny Drawer Organizers
Routine care extends an organizer’s life and keeps odors, stains, and wear at bay. Below are hands-on tips based on common wear issues and a short mini case study.
Mini case study: I reorganized a skinny kitchen drawer that previously held random utensils. I measured, bought a clear expandable poly tray, and installed a thin non-slip liner. After six months I noticed grease buildup in corners; I removed the tray, soaked it in warm soapy water for 15 minutes, and air-dried. The tray recovered without warping.
Maintenance tips and schedule:
- Weekly: Wipe out crumb and dust build-up using a microfiber cloth and mild detergent.
- Monthly: Remove inserts and wash plastic trays in warm soapy water for 10–15 minutes; dry completely before returning to the drawer to prevent mold growth.
- Quarterly: Inspect wooden dividers for warping; reapply a food-safe finish every 12–18 months in kitchen drawers.
- Odor removal: For persistent smells, wipe with a 1:10 solution of white vinegar to water, let air for 30 minutes, then dry. For delicate materials, test an inconspicuous area first.
Hygiene and professional standards: when hygiene needs are elevated (e.g., shared equipment in offices or rental properties), consult professional cleaning and disinfection guidance. commercial disinfection services guide can inform best practices and frequency.
For disinfection protocols and product choices see the CDC’s cleaning and disinfecting guidance:
CDC: Cleaning and Disinfecting Your Facility
Warning: Avoid abrasive cleaners on acrylic or polycarbonate trays as they scratch easily. When cleaning painted or finished wood dividers, use pH-neutral cleaners to protect the finish.
Transition: If you’re ready to shop rather than build, next is a practical buying guide from budget to premium options and where to look.
Where to Buy Skinny Drawer Organizers: Budget to Premium Options
Below are common purchasing channels and price brackets with what each tier typically delivers.
- Budget ($5–$20) — Expandable plastic trays and basic foam inserts found at big-box stores and online marketplaces. Pros: low cost, immediate availability. Cons: lower-grade plastics scratch and yellow.
- Mid-range ($20–$60) — Bamboo trays, higher-grade polycarbonate, and modular fabric inserts. These offer better fit and finish and often come with non-slip feet.
- Premium ($60–$200+) — Custom-cut wood dividers, integrated cabinetry inserts, or branded stainless-steel systems. Ideal for long-term durability and built-in cabinetry matching.
Where to look:
- General retailers and home improvement stores for inexpensive expandables and liners.
- Specialty home organization brands for mid-range bamboo and modular kits.
- Custom carpenters or cabinet refinishers for premium, built-to-fit dividers.
For a broader set of organizer buying strategies and product categories beyond skinny drawers see best organizers guide for streamlined room storage.
Pricing reference: According to a 2023 consumer report on storage products, well-reviewed mid-range organizers provided the best long-term value in kitchen and bathroom environments, balancing durability and cost.
Transition: Before you implement, review common mistakes that consistently undermine skinny drawer organization — and how to avoid each.
Common Mistakes to Avoid When Using Skinny Drawer Organizers
- Overstuffing drawers — I overloaded a shallow utensil drawer once; it made pulling items out awkward and accelerated wear. Avoid filling past 70% capacity; leave 1/2″ top clearance for lids and motion.
- Incorrect sizing — Buying an organizer without measuring the smallest internal width caused a return trip. Always use inside-to-inside measurements and test with cardboard templates.
- Ignoring material compatibility — I used untreated wood in a damp bathroom once and it swelled. Use moisture-resistant materials near sinks.
- Poor layout choices — Mixing very heavy items with delicate ones in the same narrow compartment leads to damage. Group by weight and frequency.
- Neglecting ergonomics — Positioning frequently used items at the rear forces stretching; place daily items in the front 1/3 and label the rest.
utility closet guide for effective organizer solutions contains related tips to avoid common layout mistakes in tight spaces.
Transition: Below are concise, searchable answers to common questions people ask about skinny drawer organizers.