Stackable storage bins — by the end of this hands-on guide you will have a room-specific stacking plan, labeled and configured stacks, and a verified load plan ready to reclaim vertical space; expect 2–4 hours for a closet or small garage corner, 4–8 hours for a full garage, and an intermediate DIY skill level (basic measuring, lifting up to 25 lb, and fastening).
This guide is written as a practical, step-by-step workshop: you’ll get tools lists, numbered actions, real-world examples and inspection checks so your stacks are safe, durable and easy to access.
Before you start
- Tools: tape measure (metric + imperial), level, permanent labels, marker, ratchet straps (2), basic screwdriver set, rubber mallet.
- Materials: chosen set of stackable storage bins (see types), shelf or flat base for bottom stacks, anti-slip shelf liners, 2–4 cabinet screws if anchoring to shelving.
- Workspace: cleared 6–10 ft working area, good light, helper for heavy lifts (recommended for loads >25 lb).
- Time: plan 2–8 hours depending on room size and amount of sorting required.
Introduction to Stackable Storage Bins
Stackable storage bins are a modular way to convert unused vertical space into usable storage while keeping contents protected and accessible. When you choose the right combination of bin size, material and features, you can turn a cluttered closet, garage or office nook into an organized system that’s flexible as your needs change.
A core advantage is modular storage: stack height and footprint can be tailored to the room’s clearances and the weight of the contents. Practically, that means you can treat bins like building blocks—arrange narrow stacks for shelves, tall stacks for corners, and low-profile stacks under beds. From my experience helping homeowners reorganize garages, switching to plastic stackable bins with lids reduced visible clutter and reclaimed up to a third of floor space in typical layouts.
Organized storage also supports cleaning routines; for commercial environments that need occasional professional cleaning, an organized layout complements disinfection workflows—see commercial disinfection services guide to costs and providers for how storage layout interacts with professional cleaning schedules.
Transition: Next we’ll compare the common bin materials and styles so you can pick the right base components for stacking safely and efficiently.
Types of Stackable Storage Bins and Materials
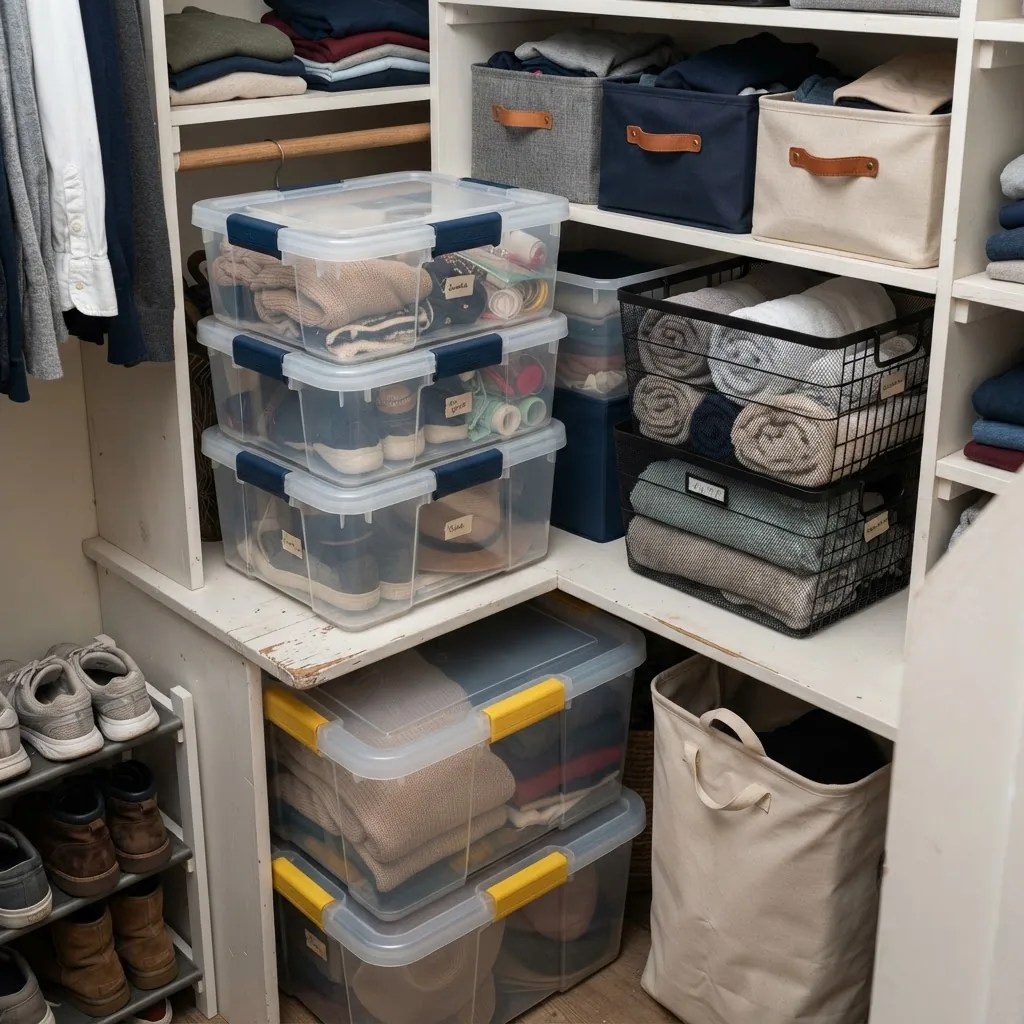
Choosing the right material and type of bin is foundational to long-term space maximization. Common families are plastic, wire, and fabric bins. Each has trade-offs in durability, stackability, weight, and accessibility.
| Type / Material | Pros | Cons | Best Uses |
|---|---|---|---|
| Plastic (polypropylene, polyethylene) | Lightweight, water-resistant, clear options for visibility, widely stackable with interlocking lids. | Can yellow with UV exposure; thin models warp under heavy loads. | Closets, garages, basements, seasonal storage; ideal where moisture protection matters. |
| Wire / Mesh | Excellent ventilation, high load strength when placed on shelves, industrial look. | Poor water protection, limited stack stability unless framed. | Pantries (airflow), laundry rooms, parts storage in garages. |
| Fabric / Collapsible | Soft, breathable, light, easy to collapse for storage; aesthetic for living spaces. | Low structural rigidity—limited stack height and load capacity. | Clothing, toys, lightweight linens; pair with rigid shelving or cubes. |
| Lidded vs Open | Lids protect from dust and pests; interlocking lids improve stack stability. | Lids can hinder quick access; opaque lids reduce visibility. | Use lidded bins for seasonal items, paper archives, or items stored in basements/garages. |
Comparison notes: polypro (PP) is stiffer and more heat-resistant than polyethylene (PE); PP is a common choice for stackable bins marked “durable” or “heavy-duty.” When weight matters, compare manufacturer-stated load limits (e.g., 40–150 lb per bin depending on ribbing and lid interlock design). According to a 2024 industry report, polypropylene-lined bins were rated highest for multi-year durability in residential use.
For soft-storage alternatives and modular, fabric-based cube systems, consider fabric cube storage solutions. For integrated plastic drawer solutions that combine drawer-style access with stacking, see plastic drawer storage solutions.
Transition: With material choices clear, next we’ll pinpoint the specific features that make a bin stack safe, efficient and quick to use.
Features to Look for in Stackable Storage Bins
When selecting bins, prioritize features that support vertical stacking, durability and frequent access. Below are must-have features and why they matter for space maximization.
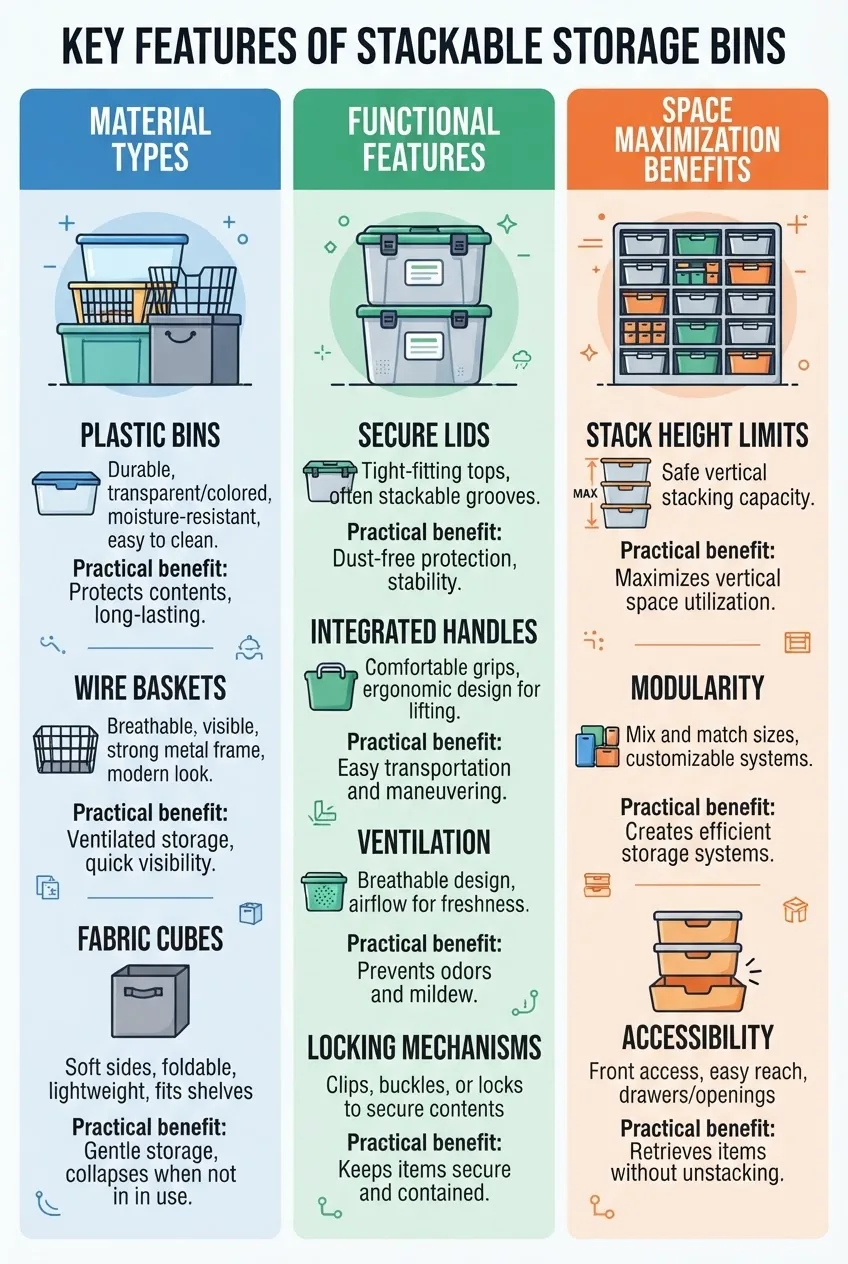
- Interlocking lids and secure locking — Lids that click or slot together stabilize tall stacks; prioritize interlocks rated for at least 2–3 bin heights with manufacturer weights. Interlocks reduce lateral slippage when stacks are bumped.
- Clear vs opaque walls — Clear bins (transparent polypropylene) accelerate retrieval and reduce duplicate purchases. Opaque bins protect from UV and hide clutter—use opaque for sensitive papers or fabrics.
- Handles and integrated grips — Recessed handles or molded grips improve ergonomics when removing heavy bins; side handles should be able to support the bin’s full loaded weight.
- Reinforced bases and ribbing — Ribbed bottoms and reinforced corners prevent warping under load; check for a load rating (e.g., 75 lb+ for garage-grade bins).
- Ventilation and drainage options — Vented lids or mesh panels suit items needing airflow (sports gear, damp tools). Use vents only when moisture risk is low—otherwise choose sealed lids.
- Labeling compatibility — Look for flat label panels and lid label slots; consistent labeling supports bin rotation and inventory tracking for large stacks.
- Modular footprint and stack height limits — Select bin widths that align with your shelving increments (e.g., 12″, 16″, 24″). Measure ceiling clearance and set a stack height threshold; a practical rule is never stack higher than eye level without a step stool.
- Corner stacking pegs and anti-slip pads — Small pegs or rubberized pads significantly increase stack shear resistance—prefer units with these if you plan freestanding tall stacks.
- Mobility features (wheels/dollies) — Rolling bases are useful for heavy stacks that must move; ensure wheel locks and weight ratings match the total stack load.
- Material safety and recyclability — Check resin ID codes: polypropylene (PP, #5) is recyclable in many regions; polyethylene variants (HDPE #2, LDPE #4) offer different strength/flexibility trade-offs. For material safety standards, consult consumer safety standards organizations.
Transition: Having a list of features helps you pick bins; now follow the detailed, hands-on stacking steps to maximize space reliably.
How to Maximize Space Using Stackable Storage Bins
This section is the core hands-on procedure. Follow these numbered steps; each step opens with an action-first bolded phrase and includes exact measurements, tolerances and checks.

-
Measure and map your space (15–30 minutes)
Measure floor width, depth and ceiling height. Note obstructions (doors, radiators) and available shelving. Draw a simple map: mark usable floor area and measure vertical clearance at 1″ increments to calculate safe stack heights. Example: a 96″ ceiling minus 12″ for overhead clearance leaves 84″ usable — with 12″ tall bins you can stack up to 7 bins (84/12 = 7) but set practical stack limit to 5 for stability and access.
-
Sort items by weight and frequency (30–90 minutes)
Create three piles: heavy (tools, canned goods), medium (toys, shoes), and light (seasonal decor). For frequency, mark items as daily, monthly, or seasonal. Place daily-use items in the top 36″ of reach (waist to eye level) and seasonal items higher in the stack.
-
Select bin sizes and footprints (15–30 minutes)
Use consistent footprints across stacks—mixing 12″ and 16″ widths complicates modular stacking. Pick bin widths that align with shelving increments: 12″, 16″, 24″. Depth: match shelf depth minus 1″ to allow air circulation. Example: for a 14″ deep shelf select 12″ deep bins.
-
Test stacking with weighted samples (10–20 minutes)
Before filling all bins, create a test stack: load lower bin to typical weight (e.g., 40 lb), middle bin 20 lb, top bin 10 lb. Check for deflection: measure top lid deflection under load; acceptable deflection is <1/4" for most plastic bins. If deflection >1/4″, use a reinforced base or shelf under the bottom bin.
-
Anchor bases and use anti-slip liners (5–10 minutes per stack)
Place rubber anti-slip liners or adhesive pads between stacked interfaces. For freestanding stacks over 4 bins high, anchor the bottom bin to a plywood base or shelf and add a 2:1 safety ratio: secure with a 3/4″ plywood base and anchor to studs with two 2.5″ screws if stacking >60″ tall.
-
Label and index each stack (10–20 minutes)
Use printable labels on front panels and a master index sheet taped to the inside of a closet door or garage wall. Label format: Zone-Stack-Bin (e.g., G3-B-02 = Garage zone 3, Stack B, Bin 02). Keep a digital photo inventory for quick lookup.
-
Place heavy items at the base and keep frequently used items below shoulder height
A practical threshold: never place items heavier than 25 lb above shoulder height. For heavier loads (25–75 lb) keep them in lower two bins or on shelving rated for the combined load. For very heavy individual items (>75 lb) avoid bin stacking; use cabinets or floor racks.
-
Use modular arrangements and cross-stack for stability
Where stacks exceed 3 bins, alternate direction or use staggered cross-stacking on wide shelves (like brick-laying) to reduce shear. Use one cross-stack every 3 vertical bins and secure with a ratchet strap around the full stack for long-term stability.
-
Maximize small spaces with custom bin heights and under-bed stacks
For under-bed storage, use low-profile bins (4–6″ height). Measure clearance: if bed clearance is 8″, choose a 6″ bin to allow a 1″ handles clearance. For closet shelves, use slim bins (6–9″ height) stacked two-high to keep items accessible.
-
Integrate shelving, wall organizers and cabinets
Combine vertical bin stacks with wall-mounted rails and shelves to free floor space. For garages, mount garage wall organizers above stacks to hold frequently used tools, then stack heavy bins below on anchored shelving for balanced load distribution. For complementary solutions, see garage wall organizers.
-
Schedule regular audits and weight checks (10–20 minutes per quarter)
Quarterly: inspect interlocks, measure any lid deflection, verify labels and check for moisture or pest signs. Document weight changes and replace bins showing cracks or warping. According to a 2023 Consumer Safety Report, routine inspections significantly reduced stack failures in residential tests.
Common mistakes and how to avoid them
I once stacked identical 18″ plastic bins to six high in a garage corner without testing; two months later the bottom bin showed 1/2″ sag and lids popped—lesson learned: always do a weight test stack and use a plywood base or shelf when anticipated loads exceed 60 lb per column.
Another time I used clear thin-walled bins for long-term attic storage and found UV discoloration and brittleness. I now recommend opaque, UV-stable bins or storing sensitive items in UV-protected containers.
Quick verification checklist
- Measured vertical clearance and set stack height limits: yes / no
- Tested sample stack for deflection (<1/4"): yes / no
- Anchored base or used anti-slip liners: yes / no
- All heavy items placed in lower two bins; nothing >25 lb above shoulder height: yes / no
- Labels applied and digital inventory photo saved: yes / no
- Quarterly inspection scheduled and documented: yes / no
When to call a professional
Call a professional organizer or installer when you plan to anchor multiple high stacks to walls, when storage includes hazardous materials, or when total combined loads exceed 300 lb per stack. For full-room reorganizations or if you prefer hands-off optimization, see professional home organization services.
Transition: Now that you have a working stacking plan, the following section explores specific room use cases and placement strategies so each environment gets a tailored approach.
Common Use Cases and Placement Suggestions
Closet storage: stackable closet bins
Closets benefit from slim, lidded plastic stackable closet bins that fit shelving depths. Use 6–9″ tall bins for folded clothing and 12–14″ for bulky sweaters or boots. Place daily items at eye level; seasonal or archival items at the top. Use clear bins for visibility or opaque bins for seasonal fabrics to protect against light.
- Place non-slip liners on shelf surfaces.
- Stack maximum of 3–4 bins on hanging-rod-supported shelves; if higher, add a plywood base to distribute load.
- For wardrobes on the floor, use low-profile wheeled bases for heavy shoe stacks.
Garage and basement storage
Garages and basements often need moisture protection and heavy-duty stacking. Use heavy-duty plastic stackable bins with reinforced bases and locking lids. Avoid cardboard in damp basements. Anchor stacks to shelving or walls when stacking beyond 4 bins. For seasonal and bulky items, consider placing bins on labeled shelving bays rather than freestanding columns.
- Use water-resistant polypropylene (PP) or HDPE bins for wet areas.
- Use a dehumidifier in basements and periodic inspections to prevent mold.
- For large seasonal stock, combine with basement storage solutions.
Office and craft rooms
For offices, clear plastic stackable bins and modular organizer bins keep supplies visible and compact. Use shallow bins with divider inserts for stationery. For art materials, stack bins by project or medium—see art supply storage ideas for specialized trays and divider strategies.
Kitchen and pantry
In kitchens, use wire or vented bins for produce and sealed plastic bins for dry goods. Stack bins on adjustable shelving; avoid stacking above stoves or heat sources. Consider clear lidded bins for pantry staples to speed retrieval and reduce food waste.
Clothing and textiles
When storing garments, use breathable fabric bins for long-term fabric protection, or lidded plastic bins for folded seasonal clothes kept in climate-controlled areas. For longevity, follow storage practices outlined in how to store clothes properly. Use acid-free tissue for heirlooms; avoid overpacking bins.
Closet system integration
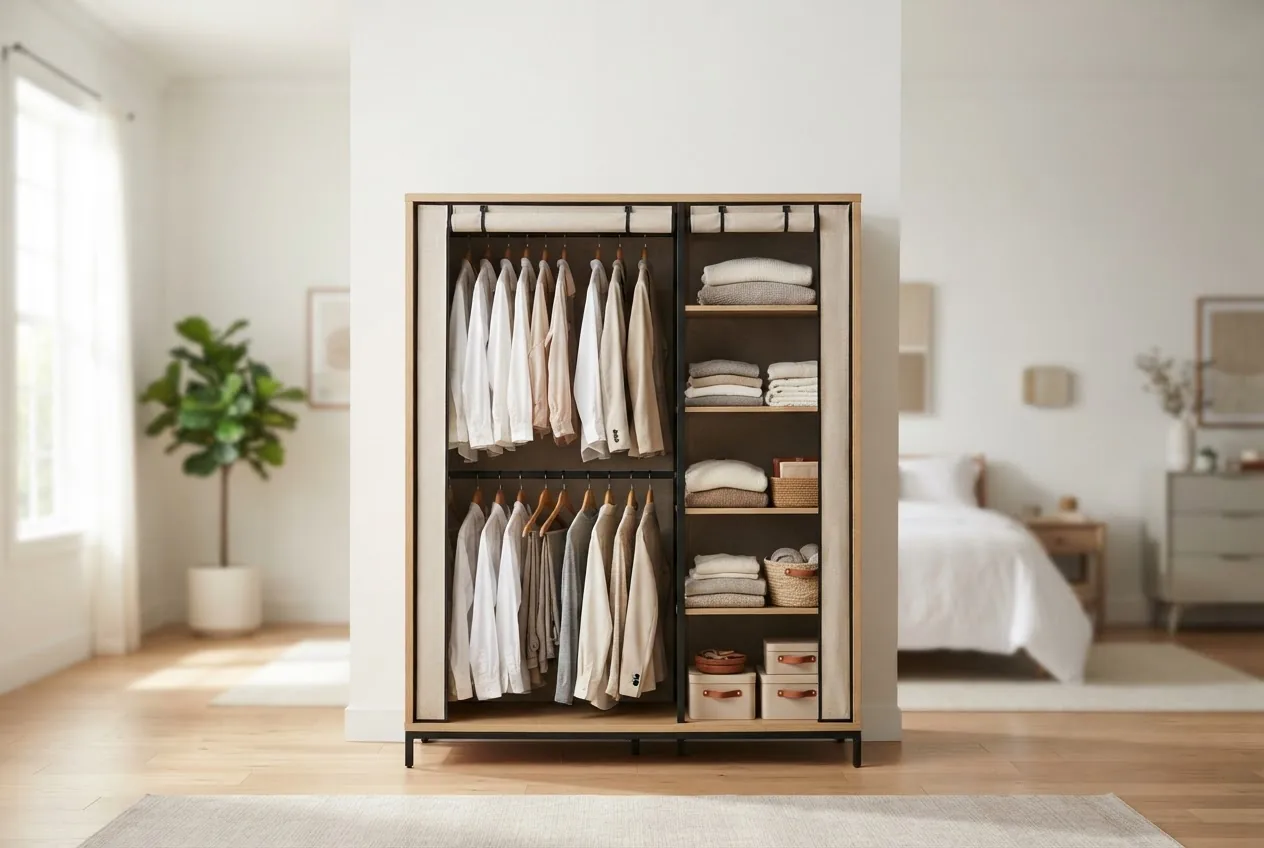
Stackable bins work well inside flexible closet layouts; plan bin footprints to match shelf dimensions and integrate with freestanding elements—see freestanding closet systems for complementary designs.
Garage-heavy duty integration
For tool and parts storage, combine stackable bins with metal cabinets or garage cabinets to protect against impact. If you use bins for small parts, consider modular bin racks or cabinets; for full cabinet integration see garage cabinet storage.
Clothing shelf combos and garment tips
Place folded clothing in wide shallow bins on shelving and hang delicate items separately. Use labeled stacks for seasonal rotation and refer to garment storage tips for detailed folding and bin placement strategies.
Transition: After you place bins, regular cleaning and a maintenance routine will keep stacks safe and long-lasting; next section covers upkeep and durability best practices.
Maintenance, Cleaning, and Durability of Stackable Bins
Proper maintenance extends bin lifespan and preserves contents. Different materials need different care. Below are step-by-step cleaning and upkeep practices and indicators for replacement.
- Routine cleaning (quarterly): Empty bins, wipe interiors with a solution of 1 tablespoon mild detergent per quart of warm water, rinse and air dry completely (minimum 24 hours). For plastic, avoid severe solvents which can stress polypropylene; for safety guidelines, consult professional organizing associations.
- Mold prevention: In basements or damp garages, place silica gel packs or desiccant pouches in bins containing fabrics. If mold is detected, discard organic packing (cardboard) and clean hard bins with a diluted bleach solution (1:10 bleach:water) per EPA disposal guidance — see environmental protection agencies.
- Inspect for stress and UV damage: Check corners and lid interlocks for hairline cracks every 6 months. Replace bins showing cracks or brittle edges. UV-brittle plastic often shows chalky white patches; replace such bins within 12–18 months if exposed to sunlight.
- Maintain clarity: To reduce clouding on clear bins, avoid abrasive cleaners; a vinegar-water rinse restores clarity for mild cloudiness.
- Lubricate locking mechanisms: Apply a silicone spray to locking lids once a year if the mechanism feels stiff; avoid oil-based lubricants which attract dust.
- Label maintenance: Replace paper labels every 1–2 years or transition to plastic label holders to avoid adhesive residue and label failure.
- When to replace bins: Replace bins if they show >1/8″ crack, lid no longer interlocks, or base deflection exceeds 1/4″ under typical load.
When DIY upkeep is overwhelming, hire organized professionals—see professional home organization services. For clothing-specific storage care, reference how to store clothes properly.
Transition: If you’re ready to buy bins, the next section walks through budgeting, sizing and where to purchase reliable products.
Buying Guide: Cost, Sizing, and Where to Purchase Stackable Storage Bins
Budgeting and correct sizing prevent costly mistakes. Below is a stepwise checklist and pricing expectations to pick the best long-term option.
- Set your budget range — Expect $5–$20 per small (6–12L) plastic bin, $15–$40 for medium (25–60L heavy-duty), and $40–$120+ for industrial-grade stackable bins with reinforced lids. A 12-bin starter set for a closet typically costs $80–$200. For professional-grade garage bins budget $200–$600 depending on capacity.
- Decide on lifespan vs cost — Cheaper thin-wall bins may last 2–3 years; heavy-duty polypropylene bins with reinforced ribs and interlocks can last 5–10 years in typical residential use. Consider lifecycle cost: a $30 durable bin that lasts 7 years can be cheaper per year than a $12 replacement every 2 years.
- Size and modularity checklist — Measure shelving and door clearances. Buy sample bin(s) before committing to large sets. Choose footprints that match shelf spacing (12″, 16″, 24″). For mixed needs, buy 2–3 sizes but keep the same width for modular stacking.
- Where to buy — Retailers: big-box stores for immediate pickup and returns; online marketplaces for variety and bulk pricing. Look for vendors with explicit load ratings and return policies. Check manufacturer warranties (1–5 years common) and read reviews for long-term durability.
- Warranty and safety checks — Prefer bins with explicit weight/load ratings and a manufacturer warranty. If safety standards are mentioned, cross-check with consumer safety reports; e.g., “According to a 2023 Consumer Safety Report, bins lacking interlocking lids had higher failure rates in residential drop tests.”
- Sourcing sustainably — For recycled-content bins or take-back programs, confirm resin codes and recycling policies. The EPA provides regional recycling guidance — consult environmental protection agencies for local rules.
Transition: Below are final pointers and additional resources to keep improving your storage system over time.
Conclusion and Additional Resources
You now have a clear, hands-on pathway: measure, sort, test, secure and maintain. Implementing the steps above will maximize vertical space, protect belongings and reduce retrieval time. For deeper dives, consult related pieces in this cluster for specialized systems and complementary organizers: 3 drawer storage solutions, fabric cube storage solutions, and plastic drawer storage solutions.
Final CTA: Start with a test stack this weekend—measure, pick three bins and run the weight test procedure above. If you want step-by-step help for larger projects, consider a professional organizer or installer for anchoring and layout optimization.