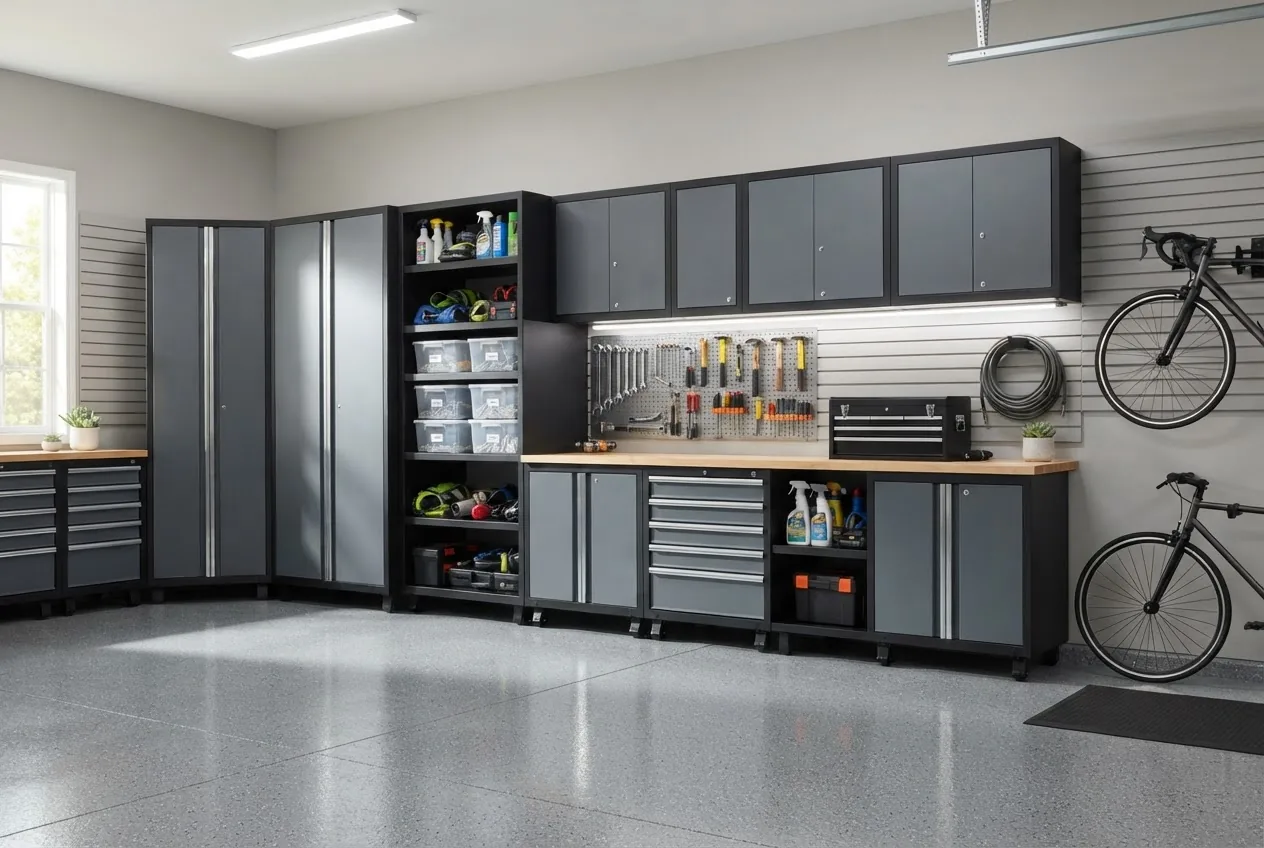
Garage cabinet systems that last will protect tools, tidy hobbies, and maximize floor space for years. By the end of this hands-on guide you will be able to select a durable system, plan your garage layout, install or supervise a professional install, and maintain cabinets for a 10–25+ year lifespan. Expect to spend 1–3 weekends for planning and basic DIY installation (skill level: intermediate DIY—comfortable with power tools and wall anchors); complex custom installs or heavy masonry work will require a professional.
Introduction to Garage Cabinet Systems
Durable garage storage starts with the right cabinet system. Whether you need secure storage for hazardous materials, weather-resistant steel for a damp garage, or modular units that grow with your needs, the goal is the same: protect contents, reduce clutter, and make tools and supplies accessible.
This guide emphasizes long-term durability and practical trade-offs—how material choice affects corrosion resistance, how modular designs influence reconfiguration costs, and how load-bearing ratings determine where heavy tools should live. You’ll get practical examples: a family garage focused on seasonal storage, a hobbyist workspace that prioritizes small-part organization, and a light commercial workshop that needs lockable, secure cabinets.
Garage cabinet systems differ from simple shelving or wall organizers because they enclose contents: dust, moisture, pests and curious children are kept out. Good cabinets extend the life of tools and consumables; they also protect vehicles and the home by preventing spills and improper storage of hazardous materials.
Throughout the guide I’ll reference independent durability testing and safety standards so you can weigh cost versus lifespan. For example, Consumer Reports durability testing (2024 industry report) highlights common failure points in low-cost cabinets: hardware fatigue, hinge corrosion, and laminate delamination under humidity. We’ll use those insights to choose features that truly matter.
Transition: next we’ll compare common cabinet types and when each is appropriate for durable storage needs.
Types of Garage Cabinet Systems and Their Uses
| Type | Best uses | Durability & typical cost | Load capacity (per shelf) |
|---|---|---|---|
| Freestanding cabinets | Tool storage, seasonal bins, flexible layout | Steel or laminated wood, moderate to high durability; $150–$900+ | 100–600 lb |
| Wall-mounted cabinets | Maintain floor space, keep hazardous items out of reach | Steel or wood; depends on mounting; $100–$700 | 50–350 lb (anchored) |
| Modular units | Expandable workshops, mixed materials storage | Plastic, steel, or composites; durable when bolted together; $200–$2,000 | 40–500 lb (varies) |
| Custom built-in cabinets | High-end garages, integrated workbenches, unique spaces | Highest durability if specified properly; $1,500–$10,000+ | Custom-rated (engineer spec) |
| Plastic and resin cabinets | Lightweight storage, moisture-prone garages, quick installs | Resistant to rust but less load capacity; $50–$600 | 20–200 lb |
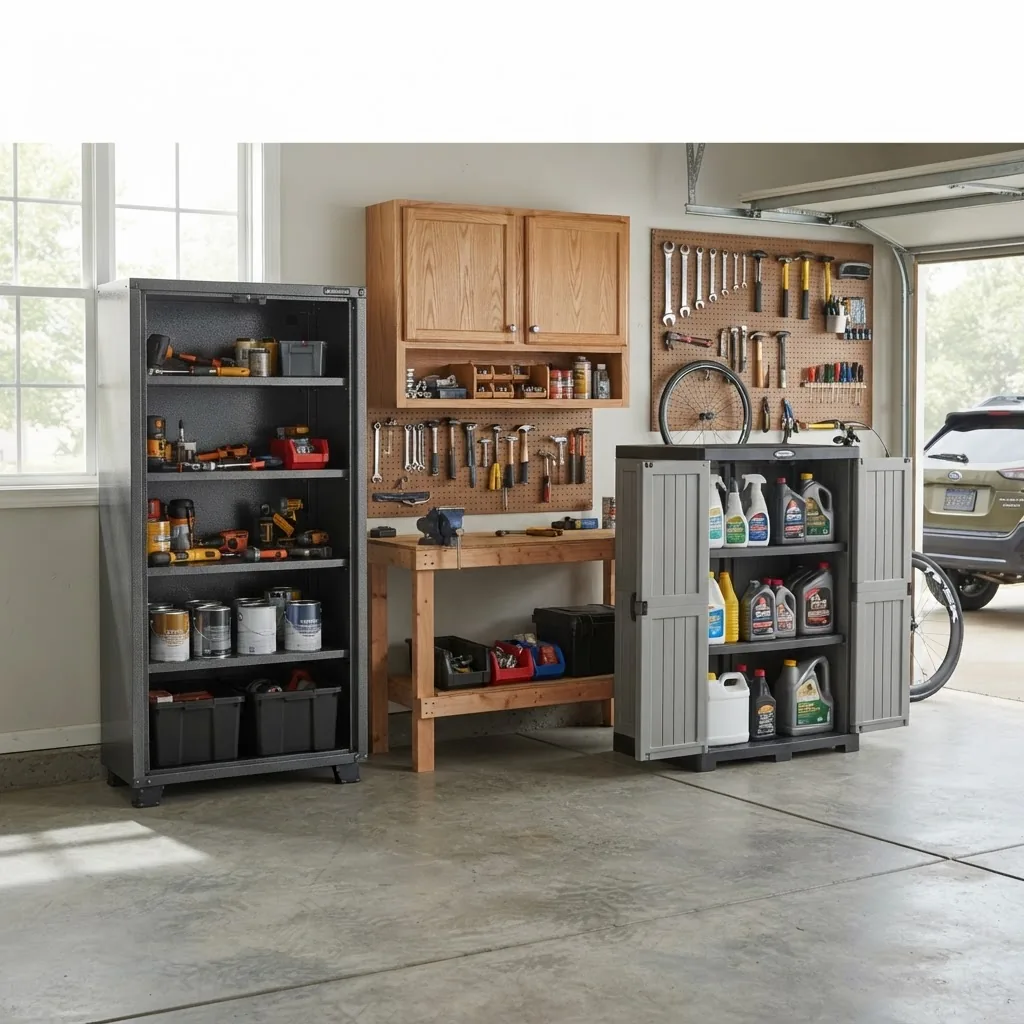
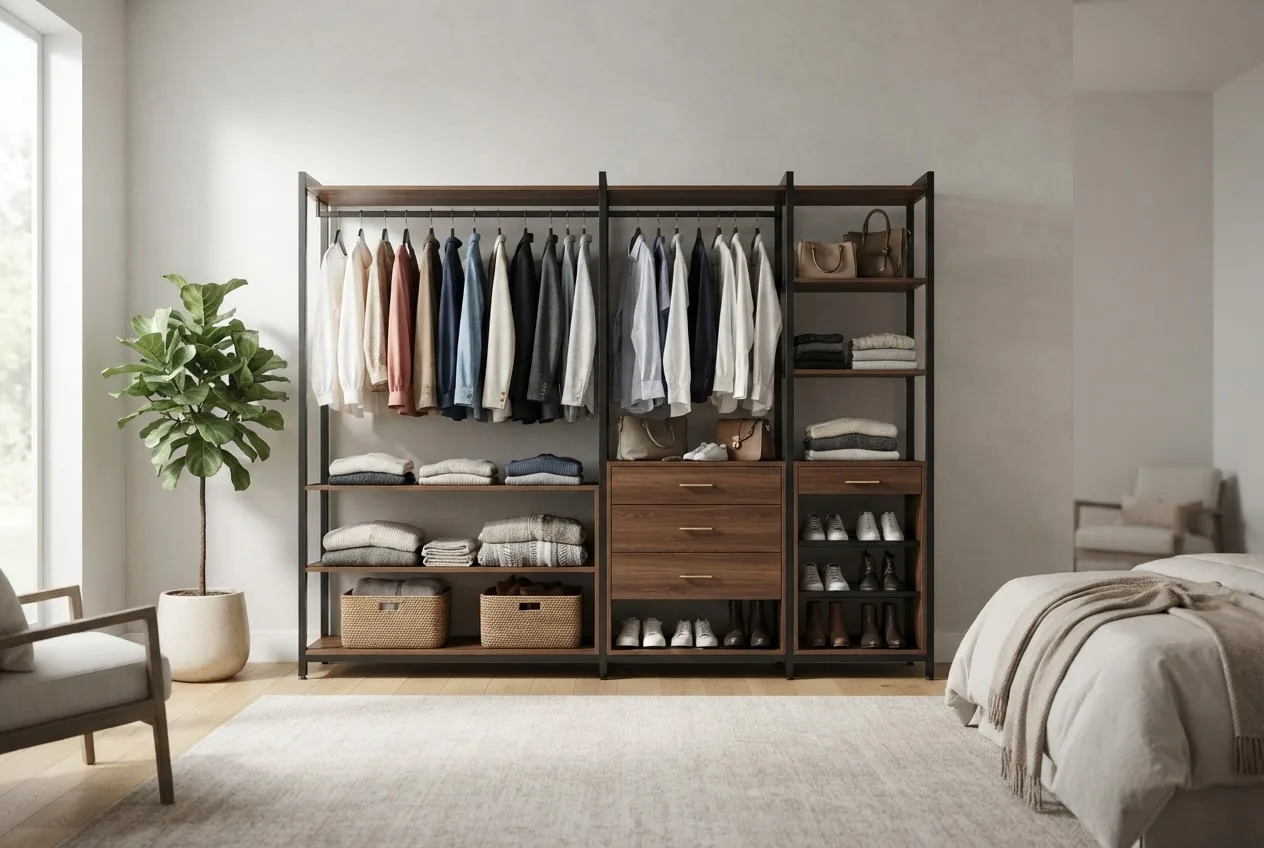
Freestanding cabinets are the go-to when floor layout needs flexibility: move them to make room for a car or a project. Wall-mounted cabinets free floor space but require solid anchoring into studs or masonry. freestanding closet systems often share the same modular hardware as garage freestanding cabinets, making them a sensible crossover option.
Modular units permit staged investment: start with a base set and add tall cabinets, drawer banks, or pegboard inserts. If you’re a hobbyist storing paints and delicate art supplies, modular arrangements can incorporate bespoke drawer banks and trays—see art supply storage ideas for specialized small-part organization and protective storage practices.
Plastic cabinets are lightweight and corrosion-resistant; choose reinforced resin where heavy items are planned. Custom systems offer the greatest durability if built with exterior-grade plywood, powder-coated steel frames, and stainless fasteners; they’re worth the investment when lifespan and appearance matter.
Compare cabinet choices against alternative storage methods: cube storage is flexible but rarely rated for very heavy loads—contrast with cube storage organizers if you need modular, low-cost sorting. Use freestanding cabinets when you need solid doors and secure, lockable storage for chemicals or power tools—see locker storage cabinets for commercial-grade security options.
For garment or seasonal clothing storage in garages (rare but sometimes necessary), compare with indoor solutions to control humidity and pests: garment storage solutions offers interior storage techniques that inform how to protect fabric in garages.
Transition: after you choose a type, material and durability features are the next critical decision.
Materials and Durability Features to Consider
Material choice drives the usable lifetime of your cabinets, their maintenance needs, and what you can safely store inside. Below I summarize trade-offs and offer practical thresholds you can use when purchasing.
- Steel cabinets — Pros: highest structural strength, excellent for heavy tools, often powder-coated for corrosion resistance. Cons: can rust where coating is thin or scratched; hinges and locks are susceptible to corrosion if not stainless. Practical note: choose powder-coated steel with at least 1–2 mm gauge for cabinets expected to hold >300 lb per shelf. According to a 2024 industry report from Consumer Reports, powder-coating and stainless fasteners significantly increase lifespan in humid garages.
- Wood cabinets (plywood, MDF, hardwoods) — Pros: customizability, good aesthetics, behaves well for built-ins. Cons: vulnerable to moisture, swelling, and delamination unless marine-grade or exterior plywood and sealants are used. Practical note: specify exterior-grade plywood (marine-grade or ACX) and use water-resistant finishes when humidity regularly exceeds 50%.
- Plastic and resin cabinets — Pros: immune to rust, lightweight, low maintenance. Cons: lower load-bearing capacity, can warp under heat. Practical note: choose reinforced polypropylene or HDPE with metal bracing for heavier loads; avoid thin injection-molded units for tool storage above 50 lb per shelf.
- Composite and laminate surfaces — Pros: durable finishes resist scuffs and are easier to clean. Cons: edges and joints are failure points under repeated moisture cycles. Practical note: check edge banding quality and specify stainless or zinc-coated hardware for damp environments.
- Corrosion resistance features — Look for powder-coating, galvanization, stainless steel hinges, and zinc or chrome-plated fasteners. If your garage experiences condensation or is partially unheated, insist on stainless or galvanized exposed hardware and sealed door bottoms.
- Weatherproofing and UV resistance — For unconditioned garages with direct sun or wide temperature swings, UV-stable plastics and UV-resistant powder-coating help prevent brittleness and color fade. Expect decreased service life of unprotected wood in direct sunlight.
- Sealing and door types — Metal doors with full-length tubular hinges and magnetic gaskets keep out dust and pests; solid wood doors require threshold seals and proper ventilation when storing chemicals to avoid off-gassing concentration.
- Finish and maintenance trade-offs — Some finishes hide wear (textured powder-coat) while glossy laminates show chips. Factor replacement cost: inexpensive cabinets ($50–$200) may last 3–7 years; mid-tier steel or sealed plywood systems often last 10–20 years with proper maintenance. According to a 2023 industry durability summary, cabinetry with stainless hardware and powder-coated steel lasts up to 2–3× longer in coastal or high-humidity environments (source type: independent product testing report).
Transition: with materials understood, the next section walks you step-by-step through choosing the right cabinet system for your specific garage and needs.
How to Choose the Right Garage Cabinet System for Your Space
Before the step list, you’ll complete a short assessment: measure, inventory what you store, and set a budget. This section is a hands-on checklist and decision tree you can follow in order.
- Measure your usable wall height (from floor to lowest ceiling obstruction): record in inches or mm.
- Inventory items you’ll store: list heavy items (compressors, tool chests), medium (paint cans, power tools), and small parts (nails, screws).
- Set a durability budget range: Low ($100–$400), Mid ($400–$2,000), Premium ($2,000+)
- Measure and map your garage. Measure wall lengths, ceiling height, door swings, window positions, and obstructions (water heater, fuse box). Use a tape measure and paper or a smartphone app to draw a to-scale sketch. Mark electrical outlets and stud spacing (studs typically 16″ on-center in modern US homes). Note: if studs are not accessible where you want wall-mounts, plan for a 3/4″ plywood backer secured to studs to spread load.
- Calculate storage volume needs. Add up the approximate cubic feet of what you’ll store. Example: a set of four 5-gallon paint cans is ~6.7 gallons each ≈ 0.9 cu ft per can; multiply and round up by 20–30% for future needs. For workshop tools, allocate 2–4 cu ft per power tool. This helps decide tall cabinets vs. shallow wall cabinets.
- Match cabinet type to use case. For heavy, infrequently moved items (compressors, sawhorses), choose freestanding steel cabinets with 300+ lb shelf capacity. For seasonal and hazardous storage, prioritize lockable wall-mounted or tall cabinets. If you need reconfigurability, start with modular units rated for 200+ lb per shelf and ensure bolt-through connections.
- Decide material based on environment. If humidity >50% or your garage is near the coast, prioritize powder-coated steel or marine-grade plywood with sealed finishes. If the garage is unheated and temperatures swing −10°F to 110°F, avoid MDF laminates and thin plastic. Use a moisture meter (target <60% relative humidity for standard cabinets).
- Check load-bearing capacity requirements. For each planned shelf, set a minimum acceptable rating. Example thresholds: light (≤50 lb), medium (50–200 lb), heavy (200–600+ lb). Verify manufacturer load specs and ask for test reports when planning to store items >350 lb. Include weight distribution: heavy items should live low and near vertical supports.
- Assess modularity vs. custom. Modular prefab systems reduce upfront cost and allow DIY installation; custom built-ins cost more but integrate worktops, electrical outlets and ventilation. If you plan to keep the garage 10+ years or want a home-value upgrade, invest toward premium materials or a custom spec that includes stainless fasteners and sealed joints.
- Plan for locking and security. Decide on locking needs: basic keyed cam-locks, three-point locking rods, or keyed-alike systems for multiple cabinets. For high-value tools or hazardous materials, prefer three-point locking or cabinet systems that accept padlocks. If you need certified security, consult locker storage cabinets options.
- Factor in ventilation and hazardous storage. If storing solvents or fuels, include ventilation or sealed cabinets with spill containment trays. Keep flammables in approved metal cabinets and follow local code; reference manufacturer MSDS for storage limits and separation from ignition sources.
- Incorporate drawer systems for small parts. For small tools, nuts, and bolts, include dedicated drawer banks and dividers. For compact drawer options see 3 drawer storage solutions. Drawers rated 75–150 lb with full-extension ball-bearing slides provide reliable access to heavy hand tools.
- Use accessory planning to support workflows. Plan pegboards, worktops, power strips, and lighting. If you need open, visible storage for frequently used items, combine an open shelving run above a closed lower cabinet run. For hobbyists, review art supply storage ideas for compartmentalized trays and ventilation when storing solvents.
- Balance cost vs. longevity. Align your budget with expected lifespan: low-cost plastic cabinetry ($50–$300) lasts ~3–7 years; mid-range powder-coated steel or sealed plywood ($500–$2,000) often lasts 10–20 years; high-end custom builds (>$2,000) can exceed 20–30 years with proper maintenance. I recommend prioritizing hardware quality (stainless hinges and drawer slides) over decorative finishes—hardware failure is a common early failure point.
- Visualize and prototype layout. Use painter’s tape on the floor and walls to mark cabinet footprints and door swing radii; simulate movement patterns (car entry/exit, opening refrigerator, workshop workflows). This low-cost test prevents costly misplacements. Adjust layout until door clearances are a minimum of 30″ for work areas and 36″ aisle for drive-through paths.
- Document orders and installation plan. Create a checklist of cabinet model numbers, mounting hardware, and fastener types. If the cabinet requires a plywood backer, include 3/4″ exterior plywood cut list and fastener spacing (screws every 16″ into studs, 1-1/4″ #12 screws for timber to cabinet interface). Save manufacturer installation manuals and warranty details in a labeled binder or digital folder.
- Cross-link organizational principles. Apply room-storage practices to your garage layout; see best organizers for room storage for principles like access frequency zones (daily, weekly, occasional) that apply equally to garage cabinets.
Transition: after selecting a system and creating an installation plan, the next section gives a step-by-step installation walkthrough you can follow for a typical wall-mounted and freestanding combination.
Installation Guide for Garage Cabinet Systems
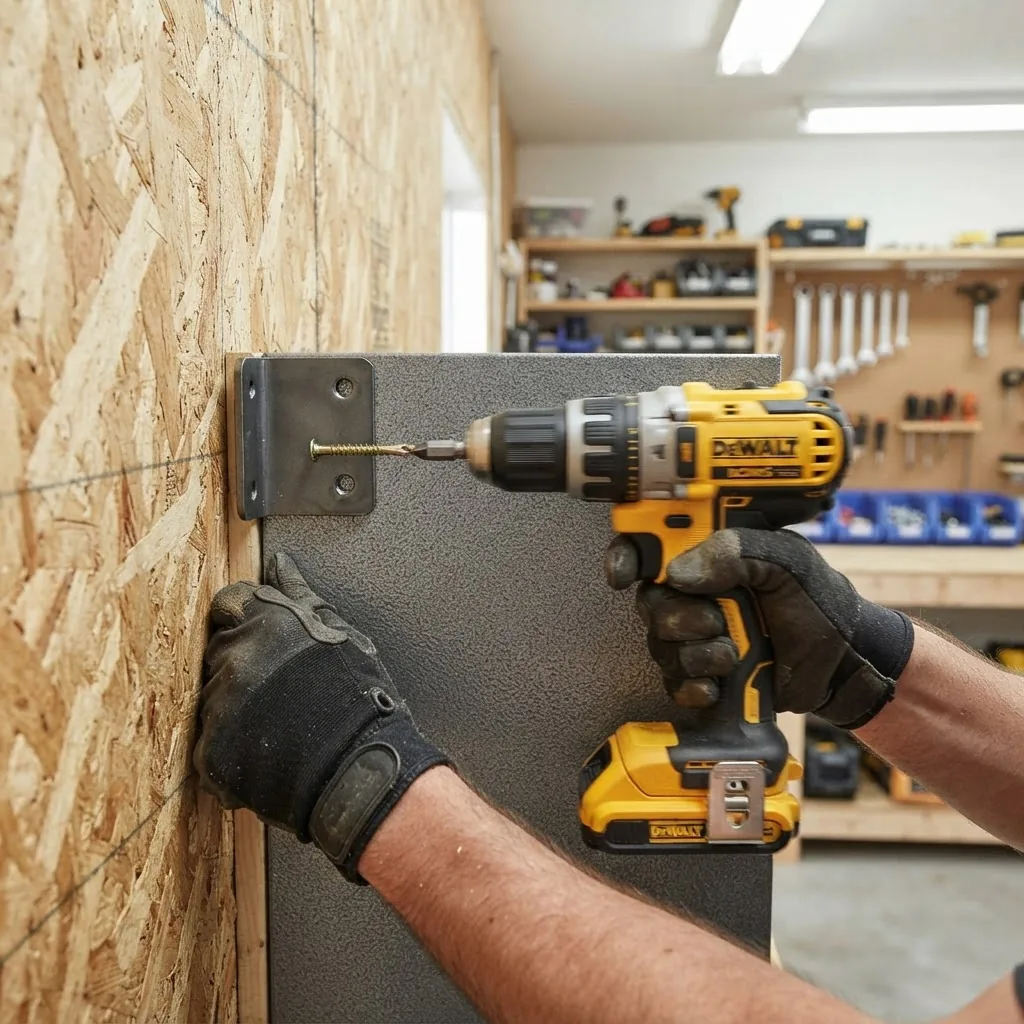
This installation guide covers common prefabricated cabinet systems (wall-mounted upper cabinets, freestanding bases, and tall cabinets) and includes professional safety references. Follow OSHA guidelines for safe ladder and tool use; see OSHA for ladder and electrical safety standards (source type: federal workplace safety guidance).
- Prepare the site and verify structure. Clear the installation area and sweep the floor. Use a stud finder and verify stud locations; measure and mark studs at 16″ on-center where possible. For masonry or concrete walls, plan for sleeve anchors (minimum 1/4″ diameter, embed 1.5″ in concrete). If studs are spaced irregularly, install a 3/4″ exterior plywood backer (anchored into studs at 16″ spacing with 2½” structural screws) to distribute cabinet loads.
- Unpack and inventory components. Open boxes and lay out drawers, hinges, mounting rails, fasteners, and hardware. Confirm you have the manufacturer-provided mounting bracket kit and instructions. Typical hardware not supplied: 3/8″ or 1/4″ lag screws (for wood studs), sleeve anchors (for concrete), #12 x 2½” structural screws for plywood to stud, and 3/8″ washers for heavy units. If screws are missing, DO NOT proceed—order exact replacements.
- Assemble cabinets flat on the floor. Assemble per manufacturer instructions on a soft, level surface to avoid scratching finishes. Tighten cam locks and confirm cabinet face frames are square—diagonal measurements should be within 1/8″ of each other for units wider than 36″. Pre-install shelves and test drawer slides before mounting.
- Mark and install mounting rails or cleats. For wall-mounted cabinets, install a continuous mounting rail into studs at the recommended height (typically 68″–72″ from the floor for upper cabinets, measured to the bottom of the cabinet). Use a level; secure with lag screws into studs every 16″ and additional screws at the ends. For masonry walls use 1/4″ sleeve anchors spaced per weight specs (consult the manufacturer). Always fasten into structural members—anchoring into drywall only is unsafe.
- Lift and secure cabinets to the rail. With two people for cabinets >60 lb, hang the cabinet on the rail. Adjust for level and shim as needed (use plastic shims, not wood). Once level, secure cabinet to studs with provided bracket screws; use pan-head or hex screws into the cabinet backers. Tighten until snug—do not over-torque and deform the back panel. For freestanding tall cabinets, bolt cabinets to the wall with a top rear bracket to prevent tipping (ANSI recommends anti-tip anchoring when top-heavy).
- Fasten adjacent cabinets together. Align adjacent faces and clamp. Fasten through predrilled holes with 1″ cabinet screws, countersink slightly and use matching caps. This distributes load and keeps gaps minimal. For modular systems, lock dowels and cam locks require exact engagement—verify alignment before final tightening.
- Install hardware and test operation. Fit doors, adjust hinges for 1/16″ to 1/8″ reveals, install magnetic catches or gaskets if supplied, and check drawer travel. For full-extension slides, test at least 10 cycles with loaded drawers (add mass equal to anticipated load) to verify smooth operation.
- Secure freestanding units to the floor or wall. For tall freestanding cabinets, bolt to the wall with anti-tip brackets at top rear secured into studs. For floor-mounted bases, use 3/8″ anchor bolts in concrete slabs (drill-to-depth: 1.5″ embedment recommended). When anchoring to wood floors, use 3″ structural screws into engineered floor joists where accessible.
- Install countertops and integrated work surfaces. If adding a worktop, use 3/4″ plywood or butcher block secured with 1¼” screws spaced 8–10″ along the back and at cabinet joints. Apply silicone bead at the back edge to prevent liquids from seeping into cabinet tops. For heavy machinery mounted to the top, verify vibration isolation and anchoring per machine manual.
- Set up electrical and lighting (if required). If adding under-cabinet lighting or outlets, consult a licensed electrician for permanent wiring. For plug-in solutions, mount power strips with protected outlets above the countertop; run cords through cord management channels to avoid pinch points. Follow local code and consult OSHA references for safe wiring practices.
- Seal and protect seams. Apply silicone sealant between cabinet backs and concrete walls where moisture intrusion is possible. Use gaskets on door perimeters to keep dust out. Where finishes were scratched during install, touch up with manufacturer-specified paint or coating to maintain corrosion resistance.
- Load and organize with weight distribution in mind. Place heaviest items on lower shelves (bottom 12–18″ of cabinet), medium items at waist height, and lightweight or infrequently used items on top. Use adjustable shelving to create tiers—set shelf increments in 2″ or 3″ increments for flexibility. Where stored items exceed 200 lb per shelf, place a plywood shelf supported on L-brackets secured to studs.
- Final inspection and safety check. Verify all fasteners are torqued to manufacturer specs, doors align within 1/8″, and anti-tip brackets are engaged. Test all locks and ensure hazardous materials are stored in labeled, sealed containers with secondary containment where spills are possible.
- Document installation for warranty and future maintenance. Photograph the installed cabinets, backer locations, and anchoring details. File receipts, serial numbers and install photos in a digital folder. This supports warranty claims if corrosion or hardware failure appears within the warranty period.
- When to hire professionals. For masonry embeds, electrical work, or custom carpentry involving load-bearing changes, hire licensed professionals. See professional home organization services for vetted installers and project management.
Transition: once installed, a maintenance regimen preserves durability and warranty coverage; the next section outlines a practical upkeep plan.
Maintenance and Upkeep for Long-Lasting Garage Cabinets
Routine maintenance prevents early failure. Below are concise, repeatable tasks with suggested frequencies and materials. Mentioned is the need to occasionally disinfect enclosed storage areas when storing consumables or after pest exposure—linking to professional cleaning guidance.
- Monthly: visual inspection — Check for loose fasteners, hinge wear, and any rust spots. Tighten screws to manufacturer torque values (usually hand-tight plus 1/8 turn). Replace missing or corroded screws with stainless equivalents.
- Quarterly: clean and lubricate — Wipe interior and exterior with a mild detergent solution (pH-neutral) and dry thoroughly. Lubricate metal drawer slides and hinges with a silicone spray or light machine oil. For powder-coated steel, use a soft cloth and avoid abrasive cleaners.
- Annually: corrosion treatment and seal reapplication — For metal cabinets in humid environments, check for surface corrosion. Sand lightly, apply corrosion inhibitor, and touch up with matching powder-coat touch-up paint. Reapply sealants on wood cabinet edges and door thresholds as needed.
- Spill response — For chemical or oil spills, remove contents, ventilate area, and clean with absorbent pads and appropriate neutralizer per MSDS instructions. Store used absorbents in sealed disposal containers as hazardous waste per local regulations.
- Pest control — Inspect for signs of pests; use sealed bins for grain-based items and desiccant packets to control moisture. For commercial settings or significant infestations consult professional services; see the commercial disinfection services guide for professional cleaning and disinfection options that can include pest-proofing and deep cleaning protocols.
- Humidity control — Maintain garage relative humidity under 50% where possible. Use dehumidifiers sized for your garage volume (a 50–70 pint unit for 400–600 sq ft unconditioned garages is common) and empty or direct condensate to a drain.
- Hardware replacement — Replace drawer slides or hinges that show excessive play (>1/8″ lateral movement) or binding. Keep spare fasteners and a small parts kit (assorted screws, washers, shims) on hand.
- Warranty and documentation — Keep manufacturer warranty details and proof of maintenance; many warranties require periodic maintenance to remain valid. For long-term upkeep and sanitization of storage that houses consumables or medical supplies, consult professional cleaning references such as commercial disinfection services guide.
- Cloth storage guidance — When storing textiles, use breathable garment bags and humidity controls; follow clothing storage and care tips to prevent mildew and fabric degradation.
- Periodic safety audit — Check locks, anti-tip anchors, and secure mounts every year. Test keyed locks and combination systems for reliable operation; replace batteries in electronic locks annually.
Transition: maintaining cabinets ties directly to budget planning; the next section breaks down costs and budgeting strategies including lifespan expectations.
Cost Breakdown and Budgeting for Garage Cabinet Systems
Budgeting should account for purchase price, installation, anchoring/backers, and long-term maintenance. Below is a practical cost breakdown and example scenarios to help set realistic expectations.
| Tier | Typical materials | Price range (USD) | Average lifespan |
|---|---|---|---|
| Low | Thin plastic or low-grade particleboard | $50–$400 | 3–7 years |
| Mid | Powder-coated steel, sealed plywood | $400–$2,000 | 10–20 years |
| Premium | Custom cabinetry, stainless hardware | $2,000–$10,000+ | 20–30+ years |
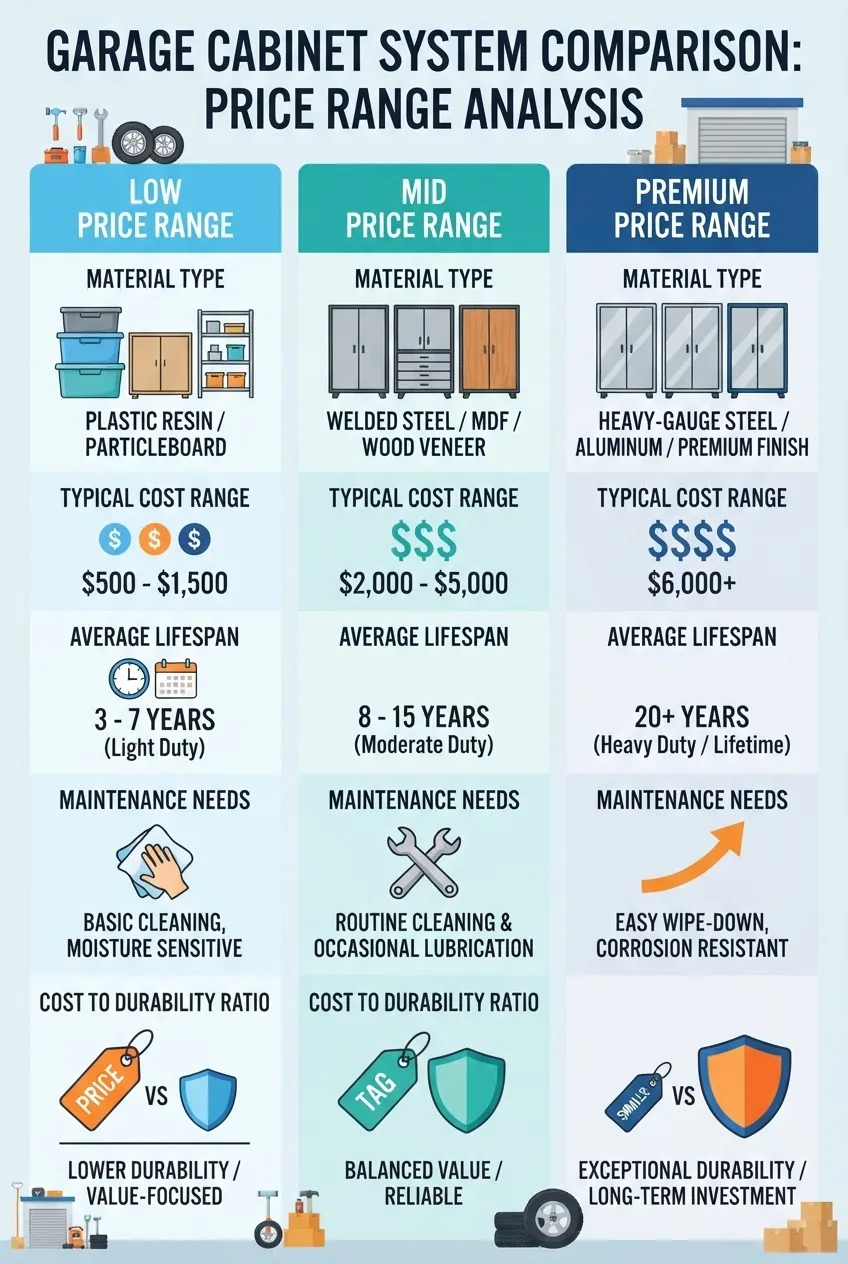
Example budgets
- Starter hobbyist (Mid-tier): $900–$1,500 — includes a modular 6-cabinet set: 2 wall cabinets ($200 each), 1 tall cabinet ($350), 1 base cabinet with drawer bank ($300), installation hardware, and plywood backer ($100). Expect 10–15 year service life with annual maintenance.
- Family garage upgrade (Premium): $2,500–$6,000 — full wall run with custom top cabinets, sealed plywood doors, and powder-coated steel drawer banks. Includes professional installation (20–30% of material cost). Expected 20+ year lifespan when maintained.
- Light commercial workshop: $4,000–$12,000+ — heavy-gauge steel cabinets, three-point locking, ventilation, and dedicated worktop with machine mounts. Budget extra for certified anchoring and fire-rated storage for hazardous materials.
Cost-to-durability rule of thumb: spend 25–40% more on higher-quality hardware and materials to double expected life. According to a 2024 independent product durability summary, investing in stainless fasteners and powder coat increased median cabinet life by roughly 2× in humid environments (source type: independent product testing report).
Transition: when you compare cabinets to other storage options, weigh trade-offs in security, dust protection, and load capacity.
Comparing Garage Cabinet Systems to Other Garage Storage Solutions
- Shelves vs cabinets — Shelves are cheaper and easier to install but offer no enclosed protection. Cabinets protect from dust, moisture, and children; they also usually provide better locking options and spill containment.
- Wall organizers (pegboard, slatwall) — Provide excellent tool visibility and quick access. For small tools, combine with drawer systems. See garage wall organizers for optimized layouts.
- Racks and overhead storage — Overhead racks maximize ceiling space for seasonal bins but are poor for frequently used items and add hanging load to ceiling joists—verify joist ratings before loading.
- Cube and fabric storage — Flexible and inexpensive for light items; not recommended for heavy or hazardous storage. Contrast with cube storage organizers for flexible compartmentalization but limited load capacity.
- Basement vs garage comparison — Basements typically offer more stable temperature and humidity, making them preferable for long-term fabric or delicate storage; review basement storage solutions for cross-home strategies.
Transition: secure storage is often a deciding factor—next we cover locking, certifications and safety considerations.
Security and Safety Features of Garage Cabinet Systems
Secure storage preserves the value of tools and keeps hazardous materials out of reach. Basic locks provide deterrence; upgraded systems provide measurable security. When in doubt, choose hardware with documented ratings.
Locking mechanisms
- Cam locks — Common on consumer cabinets; inexpensive but easy to bypass. Suitable for deterrence rather than high security.
- Three-point locking rods — Offer better door engagement across the cabinet height; recommended for taller cabinets storing valuable tools.
- Electronic keypads and RFID locks — Offer audit trails and keyless access; require battery maintenance and are vulnerable to electronic interference if not specified properly.
- Padlock-ready designs — Allow heavy-duty padlocks; use Grade 2 or higher padlocks for real security against tampering.
Safety certifications and features
- Fire resistance — Some metal cabinets have fire-retardant properties; for flammables, use UL-rated flammable storage cabinets per local code.
- Child safety — Magnetic or hidden-release latches reduce accidental opening by children. Keep hazardous materials in locked, labeled cabinets out of reach.
- Spill containment — Cabinets storing liquids should have integrated drip trays or secondary containment rated for the volume stored (e.g., 110% of largest container).
- Secure storage comparison — For high-security needs, consult locker storage cabinets which outline industrial-grade locking and certification options.
Transition: final section wraps up recommendations, a concise checklist and guidance on when to call a pro.
Conclusion and Recommendations
Choosing durable garage cabinet systems hinges on matching material, mounting and hardware to your environment and intended loads. For humid or coastal areas prioritize powder-coated steel or stainless hardware; for aesthetic built-ins choose sealed exterior plywood. Invest in good hardware—drawer slides and hinges are the most failure-prone parts.
Recommendations summary:
- Prioritize load capacity and anchoring over cosmetic finishes.
- Use modular solutions for staged investment; choose custom for long-term integrated spaces.
- Follow installation anchors into studs or masonry; use plywood backers when necessary.
- Maintain humidity control and perform scheduled maintenance to extend life 2–3× compared to neglect.
Common mistakes and how to avoid them
I once installed wall cabinets on drywall alone to save time—within a year a heavily loaded cabinet tore the drywall anchors out and splintered the cabinet back. Lesson: always anchor to studs or use a plywood backer. I also accepted the cheapest plastic drawer slides and replaced them after they sagged under 80 lb; upgrade slides from the start.
Final checklist
- Measured studs and wall space, created to-scale layout.
- Selected material appropriate for humidity and temperature.
- Verified shelf load ratings and distributed heavy items low.
- Pinned installation plan: plywood backer or masonry anchors as needed.
- Installed anti-tip hardware and tested locks.
- Documented warranty, photos and maintenance schedule.
When to call a professional
Hire licensed professionals for masonry anchoring, electrical integrations, and complex custom cabinetry (especially when load-bearing alterations or permits are required). For professional project management and complex organizational planning, see professional home organization services.