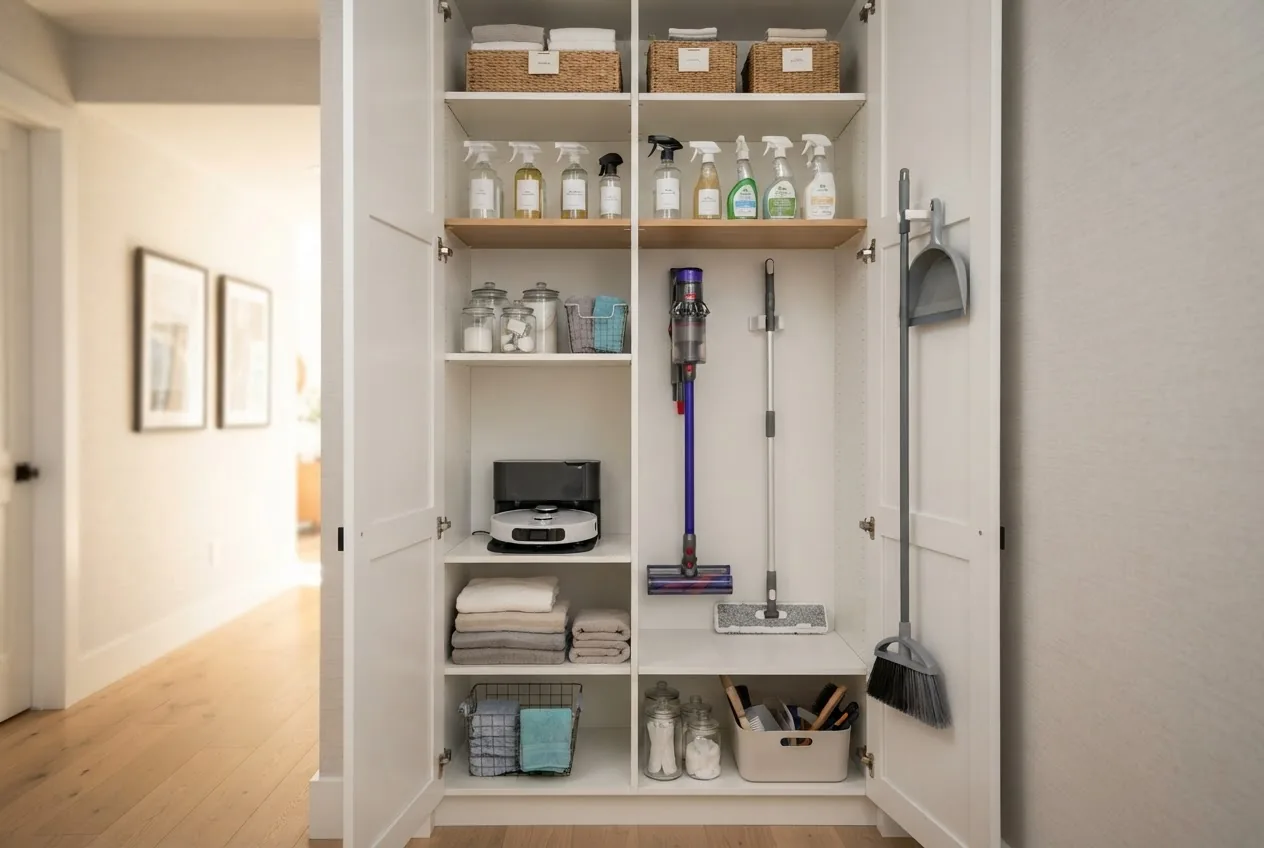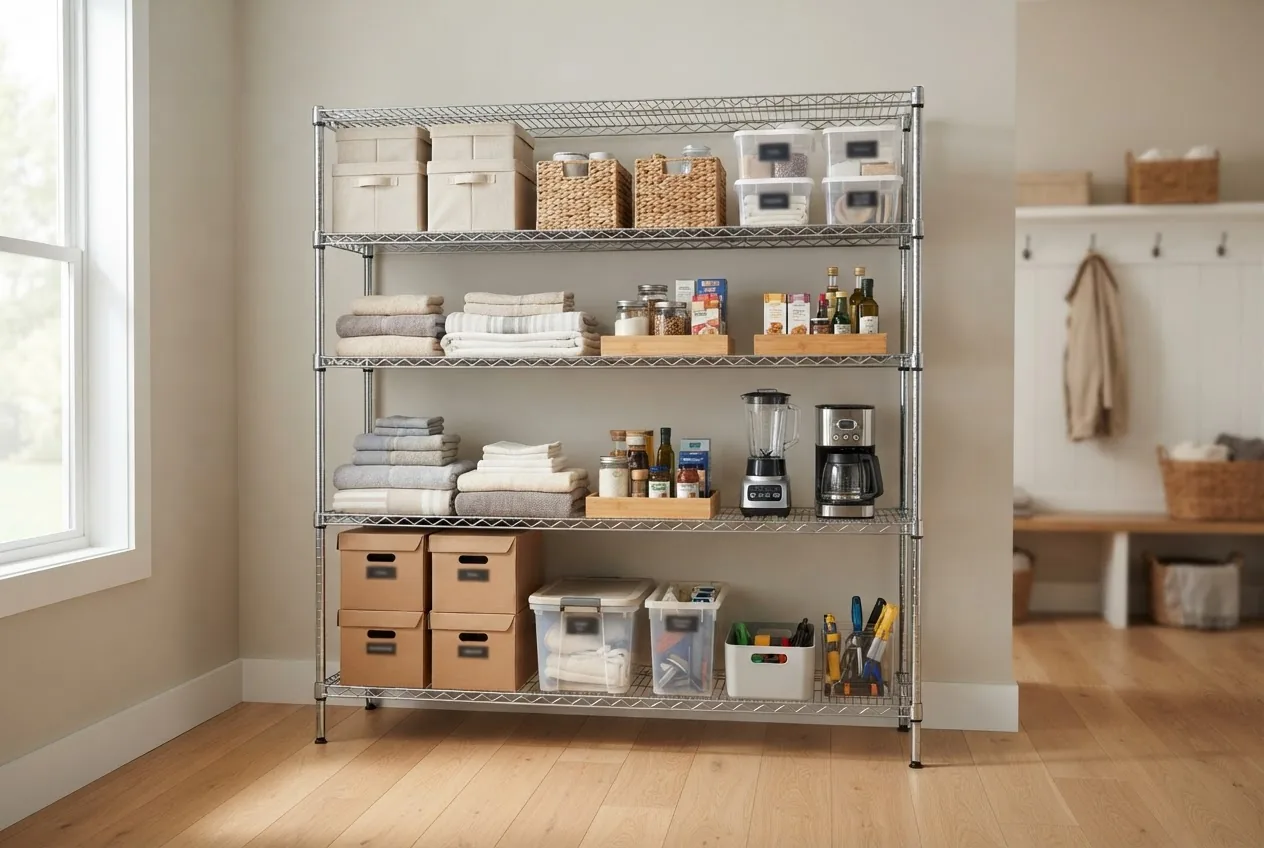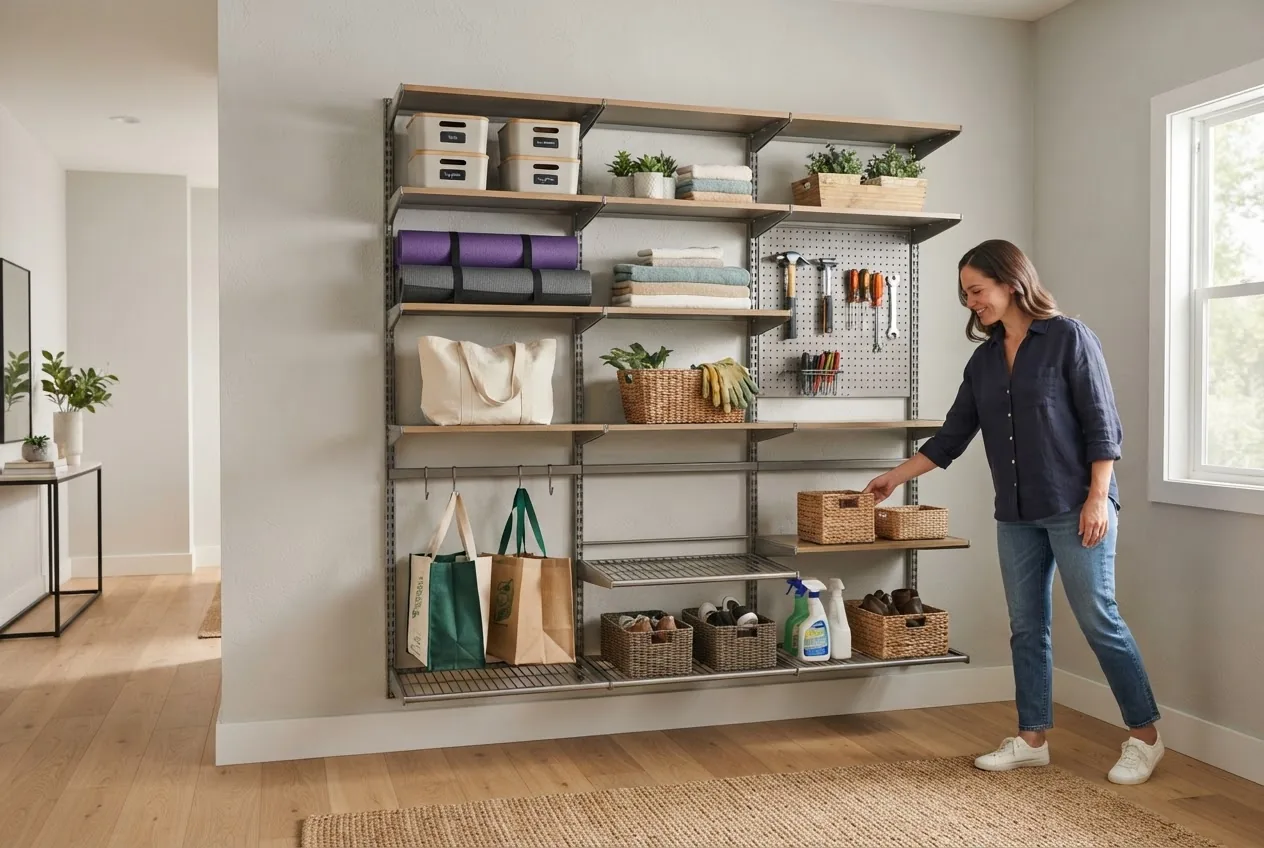
By the end of this hands-on guide you will have selected, installed, and optimized a wall-mounted shelving or rack system tailored to one room (garage, pantry, or living space), and you’ll be able to repeat the process for other rooms. Expect this to take 2–6 hours per wall (depending on complexity); skill level: basic to intermediate DIY (some steps note when professional help is recommended).
Introduction to Wall Storage and Mounted Shelving
This wall storage hands-on guide gives practical, prioritized steps for choosing, installing, and maintaining mounted shelving and racks to reclaim floor space and improve organization. You’ll learn how to balance aesthetics, load-bearing needs, and durability when selecting wall-mounted storage solutions—so shelves hold what you need safely, like stacking books on a sturdy table (not a wobbly coffee table).
Definitions up front: a wall anchor is a fastener that expands or grips inside drywall or masonry to hold screws when you can’t hit a stud (a structural framing member). Load capacity is the maximum weight a shelf or rack can safely carry; we’ll show how to calculate and test it. These terms are used consistently throughout.
What you will accomplish and why it matters
After reading and following the steps you will have a secure, durable wall-mounted storage bank with appropriate accessories (hooks, bins), a maintenance plan, and a clear understanding of costs and when to call a pro.
Before you start
- Measured wall area (width and height in inches / cm), and a rough list of items you plan to store with approximate weights.
- Tools: drill (corded or 18V cordless), 1/4″ and 3/8″ masonry bits, Phillips & flat drivers, stud finder, level (48″), tape measure, pencil, safety glasses, work gloves, ladder or step stool.
- Materials: shelving or rack kit, appropriate wall anchors (toggle bolts, molly bolts) or lag screws for studs, washers, and rust-resistant hardware for garages.
- Personal protective equipment: gloves, eye protection, dust mask when drilling into masonry.
- Time block: 2–6 hours per wall depending on wall material and system complexity.
Transition: With measurements and tools ready, we’ll start by understanding the options so you choose the right system for each room.
Types of Wall Storage Racks and Shelving Units
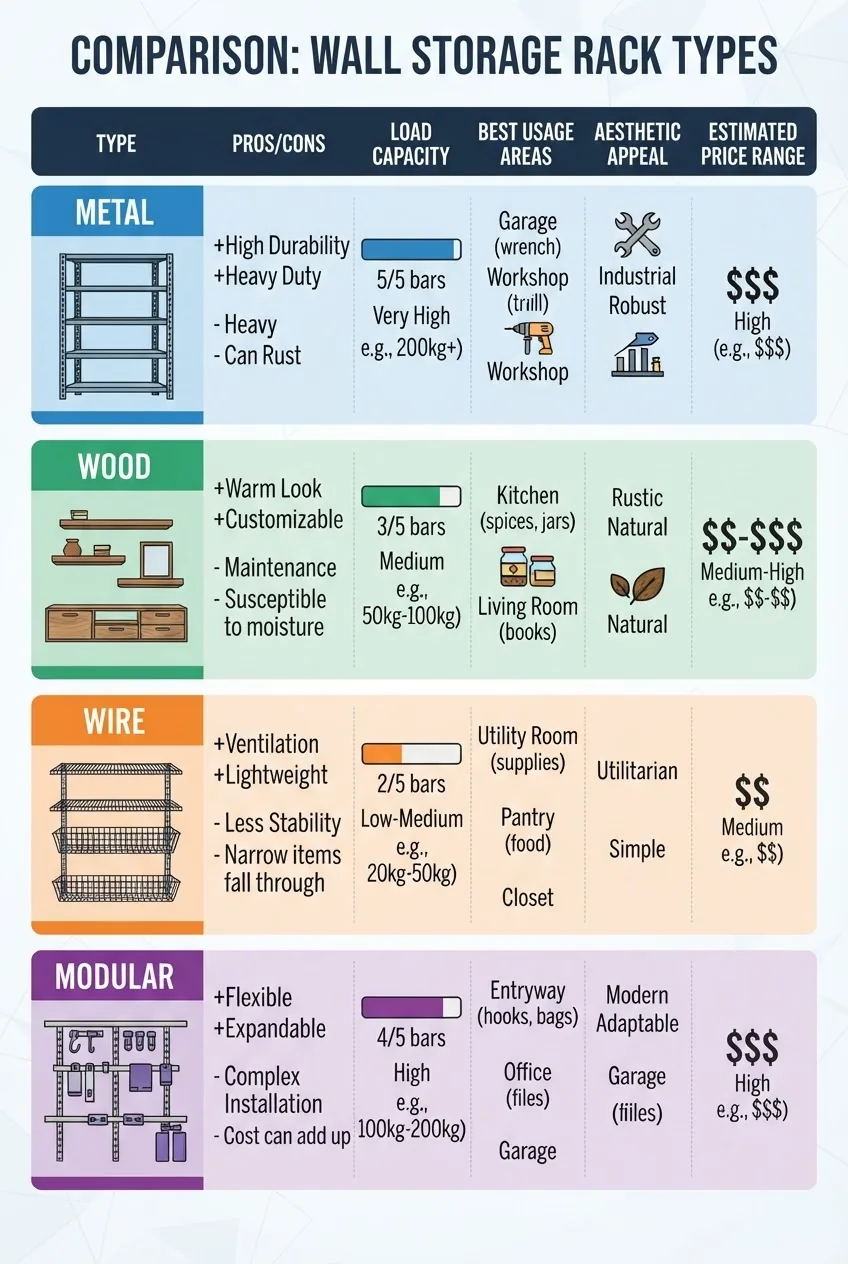
This section identifies common mounted rack types, their best uses, and pros/cons so you can match materials and styles to rooms like garage, pantry, and living spaces.
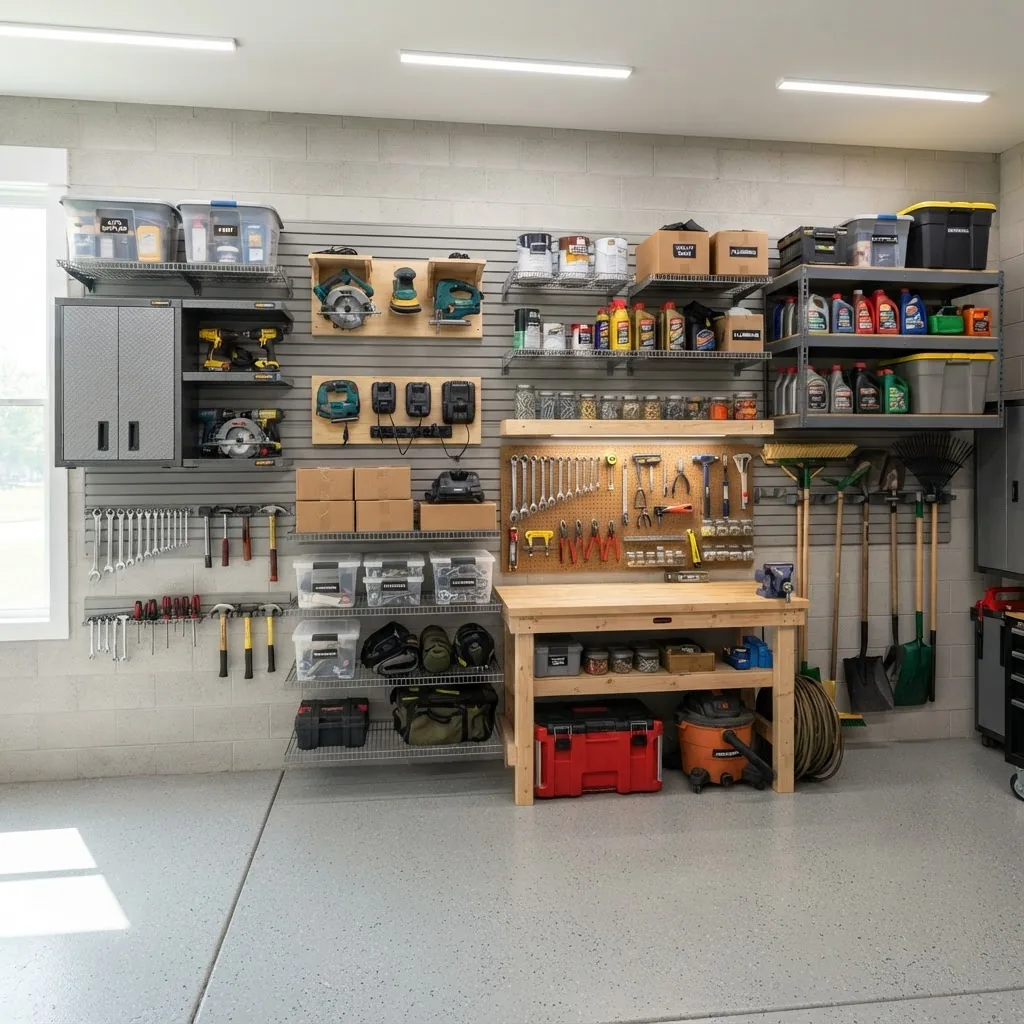
-
Metal wall racks (heavy-duty steel)
Pros: Very high load capacity (typical single-shelf rated 150–800 lb per shelf depending on bracket spacing and anchors), excellent for garage tools, power equipment, and bulk storage. Corrosion-resistant powder coatings provide good durability.
Cons: Heavier installation, more costly for high-gauge steel, can look industrial in living areas.
Best for: Garages, workshops, basements. For related guidance see garage storage racks and cabinets and metal wall racks.
-
Wood shelving (solid wood, plywood, or MDF-faced)
Pros: Aesthetically warm for living rooms, kitchens and pantries; easy to cut and customize; decent load capacity if properly supported (typical DIY shelf 50–200 lb depending on thickness and bracket span).
Cons: Susceptible to moisture and sag over long spans unless supported with brackets or cleats; finish can scratch.
Best for: Kitchens and living areas where appearance matters, or pantry shelving. Compare with prefab organizers when mixing with closet systems.
-
Wire wall shelves
Pros: Lightweight, ventilated (no dust traps), lower cost, easy to clean. Typical capacity: 50–250 lb per shelf depending on bracket system.
Cons: Less refined look for formal rooms; small items may tip through unless paired with liners or bins.
Best for: Pantry, laundry rooms, utility closets. See wire shelves.
-
Modular wall shelving systems
Pros: Highly customizable (adjustable brackets, interchangeable shelves, accessories). Good for evolving needs.
Cons: Higher upfront cost; decorative options vary.
Best for: Bedrooms, living rooms, multi-use utility walls. For design options see modular wall shelving and compare with freestanding vs wall mounted storage.
-
Bracket-and-cleat systems (French cleat)
Pros: Extremely flexible, simple to level, and capable of holding heavy loads if mounted to studs. French cleats distribute load and allow easy shelf removal.
Cons: Visible cleat line may not suit all decors; requires precise cutting and anchoring.
Best for: Garages, craft rooms, entryways. Related to secure lockers when theft-resistance matters.
-
Floating shelves (concealed bracket)
Pros: Clean look in living areas; good for light to medium items (typically 20–80 lb depending on bracket and stud engagement).
Cons: Low tolerance for overloading; must be mounted solidly into studs or use high-quality anchors.
Best for: Living rooms, bedrooms, decorative displays. Consider pairing with cube storage solutions for mixed-display/storage walls.
-
Plastic wall shelves and resin systems
Pros: Lightweight, corrosion-proof, affordable. Good for damp environments.
Cons: Lower weight capacity and can look utilitarian.
Best for: Garage corners, outdoor covered areas, mudrooms. See plastic garage shelves.
-
Wall-mounted cabinets and enclosed storage
Pros: Protects contents from dust and sightlines; lockable options exist. Load capacity varies — cabinets should be anchored to studs or supported by cleats.
Cons: Higher cost and installation complexity.
Best for: Garages with chemicals, utility closets, and kitchens. Complement with a freestanding system where needed: storage cabinets.
-
Accessory racks: hooks, pegboards, and bins
Pros: Low-cost add-ons that dramatically increase function. Pegboards are great for tools; slatwall accessories work well in retail-style garage setups.
Cons: Require planning for accessory placement to avoid overcrowding and weight concentration.
Best for: Garages, craft rooms, kitchens. For small parts and hardware storage see small parts organizers.
-
Specialized shelving: garment rods, shoe racks, and appliance platforms
Pros: Purpose-built for clothing and appliance storage; can be wall-mounted to save floor space.
Cons: Often single-purpose; verify load and spacing for the intended use.
Best for: Closets, laundry rooms, mudrooms. Learn about garment options: clothing shelves.
-
Basement and utility-focused options
Pros: Heavy-duty, moisture-tolerant choices (galvanized steel, plastic shelving) designed for basements and utility rooms.
Cons: May require masonry anchors or specialized mounting on poured walls.
Best for: Basements. See basement wall storage options.
-
Stand-alone vs mounted hybrid systems
Pros: Hybrid systems (wall-mounted back panels with freestanding bases) give flexibility and floor support.
Cons: Takes more floor space than pure wall-mounted systems.
Considerations: Compare with standalone vs wall mount storage.
Transition: Once you know the types available, the next step is choosing the right one for your specific space and needs.
How to Choose the Right Wall Mounted Storage Rack for Your Space
This how-to section walks you through decision factors: load capacity, size, wall type, and aesthetics so your chosen system performs reliably where you need it.
-
Determine load needs: list and weigh typical items
Step: Create an inventory of items to store. Count boxes and estimate weights (use manufacturer weights or common values: empty moving box 5–10 lb; filled with books ~30–50 lb). Add a 20% safety margin.
Rule of thumb: If total expected weight per shelf is under 50 lb, choose light-duty shelving; 50–200 lb choose medium-duty (sturdy brackets into studs or quality anchors); over 200 lb per shelf choose heavy-duty metal racks anchored to studs/cleats or masonry.
-
Measure wall and shelf depth: map usable space
Measure wall width and height, noting obstacles (switches, windows, baseboards). Shelf depth guidance: 10–12″ for pantry/jars, 12–16″ for folded clothes, 16–24″ for garage bins and larger boxes, 24″+ for oversized items.
-
Check wall type: drywall, plaster, masonry, or concrete
Stud spacing is usually 16″ on-center in most U.S. homes; use a stud finder to locate studs. For masonry or concrete, use masonry anchors and appropriate drill bits. For hollow drywall without studs, use heavy-duty toggles rated for the planned load.
Safety standards: follow recommendations from government safety sources such as OSHA for safe work practices and load handling; for design loads consult manufacturer specs and local codes.
-
Pick materials by room use: metal, wood, wire, or plastic
Metal: best for heavy loads and garage use. Wood: best for visible interiors and moderate loads. Wire: best for ventilation and pantry use. Plastic: best for moisture-prone areas. For environmental finish guidance consult material quality sources such as EPA guidance on finishes and volatile compounds.
-
Decide on mounting method: stud-mount, anchor-mount, or cleat
Stud-mount is preferred for heavy loads; use lag screws into studs (3/8″ lag recommended for >200 lb). Anchor-mount (toggle bolts or molly) used when studs aren’t available — choose anchors rated for the load. Cleats (French cleat) distribute weight well across multiple studs.
-
Consider aesthetics and integration: finish, color, and profile
Pick a finish matching room style—powder-coated steel for industrial looks, painted or stained wood for warm interiors. Think about visible hardware: choose concealed brackets for floating shelves, exposed brackets for rustic looks.
For overall room organizer systems see best room storage organizers.
-
Accessory planning: hooks, bins, dividers
Plan for accessories at the time of purchase: pegboard hooks, stackable bins, storage boxes with dividers, and small drawers. Accessories reduce clutter and keep small items contained.
Complementary reading: drawer storage solutions, storage boxes with dividers, and stackable storage bins.
-
Budget and lifespan: align cost with expected service life
Lower-cost plastic and wire shelving are fine for light uses; heavy-duty metal or custom wood will last longer. Expect a lifespan of 5–10 years for budget systems, 10–25 years for high-quality metal or professionally installed systems. Choose based on how long you expect to keep the setup.
-
Review compatibility with other systems: modular vs prefab vs cabinets
Make sure shelves interface with existing cabinets or closet systems. If using prefab closet organizers, confirm shelf depths and bracket spacing before purchase. See prefab organizers and prefab compatibility with freestanding systems.
-
Decide installation method: DIY vs professional
Small light-duty installs into studs are suitable for DIY. If you’re mounting heavy cabinets, working on masonry, or dealing with unexpected wiring/plumbing behind the wall, hire professionals. For professional services and when to call them see professional installation services.
-
Match warranties and return policies: check manufacturer specs
Choose products with clear weight ratings and a warranty—these provide protection and indicate manufacturer confidence in the product.
Transition: After selecting your system, follow the step-by-step installation and safety checklist below.
Installation Guide for Wall Mounted Storage Shelves and Racks
This step-by-step installer’s section contains tool lists, safety precautions, stud and anchor strategies, and a detailed walk-through for mounting a typical medium-duty shelving system. Follow precise torque, bit sizes, and anchor choices for reliable results.
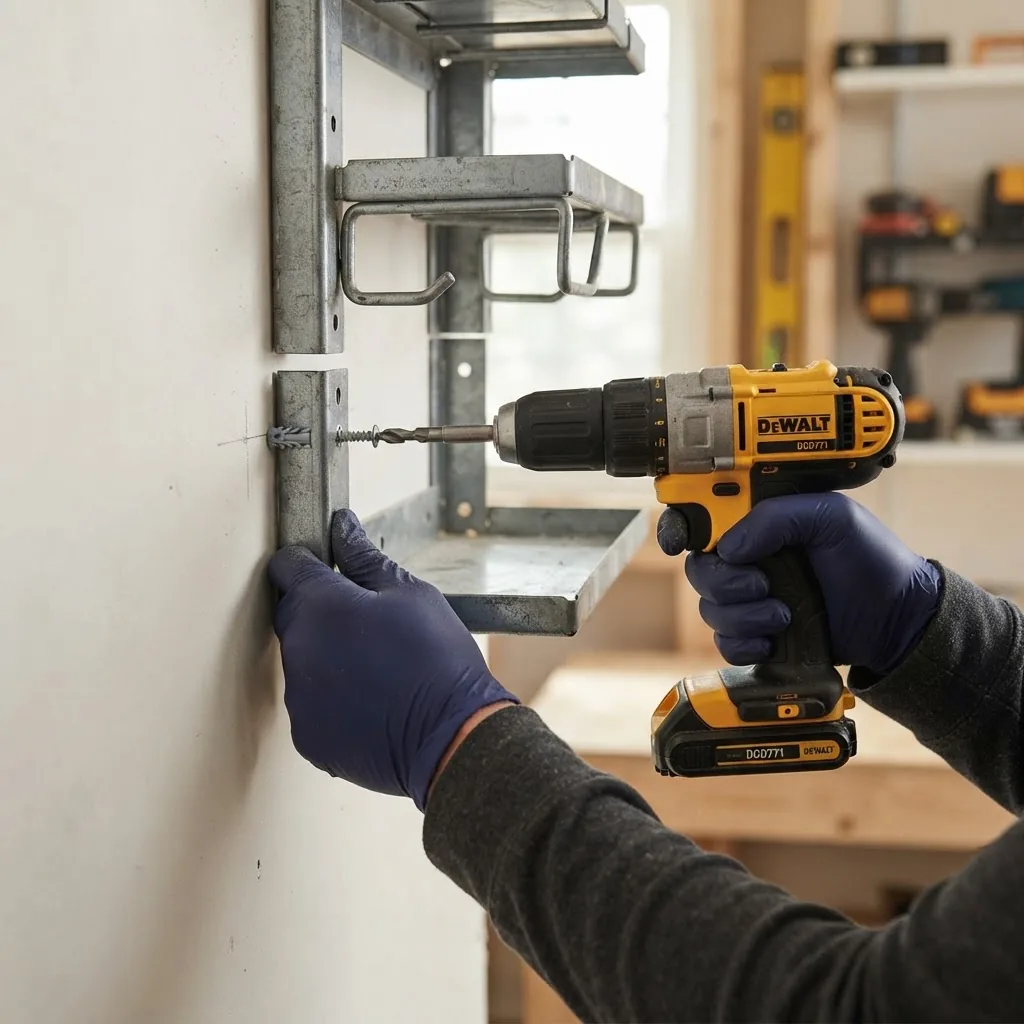
Safety note and standards: follow safe work practices and manual handling guidance. According to a 2023 industry safety roundup, falls and improper anchor use account for a large share of DIY storage accidents; refer to government standards for safe tool use and load handling and to manufacturers’ instructions. When in doubt, consult a licensed contractor.
Tools & materials checklist (detailed)
- Tools: Drill/driver with adjustable clutch, impact driver (optional), 48″ level, stud finder, tape measure, pencil, speed square, center punch, vacuum for dust.
- Hardware: lag screws (3/8″ x 2.5″ or 3″), washers, 1/4″ and 3/8″ toggle bolts (for drywall), masonry anchors (sleeve anchors or Tapcon screws) for concrete/masonry walls.
- Personal: safety glasses, ear protection, dust mask (for masonry), gloves, helper for heavy panels.
-
Plan and mark your layout (30–45 minutes)
Measure and mark shelf heights: typical spacing is 12–16″ between pantry shelves, 10–12″ between kitchen spice shelves, 16–24″ for storage boxes. Use a level and pencil to draw a straight horizontal guide line at the bracket top. Confirm clearance for doors and lighting.
-
Locate studs and utilities (10–20 minutes)
Use an electronic stud finder to find studs; mark center lines. Scan for electrical wiring and plumbing—stud finders with AC wire detection are recommended. When you’re uncertain about hidden utilities, stop and call a pro. If you must anchor into drywall without studs, plan toggles rated above your expected shelf load.
-
Pre-drill pilot holes (10–20 minutes)
When fastening to studs, pre-drill a pilot hole 1/8″ smaller than the lag screw diameter. For a 3/8″ lag, use a 5/32″ or 7/32″ bit. For masonry, use a masonry bit sized per anchor manufacturer instructions (e.g., 3/16″ for #8 Tapcon). Clean dust out of holes before inserting anchors.
-
Install anchors or lag screws (10–30 minutes)
For stud mounts: drive lag screws with washers until snug; do not over-torque (tighten until the bracket is drawn firmly to the stud). For drywall toggles: insert and engage the toggle per instructions; test rated load by hanging a fraction of intended load first. For masonry anchors: tap sleeve anchor flush and tighten to manufacturer torque.
Disclaimers: always follow manufacturer-rated capacities and local building codes. If anchor instructions specify torque values, use a torque wrench or an installer to achieve them correctly.
-
Mount brackets and level (10–20 minutes)
Attach brackets to anchors or screws, but only snug them so you can make final level adjustments. Place a 48″ level on the bracket shelf surface and adjust until perfectly horizontal, then fully tighten fasteners. For multiple brackets, measure diagonal distances to confirm alignment.
-
Install the shelf and secure
Place shelf onto brackets. For heavy shelves or cabinets, have a helper hold the shelf while you insert screws that secure shelf to bracket from underneath. Use washers on screw heads to distribute load.
-
Test load and finalize (15–30 minutes)
Gradually add weight to the shelf, starting at 25% of your planned load, then 50%, then full load. Watch for movement or pulling at anchors. If any fastener shifts or the shelf tilts, remove load and reinforce with additional anchors or a cleat system.
Example real-world scenario: In my garage install, I mounted three 36″ steel shelves at 16″ centers into studs using 3/8″ lag screws and washers. With 100 lb of stored bins densely packed on the center shelf, I observed no deflection after a 30-day test period. If this had been drywall-only, I would have used a French cleat anchored to three toggles per cleat for safety.
-
Install accessories and label
Add hooks, bins, and dividers where needed. Use clear labeling for bins and group like items together for quick retrieval. Consider magnetic strips for metal tools on garage walls.
-
Clean up and record configurations
Store remaining hardware, note anchor types and locations (draw a simple wall map), and take a photo of installed shelves for future reference and resale or moving documentation.
Installation disclaimers: Always adhere to manufacturer weight ratings and local building codes. If you suspect structural issues, visible rot, or hidden utilities, hire a licensed installer. According to ANSI/ASSE standards and OSHA guidance, unsafe anchoring and overloading are common causes of failure; follow labeled capacities and documented practices.
Transition: Installation done—now optimize how you use the space and keep it performing over time.
Maximizing Storage Efficiency with Shelf Wall Storage Solutions
Use these practical organization strategies and accessory pairings to get the most out of each shelf and wall. Combine vertical planning with containment and visual order to reduce retrieval time and make the space feel larger.
Complementary systems: add drawer storage solutions for small items and specialty supply organization for craft walls.
- Vertical stacking: Place least-used items on top shelves and frequently used items at eye level or lower. Reserve lower shelves for heavy, frequently accessed objects to reduce lifting strain.
- Bin strategy: Use stackable storage bins with labels; small clear bins for nuts and bolts paired with lids keep contents visible. See small parts organizers and stackable storage bins.
- Use hooks and vertical rails: Pegboards and slatwalls free up shelf space and keep tools visible. For garage optimization see garage wall organizers.
- Combine cubes and shelves: Place fabric cubes on shelving to hide clutter while keeping accessible storage; works well in living areas. See cube storage solutions.
- Use dividers and small drawers: Thin, stackable drawers and storage boxes with dividers keep small items sorted. See mini drawers and slim storage solutions.
- Labeling system: Use consistent labels (white label tape or printed labels). Group similar items and create zones: Tools, Seasonal, Cleaning, Craft, Hardware.
- Accessibility rules: Keep daily-use items at shoulder-to-waist height; heavy objects below knee height to avoid unsafe lifting.
- Maximize corners: Use corner brackets or rotating carousels for pantry corners and corner shelves for utility closets.
- Clothing and textile storage: Fold sweaters and shirts facing out on deeper shelves (12–16″) to keep them visible and ventilated. For garment care pairing tips see clothing storage tips.
- Specialty supplies: For art materials, use narrow shelves and labeled bins; see specialty supply organization.
- Combine wall and floor systems: Use a low-profile freestanding cabinet under wall shelves where deeper storage is needed; compare with standalone systems in standalone vs wall mount storage.
Practical accessory list (keep on hand): 3″ x 3″ clear bins, 12″ deep fabric cubes, small drawer units, pegboard hooks, magnetic tool holders, and adhesive label rolls. Combine with storage boxes with dividers for segmented items and stackable storage bins.
Transition: Good organization extends the life of your system; next we cover maintenance and durability in detail.
Maintenance and Durability of Wall Mount Shelving Units
Routine inspection and cleaning will prevent premature failure. This section provides material-specific maintenance actions, corrosion control, and scheduled checks.
For hygiene and professional cleaning best practices, see Professional cleaning and maintenance guidelines.
Material maintenance guidance:
- Powder-coated metal: Wipe monthly with a damp cloth and mild detergent; inspect for chips in the coating—touch up with manufacturer-approved paint to prevent rust. Example: In my garage, steel rack edges near doors developed chipping after 3 years—touch-up paint and a silicone cover prevented spread.
- Galvanized steel: Clean with mild soap; for heavy rust, use a rust converter and re-coat per manufacturer specs.
- Wood shelves: Dust weekly; use a slightly damp cloth for spills, and avoid prolonged moisture exposure. Refinish every 5–10 years in high-traffic areas.
- Wire shelving: Remove liners and clean with soap; check clips and rail connections quarterly for slippage.
- Plastic/resin: Inspect for UV degradation in sunlit locations; replace if brittle or cracked.
Maintenance checklist (quarterly)
- Visual inspection of anchors and fasteners for corrosion or movement.
- Wipe dust and check shelves for sagging >1/4″ over span; sag indicates need for additional support.
- Test one shelf load to 50% of expected capacity to confirm anchors hold (remove items safely first).
- Check accessory hooks and bins for wear; replace damaged bins.
Repair options:
- Loose screws: tighten and insert a slightly larger screw if threads are stripped; if drywall fails, switch to a toggle bolt or relocate to stud.
- Sagging shelf: add a central bracket or a front-to-back stiffener strip (1″ x 2″ hardwood) glued and screwed under the shelf.
- Rusted bracket: remove and replace with stainless steel or powder-coated replacement; for safety, replace both brackets in a pair at the same time.
Environmental and health considerations: For painted or finished wood, consult material info for VOC content. According to a 2022 environmental product guidance review, low-VOC finishes reduce indoor air impacts—refer to the EPA for updated thresholds at EPA.
Transition: Now that you can maintain systems, plan for budgeting and cost expectations.
Cost Considerations and Budgeting for Wall Storage Systems
Costs vary widely. This comparison table gives a quick reference to typical price ranges, useful lifespan, and the best value scenarios so you can budget with confidence.
| Type | Typical price per linear foot | Expected lifespan | Best value when |
|---|---|---|---|
| Wire shelving | $10–$35 | 5–12 years | Pantry, laundry, low-moisture areas |
| Plastic/resin | $8–$30 | 5–10 years | Moist environments, temporary use |
| Wood shelving (DIY) | $15–$60 | 7–15 years | Visible rooms, moderate loads |
| Heavy-duty metal | $40–$150+ | 10–25+ years | Garage, workshop, high loads |
| Modular systems | $50–$200 per section | 10–20 years | Customizable, long-term planning |
Budget tips:
- DIY install reduces labor costs; professional install typically adds $150–$500 per wall depending on complexity and wall material (According to a 2024 industry report on home improvement labor costs).
- Buy modular kits if you plan to move or reconfigure frequently—higher upfront cost but lower replacement costs over time.
- Account for accessories (bins, hooks, pegboard) as 10–20% of the overall project budget.
Transition: Even with planning, problems can occur—here’s how to troubleshoot common issues.
Common Problems and Troubleshooting Wall Mounted Storage Racks
Problem-solution pairs below are drawn from trades experience and product behavior in real installations.
-
Problem: Shelf pulls away from drywall under load.
Solution: Remove load, inspect anchor; replace with toggle bolts rated above the load or relocate mounting to studs. If drywall is damaged, cut out and install a plywood backing anchored to studs, then remount. -
Problem: Sagging of long wooden shelves (>36″) under weight.
Solution: Add a central bracket or install a 1″ x 2″ hardwood stiffener glued and screwed under the shelf. For wide spans, consider thicker material or shorter shelf lengths. -
Problem: Rusting brackets in a garage near salt/road runoff.
Solution: Replace with stainless steel or powder-coated brackets; clean existing units with a rust converter and re-coat. Place items on plastic trays to prevent corrosion from direct contact. -
Problem: Uneven shelf heights after leveling multiple brackets.
Solution: Loosen all bracket fasteners, re-level the shelf using a long level, then tighten progressively from the center outwards to avoid drift. -
Problem: Screws strip or spin in old studs.
Solution: Pull screw, insert slightly larger diameter lag screw or use a structural screw designed for timber. If studs are compromised, consider installing a plywood cleat screwed into multiple studs. -
Problem: Anchors rated for shear but not tension fail when shelving is pulled.
Solution: Use anchors rated for the correct load direction (toggle bolts for tension), and where possible, mount through supports into studs for both shear and tension strength. -
Problem: Shelf becomes wobbly over time.
Solution: Tighten all fasteners; if the wall material has crumbled around anchors, swap to a new anchor type or reposition and fill holes with epoxy/filler before reinstalling.
Transition: Final summary and practical closing tips follow.
Conclusion and Final Tips for Effective Wall Storage Solutions
Key takeaways: plan load and spacing first, choose materials appropriate for the room, anchor into studs when possible, and test incremental loads. Routine quarterly maintenance prevents most failures—tighten fasteners, inspect anchors, and refresh finishes as needed. When in doubt about hidden utilities, load capacity or masonry work, hire a licensed pro.
Common mistakes and how to avoid them (from direct experience)
I once mounted a fairly heavy floating shelf into drywall without checking for studs; within a week a heavy decorative lamp pulled the anchor out. I now always plan for a 20% safety margin and mark stud locations before buying brackets. Another time I reused hardware from an old cabinet and found corrosion; I now replace fasteners when installing in garages.
Final verification checklist
- All brackets anchored into studs or rated anchors at appropriate spacing (16″ or 24″ on-center).
- Shelves are level within 1/8″ over 48″.
- Anchors and fasteners show no visible movement or deformation.
- Load test performed incrementally to full expected load.
- Accessories installed and labeled; a photo of the setup saved for future reference.
When to call a professional
- Mounting heavy cabinets or shelving exceeding 250 lb per shelf.
- Working on masonry or concrete walls without prior experience.
- Finding unexpected wiring, plumbing, or extensive wall damage.
- Installing large systems in commercial or rental units requiring permits.
Closing CTA: Start with one wall—measure, choose a system, and follow the installation steps above. Share photos of your completed system or consult a licensed installer for heavy or complex projects.