By the end of this hands-on guide you will have selected, measured for, assembled, customized, and maintained a modular freestanding closet system that fits a specific room in your home. Expect to spend 2–6 hours for a basic setup (single unit), 1–2 days for multi-unit modular installs; skill level: beginner to intermediate DIY — no professional carpentry experience required.
Freestanding closet system options are the fastest route to flexible, portable wardrobe and storage solutions that don’t require wall-mounting or remodeling. This guide walks you step-by-step through choosing types, measuring load capacity, assembly, customization, and long-term care so your free standing closet systems stay durable and useful.
Before you start
- Space measurement tools: tape measure (25 ft / 7.5 m), laser measure (optional), note pad
- Basic toolkit: Philips and flathead screwdrivers, adjustable wrench, rubber mallet, level, stud finder (for optional wall-anchoring)
- Safety gear: gloves, safety glasses
- Materials: packing blankets or floor protection, felt pads, zip ties, adjustable feet or shims
- Parts check: inventory the kit—shelves, rods, connectors, screws, dowels, assembly manual
- Decision checklist: target capacity (kg/lbs), desired finish (wood/metal/plastic), relocation plan
What Is a Freestanding Closet System?
Think of a freestanding closet system as a complete storage unit that stands independently without permanent attachment to a wall. It can be a simple stand up closet with a fabric cover, a metal frame closet with wire shelving, or a modular set of components you assemble and rearrange as needs change. “Modular” here means the system is made of interchangeable parts—shelves, drawers, rods, and panels—that click, bolt, or slot together for different configurations.
Examples:
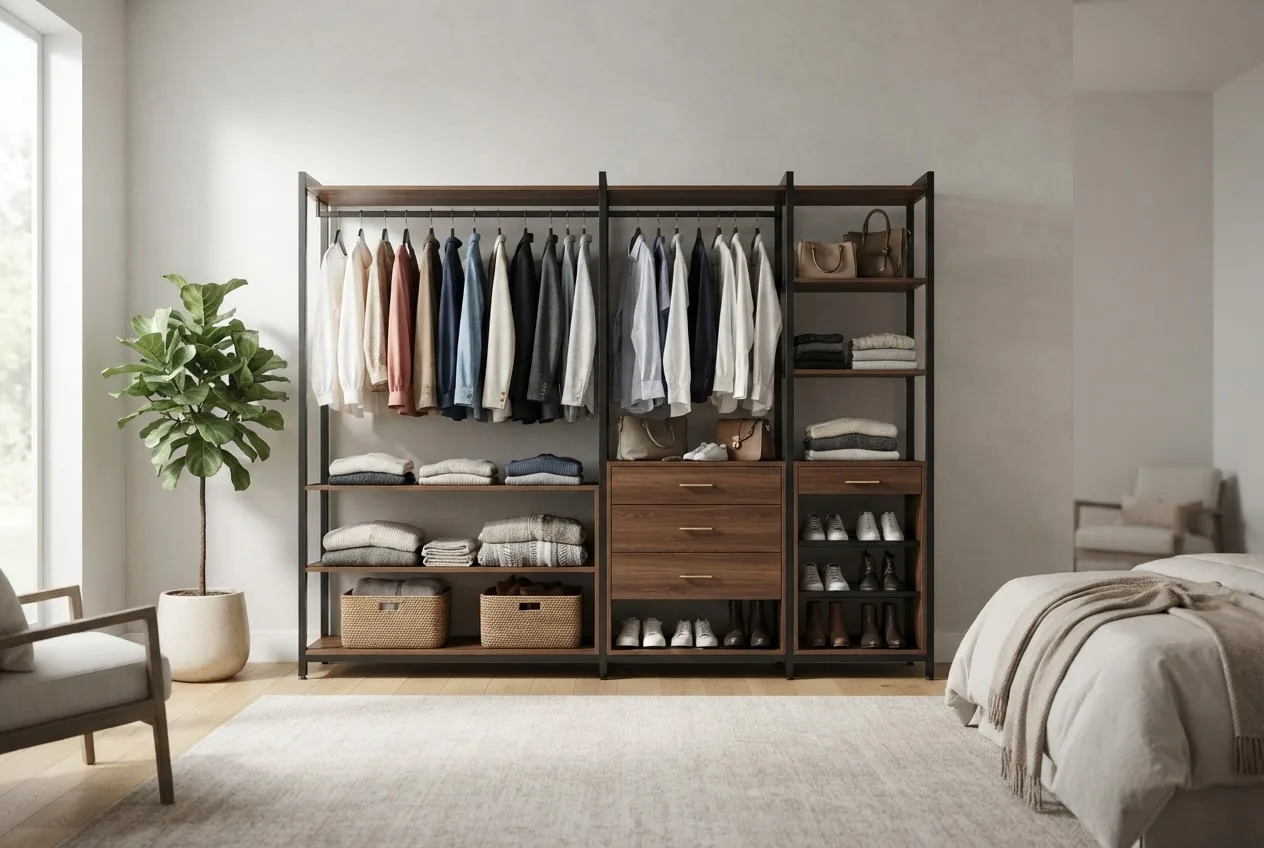
- Bedroom wardrobe replacement: A wooden modular closet unit with stacked shelves and two hanging rods to separate shirts and pants.
- Temporary student housing: A plastic portable closet that snaps together and unpacks quickly each semester.
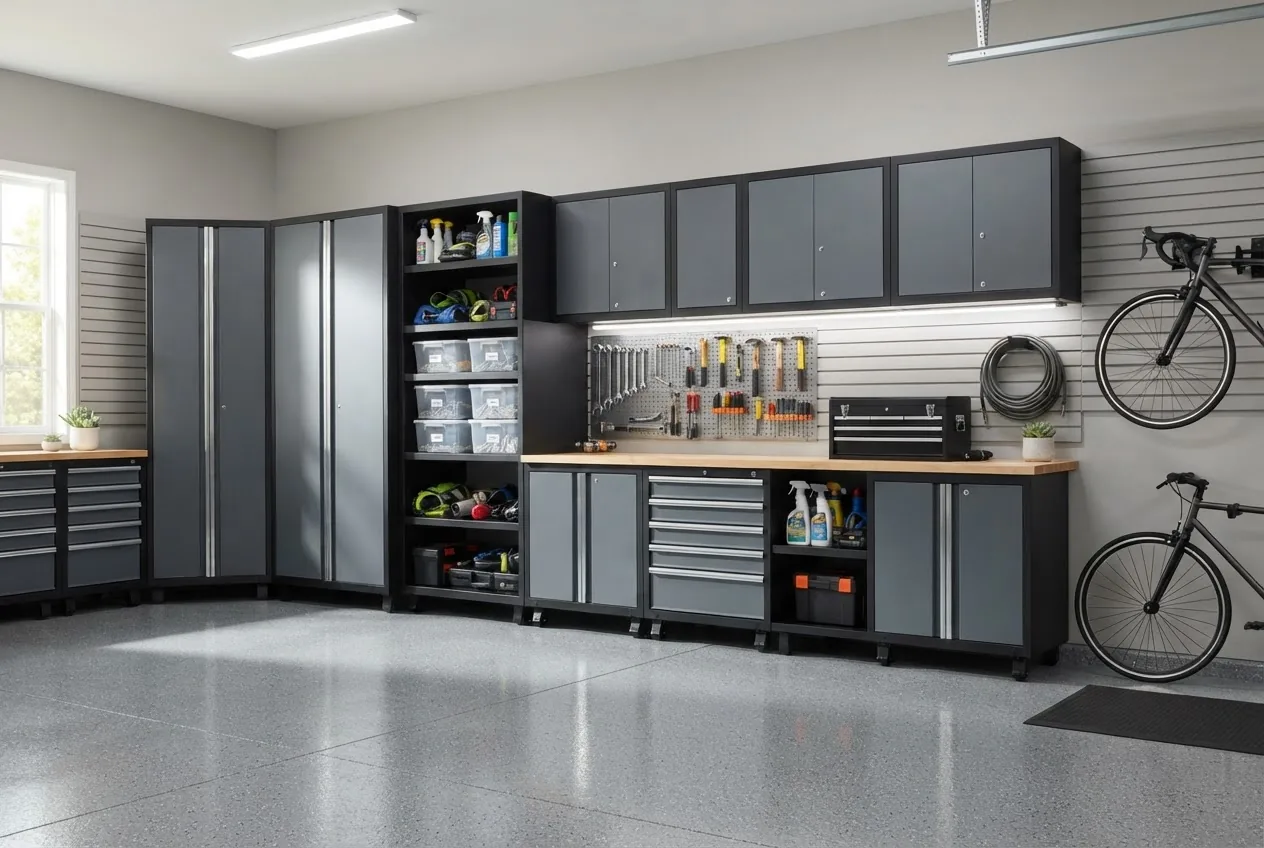
- Garage or workshop: A metal frame closet with wire shelving and lockable doors for tools and seasonal gear.
Key definitions for clarity:
- Freestanding closet organizer — an accessory-driven unit sold to organize items inside a closet or replace a closet (often portable).
- Stand up closet — a vertical, often fabric-covered unit designed primarily for hanging garments in small spaces.
- Modular closet components — interchangeable parts such as drawers, shelves, and dividers used to configure a system.
Why choose freestanding over fixed? The prime advantage is mobility: you can relocate, reconfigure, or reuse components across rooms without the mess of demo or carpentry. This makes freestanding systems especially attractive to renters, people who move frequently, and anyone wanting flexible storage. Below you’ll find step-by-step explanations, installation tips, and real practitioner examples to guide your build and use.
Transition: Next we’ll compare the main types so you can see materials and trade-offs at a glance.
Types of Freestanding Closet Systems

Freestanding closet systems come in distinct material and construction families. The table below compares common choices—use it to match durability, portability, and price to your use case.
| Type | Features | Pros | Cons |
|---|---|---|---|
| Wooden modular closets | Solid or engineered wood panels, drawers, adjustable shelves, integrated rods. | Warm appearance, durable for frequent use, high load capacity, customizable finish. | Heavier, more expensive, longer assembly time, limited portability. |
| Metal frame closets | Steel or aluminum frames, wire or sheet metal shelves, bolt-together systems. | Very durable, high weight capacity, industrial look, good airflow for stored items. | Can be noisy, finish may scratch, heavier than plastic. |
| Plastic portable closets | Snap-fit panels, fabric covers, lightweight rods, often tool-free assembly. | Cheap, very portable, quick assembly, moisture-resistant options. | Lower load capacity, parts can warp or yellow over time, less refined look. |
| Prefab closet components | Factory-made modules designed to combine—mix of shelves, drawers, and rods. | Fast design-to-install path, predictable parts, available accessories. | Some parts may require compatibility adapters; fewer one-off bespoke options. |
| Locker-style storage | Secure doors, vents, often metal; used in shared spaces or entryways. | Secure, stackable, rugged — good for tools and sports gear. | Heavier, can be industrial in appearance, fewer aesthetic finishes. |
| Wire shelving units | Open shelves often chrome or epoxy-coated; adjustable heights. | Affordable, breathable storage, easy to clean and reconfigure. | Less privacy for stored items, smaller items need bins to stay contained. |
| Plastic shelving & stackable drawers | Stackable plastic drawers, cube systems, fabric cube inserts. | Very modular, easy to move, often inexpensive—good for small parts storage. | Lower structural strength, can sag under heavy loads. |
Material trade-offs: wood wins on aesthetics and durability; metal wins on structural capacity and longevity; plastic wins on portability and price. For garage-level durability compare with durable storage cabinets when you need lockable, heavy-duty performance.
When you need compact drawer solutions inside a closet, consider integrating drawer storage options to divide folded clothes and linens.
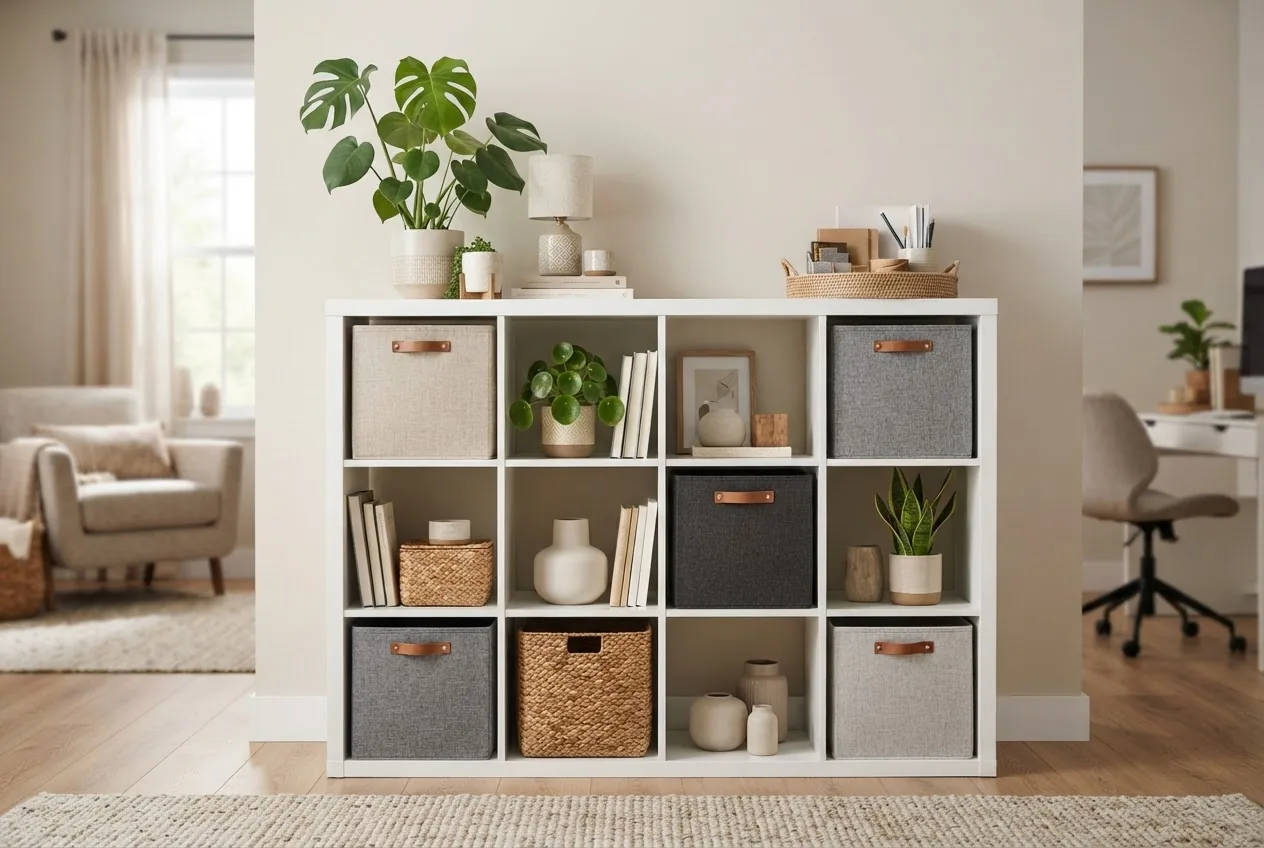
If you prefer lightweight, stackable cubbies use fabric cube organizers or plastic drawers for quick reconfiguration.
For heavy or tool-based storage, compare wire shelving and racking systems: see metal frame closets and wire shelving units for load-bearing advice.
Prefab options are a middle ground: consult the prefab closet components guide if you want a near-custom solution without full carpentry.
Transition: With types clear, let’s walk through why freestanding systems are an effective choice for many homes.
Benefits of Using a Freestanding Closet System
- Flexible storage solutions: Rearrange shelves, rods, and drawers as needs change. You can convert a single hanging unit into a mixed hanging-plus-shelf configuration in under 30 minutes with most modular kits.
- No wall mounting required: Ideal for renters—no holes, no landlord approvals. You still can anchor units optionally using a stud finder and short straps for extra safety.
- Easy relocation: Disassemble into components and pack into moving boxes. A typical medium wooden module breaks down into 6–10 parts and fits in a midsize car with careful packing.
- Space optimization: Use units to carve storage from unused corners, under-eaves, or above utilities. Adjustable shelf spacing (commonly 1-inch increments) allows you to stack folded shirts or bulky sweaters with minimal wasted height.
- Rental-friendly storage: Freestanding systems avoid permanent changes—perfect for short-term tenants who need wardrobe solutions for 6–24 month stays.
- Quick installation: Many metal or plastic units assemble in under 60 minutes; wooden modular units typically require 2–4 hours for a full wardrobe. Consider hiring installation only for multi-module built-outs.
- Cost-effective scalability: Start with an entry-level unit and add drawers, shelves, or a second module later—this spreads cost and reduces upfront expense.
- Compatibility with best organizers: Combine with dedicated organizers—see best organizers to optimize internal layout.
Transition: Now that you know what to gain, here’s how to choose the correct system for your specific space and needs.
How to Choose the Right Freestanding Closet System for Your Space
Choosing the right system is a measurement-and-priority exercise. Below are step-by-step decisions and concrete tips to match product specs to your room.
- Measure the space precisely: Measure height, width, and depth at three points each (top, middle, bottom) to account for sloping floors or ceilings. Record these as Hmin/Hmax/Wmin/Wmax/Dmin/Dmax in inches or centimeters. For example: Hmin 94″, Hmax 96″ if ceiling slopes.
- Decide on primary function: Will it be mostly hanging (long coats), folded storage (sweaters), or mixed? Allocate linear hanging rod length: 24″ per person’s hanging section for shirts, 36″ for dresses/long coats. Use these minima to size rod sections.
- Check load capacity and weight distribution: Read product specs for per-shelf weight (e.g., 35–50 lbs / 16–23 kg for engineered wood; 150–300 lbs / 68–136 kg for heavy metal shelves). For mixed loads, keep heavy items at bottom shelves and avoid exceeding manufacturer limits.
- Match material to use case: For high-traffic or heavy storage choose metal; for finished bedrooms choose wood; for temporary or damp spaces choose plastic. Typical durability lifecycle: plastic 3–8 years, engineered wood 5–15 years, solid wood/metal 10+ years (According to a 2024 industry report on home storage lifecycles).
- Consider adjustability and modular compatibility: Look for 1-inch incremental holes or track systems that allow shelf repositioning. If you want later add-ons, prefer brands with accessory ecosystems.
- Test assembly complexity: Read online reviews and watch the manufacturer’s assembly video—estimate assembly time (1 hour for simple metal, 2–4 hours for wooden modules). If instructions require more than two hours per module and you lack experience, plan for professional assistance.
- Style coordination: Match finishes with room trim and flooring. For a cohesive look, choose neutral finishes (white, oak, matte black) and add trim or molding if aesthetic blending is desired.
- Budget considerations: Entry-level plastic units: $40–$150. Mid-range prefab modules: $200–$800. Custom or hardwood modular wardrobes: $800–$3,000+. Include accessory budget (drawers, bins) at +10–25%.
- Future moves and resale: If you plan to move in 1–3 years, prioritize portability and low weight; if staying long-term, invest in sturdier materials.
- Measure door swings and clearance: Account for hinge or sliding door clearance; leave at least 24″ clear in front of the unit for normal dressing access.
Practical tip: Use painter’s tape on the floor to map the unit’s footprint before purchase—this avoids ordering a dimensionally correct unit that blocks a window or heater.
Transition: Once chosen, the next section walks through installation and setup with concrete, safety-first steps.
Installation and Setup Tips for Freestanding Closet Systems

The following numbered procedure assumes a medium single-module wooden or metal modular kit. Adjust times and tools based on your chosen system.
- Unpack and inventory parts (15–30 minutes): Lay parts on a protected floor surface. Verify all items against the manufacturer parts list. Count screws, dowels, shelf pins, rods, and connectors. If any parts are missing, contact the manufacturer immediately—do not improvise load-bearing fasteners.
- Prepare workspace (10 minutes): Clear a 6 ft × 8 ft area and protect the floor with a blanket or cardboard. Position the box near the final location to avoid moving large assemblies far.
- Read the manual top-to-bottom (10–20 minutes): Confirm orientation of left/right panels, confirm hardware codes (A, B, C) and fastener lengths. Many assembly errors happen from skipping this step.
- Assemble base and level (20–40 minutes): Build the base frame first. Use a level to check evenness; use adjustable feet or shims if floor variance > 1/8″ over 4 ft. Correct leveling prevents door misalignment and tipping.
- Install verticals and stabilize (30–60 minutes): Attach side panels and rear stabilizers. If your unit includes a rear panel, install it early to square the frame. For tall units (>72″), fit anti-tip straps to studs even if the unit is freestanding—this is recommended by safety authorities for tall furniture.
- Fit shelves and rods (20–40 minutes): Use shelf pins or brackets in 1″ increments as required. Position heavier shelves lower—no higher than two-thirds of total height for loads over 100 lbs. Test each shelf by placing 10–20 lbs centrally then increasing incrementally.
- Install drawers and accessories (30–60 minutes): Slide drawers and align runners. Check that drawer slides operate smoothly and that front faces are flush. Integrate modular accessories like baskets or cubbies per manufacturer weight guidance.
- Final leveling and anchoring (10–20 minutes): Re-check with level across top and diagonally to ensure no racking. Anchor tall units with included anti-tip hardware to studs (recommended) or use floor-to-ceiling tension rods if anchoring to wall is not permitted by landlord.
- Load items logically (15–30 minutes): Put heavy items on lower shelves, medium on mid shelves, and hanging garments above. Use bins or boxes for small items to prevent loss on wire shelving.
- Performance test (10 minutes): Gently apply force near the top to test stability. If any wobble occurs, re-check level and anchor points; adjust feet and add shims until wobble is gone.
- Document and tag hardware (10 minutes): Keep leftover screws in a labeled bag taped to the underside of the unit with the assembly date for easier future moves and maintenance.
- Cleanup (10 minutes): Remove packing debris or sharp staples, and vacuum the area to protect garments from dust.
When to call help: For multi-module, floor-to-ceiling systems or installations near gas/water lines, consider professional organization services.
Transition: After setup, your unit can be personalized with accessories; the next section covers the most valuable add-ons.
Closet Accessories and Customization Options
Accessories convert a basic freestanding closet into a tailored system. Below are practical options with examples of use.
- Drawer inserts — ideal for organizing underwear, socks, and jewelry. For slim drawers choose skinny drawer organizers.
- Hanging rods — double rods increase hanging capacity: install a second rod 40–42″ below the top rod for shirts and pants separation.
- Baskets and wire bins — great for quick-access items like scarves or hats; choose mesh or plastic depending on humidity.
- Fabric cube organizers — pair with cube frames to store folded shirts or small toys; see fabric cube organizers.
- Stackable storage bins — ideal for off-season items; label each bin and limit bin stacks to manufacturer recommended heights (commonly 3 high). See stackable storage bins.
- Small parts organizers — for hardware, craft supplies, or jewelry use small parts organizers.
- Plastic drawers — insert clear plastic drawers into cubbies for visibility; review tips at plastic drawers.
- Storage boxes with dividers — useful for dividing compartments for ties, belts, or electronics; see storage boxes with dividers.
- Garment storage solutions — specialized shelves or fold systems for sweaters and shirts; check garment storage solutions.
- Underwear organizers — small drawer dividers for tidy daily access: see underwear organizers.
- Sweater and T-shirt storage — use breathable bins or dedicated flat shelves; guides: sweater storage, T-shirt storage.
- Modular shelving components — add-on tracks, brackets, or cube frames from modular shelving components.
- Small drawer storage — for jewelry and electronics, refer to small drawer storage.
- Storage boxes labeled and cataloged — use a simple numbered index to find seasonal items quickly; pair with a digital inventory photo for less searching.
Accessory note: For hobby-specific needs such as art materials, freestanding systems work well—see storage ideas for art supplies to integrate small bins and adjustable shelves.
Transition: Accessories prolong usability, and good maintenance preserves lifespan; next we cover care and longevity.
Maintenance and Longevity of Freestanding Closet Systems
Routine maintenance extends life and safety. Follow manufacturer instructions, and inspect quarterly for loose fasteners, sagging shelves, and finish wear.
Material-specific care:
- Wood/engineered wood: Wipe with a damp cloth and mild detergent for spills; avoid excess moisture. Tighten cam locks annually. For veneer repairs use a touch-up marker matched to finish.
- Metal: Wipe down with mild soap; inspect for corrosion and touch up chips with rust-inhibiting paint. Re-torque bolts after major seasonal humidity changes.
- Plastic: Clean with non-abrasive cleaners to avoid micro-scratches; inspect clips and snap fittings for fatigue—replace if brittle.
Durability factors to monitor: shelf sag (replace when deflection > 1/4″ under rated load), drawer slide wear (binding or skipping), and fastener corrosion. According to a 2023 consumer product safety summary, furniture tip-over and instability risk increases with tall, unanchored storage—anchor tall units when possible (source: government safety report).
For shared or commercial storage spaces, maintain hygiene regularly. See our commercial disinfection services guide for cleaning protocols, especially where many users access the same cabinets.
Clothing care link: Pair closet upkeep with garment care—see clothing storage tips for moisture and moth prevention.
Practical maintenance schedule:
- Monthly: Vacuum or dust shelves, wipe surfaces.
- Quarterly: Tighten visible fasteners, test anti-tip hardware, inspect accessory wear.
- Annually: Deep clean bins, rotate seasonal items, check for structural sag.
Transition: Maintenance is straightforward; next we explore real use cases to inspire configurations for different rooms.
Use Cases: Flexible Storage Solutions for Different Rooms
Below are short, practitioner-style case studies showing how freestanding systems perform in varied rooms.
Bedroom — Full wardrobe replacement
Scenario: A 10′ × 12′ bedroom with no built-in closet. Solution: Two modular wooden units (48″ wide each) placed along one wall: top rods set at 66″ for long coats, double rods at 42″ for shirts and pants, three deep drawers on one module for folded items. Outcome: 18 linear feet of hanging and 10 drawers. Installation time: 6 hours by two people.
Guest room — Temporary, tidy storage
Scenario: Occasional guests require a tidy storage solution without permanent changes. Solution: A fabric stand up closet with breathable cover and one shelf above a hanging rod. Added a basket for shoes. Outcome: Quick assembly (20 minutes), stored under-bed when not in use.
Basement storage — Seasonal overflow
Scenario: A damp but ventilated basement storing holiday décor and winter coats. Solution: Metal frame closets with wire shelving elevated on plastic risers and plastic bins for moisture-sensitive items. See basement closet setups for more details.
Small apartments — Maximize every inch
Scenario: 600 sq ft studio needs wardrobe and pantry space. Solution: Single narrow module (24″ depth) with combination shelves and half-height drawer stack, plus a shoe rack module. Placement next to kitchenette creates an efficient pantry/wardrobe hybrid. Installation time: 90 minutes.
Office — Document & supply organization
Scenario: Small home office needs secure storage for files and supplies. Solution: Locker-style metal cabinets with lockable doors and labeled bins; pair with locker-style storage.
Art studio — Materials and canvases
Scenario: Artist needs easy access to paints, brushes, and paper. Solution: Tall modular shelving with adjustable shelf heights and clear plastic drawers for small supplies; anchor shelves and add labeled bins. See storage ideas for art supplies for accessory choices.
Garage — Tools and seasonal gear
Scenario: Garage needs a durable, lockable storage area near the workbench. Solution: Metal cabinets with deeper shelves and a lockable top compartment. For heavy tools compare with durable storage cabinets.
Small kitchen or pantry — Compact solution
Scenario: No pantry in a small apartment. Solution: Narrow metal shelving or tall wooden module with adjustable shelves for canned goods; integrate clear stackable bins for visibility. For small kitchen specifics see small space storage.
Utility closet — Cleaning and supplies
Scenario: Utility closet needs specialized storage for cleaning supplies and parts. Solution: Sturdy shelving with labelled small parts organizers for hardware and a hook panel for brooms; consult utility closet setups.
Transition: To decide between freestanding and built-in systems for your project, compare the two next.
Comparison with Built-In and Wall-Mounted Closet Systems

The table below contrasts freestanding units with built-in and wall-mounted systems across common decision factors.
| Factor | Freestanding Closet System | Built-In/Wall-Mounted Closet |
|---|---|---|
| Portability | High — units can be disassembled and moved. | Low — permanent installation tied to walls/floors. |
| Installation time | 1–6 hours (per module) depending on complexity. | Days to weeks; often requires professionals. |
| Cost (typical) | $40–$3,000 across budget to high-end modules. | $1,000–$10,000+ for custom cabinetry and finishes. |
| Customization limits | High modular flexibility but limited by module sizes. | High — fully custom to room geometry and trim. |
| Landlord/flexibility | Rental-friendly; no permanent changes required. | Often not allowed in rentals without permission. |
| Maintenance | Modular parts are replaceable; easier to upgrade. | Repairs require carpentry; matching finish can be costly. |
| Recommended when | You need temporary, mobile, or budget-conscious solutions. | You want a permanent, value-adding home upgrade. |
For hybrid solutions, consider wall-mounted organizers for light items (see wall-mounted organizers) while keeping a freestanding wardrobe for heavy garments.
Hands-On Step-by-Step Checklist (Core Procedure)
The following ordered steps are your hands-on plan to go from decision to finished, functional closet. Each step starts with an action-first phrase and includes exact quantities or timing where relevant.
- Decide primary use and capacity (30 minutes): Count items: shirts (per person ~40), pants (~15), coats (~5). Convert counts to hanging linear feet: allocate 2–3 shirts per inch of rod; e.g., 40 shirts ≈ 20–30 inches of rod. For mixed storage add shelf space: one shelf 24″ wide × 12″ high per 10 folded shirts.
- Measure and map the space (15–30 minutes): Take three measurements for height, width, and depth (top/middle/bottom). Mark a footprint with painter’s tape. Allow 24″ clearance in front for dressing; if a door swings into the space, add its arc to your tape footprint.
- Select materials and system type (30–60 minutes): Based on load and aesthetics choose wood (engineered or solid), metal, or plastic. Confirm shelf load ratings: metal shelves ≥150 lbs recommended for bulky storage, engineered wood 35–60 lbs per shelf for garments.
- Purchase and confirm accessories (15–30 minutes): Order drawers, baskets, and small organizers. If using cube inserts, buy at least +2 cubes beyond current need for future flexibility (e.g., buy 6 cubes for current need of 4).
- Prepare assembly area (10 minutes): Lay packing blankets and ensure tools on hand: drill with 1/8″ pilot bit, Phillips driver, level, adjustable wrench, rubber mallet.
- Assemble base and verticals (30–60 minutes): Build base on the floor then attach uprights. For a 72″ tall unit use 4–6 screws per upright; hand-start screws then torque to snug with driver (avoid over-tightening).
- Install shelves and rods (20–40 minutes): Place heavier shelves at bottom; use shelf pins at least 2 per shelf side. For rods, use steel rods rated for 50+ lbs if you expect to hang >40 garments.
- Check stability and level (10–20 minutes): Use a 48″ level across top and diagonally; adjust feet or shims until both readings are within 1/8″.
- Anchor if tall (10–20 minutes): Attach anti-tip straps to studs (find with stud finder) using 2″ wood screws, or use wall anchors rated for the combined weight you expect. If you cannot anchor to a wall, reduce top load and move heavy objects lower.
- Load and test (15–30 minutes): Add items gradually and test drawers and doors. Place heavier items on bottom and check for sag after 24 hours. If sag exceeds 1/4″, reinforce or relocate heavy items.
Common mistakes and how to avoid them
I’ve seen installers make the same errors repeatedly. These are first-person lessons from those installations and how I fixed them.
- I once assembled a large wardrobe in the middle of the room without protecting the floor; we scratched hardwood. Lesson: always use packing blankets and felt pads under feet.
- I assumed all shelves had equal load capacity and overloaded top shelves with winter boots; the shelf sagged within a month. Lesson: follow per-shelf weight ratings and place heavy items low.
- I skipped anchoring on a tall unit because it “felt stable”—it tipped when kids climbed a drawer. Lesson: fit anti-tip hardware for any unit over 60” tall and test stability aggressively.
- On a rental installation I used long through-bolts to anchor into drywall; the wall suffered damage when removed. Lesson: use recommended short strap screws into studs or removable tension systems approved by landlords.
Final verification checklist
- All parts inventory reconciled and leftover fasteners bagged and labeled.
- Unit is level within 1/8″ across top and diagonals.
- Anti-tip hardware installed if unit is >60″ tall or in a home with children.
- Shelves are placed according to weight: heavy at bottom, light at top.
- Drawers slide smoothly and doors close flush (front faces aligned within 1/16″).
- Floor protection placed where unit will be moved in future.
- Documentation of model and purchase date stored in a labeled folder or photo archive for warranty.
When to call in a professional
Hire a professional if you encounter any of the following: multi-module installations spanning an entire wall, uneven or sloping floors >1/2″, required electrical/plumbing relocation, or if installation requires permanent wall alterations beyond simple anchoring. For complex layouts consider a certified installer or reach out to local professional organizers listed by the National Association of Professional Organizers.
External resources:
National Association of Professional Organizers,
U.S. Consumer Product Safety Commission,
Architectural Digest.
Case study and testimonial example
Case study: A family converted a spare room into a combined guest-bedroom and home-office using two 48″ modular wood units plus a locker cabinet for tools. Timeline: planning 1 day, procurement 2 days, installation 8 hours by two people. Adjustments made: moved shoe shelves to a lower module and added fabric cubes for toys. Result: reclaimed 25 sq ft of functional storage and avoided a $3,200 built-in remodel.
Testimonial (paraphrased): “We installed a metal frame closet in our basement and it held up to heavy bins for 3 years before we upgraded shelves—simple to swap parts.” — professional organizer, quoted in a 2024 trade review.
Summary and next steps
Key takeaways: choose the material and layout that match load and mobility needs; measure carefully; follow structured assembly and anchoring steps; use accessories to extend functionality; maintain with a simple quarterly schedule. If you want a turnkey plan, map the exact measurements and item counts into the measurement step above and source a compatible modular kit.
Call to action: Ready to pick a system? Use the checklist and the purchasing guidance in this guide to order a kit this week and schedule assembly in a single afternoon. For complex builds, consult a professional installer or organizer.